Search This Blog

Featured Post

Simple Flower and Lace Headband Tutorial

This post may contain affiliate links, please check out my disclosures page for more info.  Thanks! As promised yesterday, here is my headb...

Showing posts with label fabric scraps. Show all posts

Sunday, September 7, 2025

Scrap Rosette Brooch Tutorial

This post may contain affiliate links, please check out my disclosures page for more info.  Thanks!

Today, I am sharing a tutorial for a quick and easy use for fabric scraps, making brooches.

So, dig up your cutest scrap fabrics and let's get started.


Scrap Rosette Brooch Tutorial, sewing pretty accessories with fabric leftovers.

Scrap Rosette Brooches


Materials needed:


Cut the fabric scraps with pinking shears.

First, using your pinking shears, cut the fabrics into long strips. Roughly about 1-2 inches wide and 5-6 inches long.

Strips of fabric cut using pinking shears.

It's good to cut several strips of varying widths, it makes the next steps more interesting.


Rosettes or flower shapes made by sewing and gathering fabric strips.

Here is my video tutorial for lace rosettes. You will need to follow the same steps to turn your fabric scrap strips into fabric scrap rosettes.

While you're at it, make a few lace rosettes too to pair with your scrappy ones.

Supplies gathered to make fabric brooches.

When you're ready, gather all your rosettes and buttons and start assembling.

Sewing the button to the center of the brooch.

Stack together at least 2 rosettes in colors that work to your taste to create a cute brooch.


Sew a button in the center, sew through all layers of your brooch. Feel free to add any other embellishments that you wish.

Sewing the back of the brooch.

Cute a circle of felt and sew to the back of the brooch. This is demonstrated in my lace applique brooch video tutorial. Attach a pinback to finish up your brooch.

Now go make some more, they make great little gifts.

Two finished brooches made from fabric scraps, ribbon, and buttons.

I made several varieties. These black and blue brooches are my favorite, I love the cute heart buttons.

Four brooches made from fabric scraps, lace, and buttons.

I also love how well the lace works with the pattern of the fabric on the green brooches. The purple and blue fabrics are an interesting combination too.

I hope you enjoyed this post, my next one should be up soon. Look forward to it.

Give it a try:


Read More »

Sunday, July 29, 2018

Plastic Caddy to Pretty Headband Holder


This post may contain affiliate links, please check out my disclosures page for more info.  Thanks!

For the first project on my new craft list, I decided to fix a storage problem in a pretty way.

A pile of pretty headbands, mixed up and cluttered.

I have made a ton of cute headbands overs the years to go with pretty outfits.  The problem with having all these nice hair things is storing them so they don’t get tangled up in a heap like this, or damaged.

A simple plastic storage caddy, the solution to our messy head band problem.

The solution is this, a simple plastic caddy.


I got this one for free from a friend, but I found similar ones here at DollarTree.  They are useful to store all kinds of things neatly and within reach.

Plastic Caddy to Pretty Headband Holder.

However, for hair accessory storage I wanted something prettier. 

So, that’s what I did, I made the caddy prettier, to turn it into the perfect headband holder.

Two plastic bins full of laces, ribbons, bows, flowers and other embellishments.  These will be used to make the plastic caddy all pretty.

First I whipped out my embellishments.  The container on the right is where I keep all my lace and ribbons, and the one on the left is full of smaller bits of ribbon, flowers, bows and other random small stuff.

Lately, I gotten into sorting and organizing all my craft supplies, mostly using plastic shoebox size containers and cute baskets.

Start gluing the lace around the caddy with a glue gun.

I picked out some wide lace, and started carefully gluing it around the caddy with a glue gun.

Finish gluing the lace by folding the end before gluing down.

When I got it completely around the caddy, I folded the edge of the lace before gluing it down.

Gluing ruffled lace along the top edge of the caddy with a glue gun.  Careful, it's really hot.

Then I did the same thing with some pretty ruffled eyelet lace.  I glued it along the edge of the container.  I had to be extra careful here, because it’s easier to get burn gluing there.

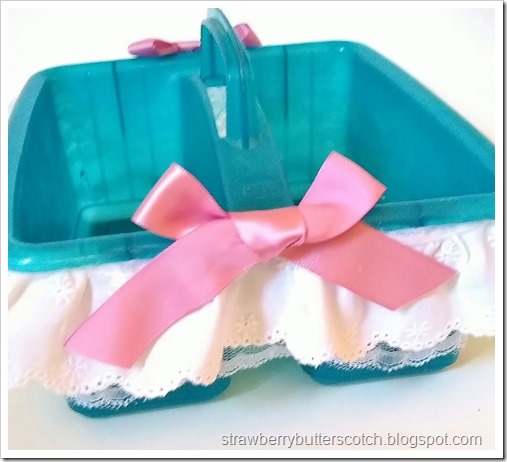
Glue cute pink ribbon bow to the sides of the caddy as a finishing touch.

To finish it off, I made two large-ish bows from some leftover ribbon and glued them to the sides of the caddy.  This ribbon was left over from this pretty pink dress I made for Easter a while ago.

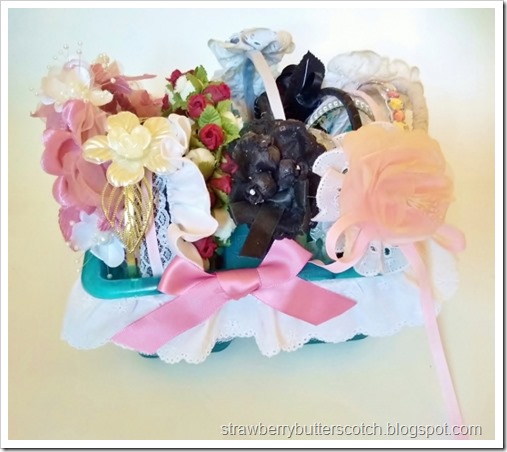
The finished and nicely decorated plastic caddy, now a pretty headband holder.

And now it is done, and ready for use.

The pretty caddy full of mostly home made headbands.

See, doesn’t that look much better?  And it actually took about 15 minutes to do.  Maybe I should make more.

Here’s the updated list:

  • 3 piece outfit
  • Holder
  • First aid cases
  • Umbrella
  • Tea set
  • Tote

One down, five more to go.  The next two should be up soon, look forward to them!


Give it a try:

Read More »

Friday, May 11, 2018

Leftover Lace Rosette Broaches for Mother’s Day

This post may contain affiliate links, please checkout my disclosures page for more info.  Thanks!


Here’s a special craft project and a great idea for a quick and pretty gift for Mother’s Day.

Two broaches made from scraps of pretty lace.  One has a bow and pearl center, the other has a cameo.

Rosette broaches.

They are so very pretty and fun to make. I’ve made multiple versions before. 

All it takes is a bit of lace, maybe some felt, glue (like the Aleene’s Jewel-it I used), pin backs, and some embellishments.

If you look carefully, you should see that I used some of the lace leftover from one of my blouse makeovers.  That’s what I love about this, you can use up scraps and bits easily.

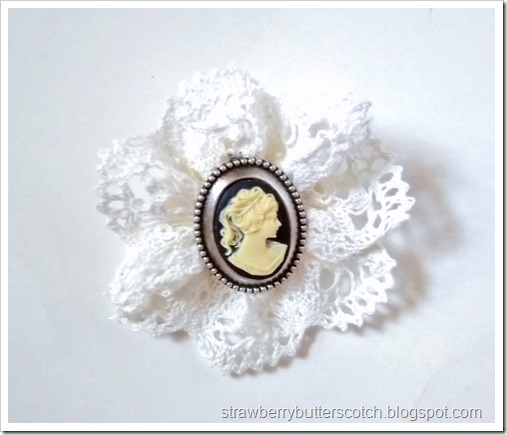
Close up of the cameo lace rosette broach.

The first broach was inspired by my old button broach tutorial.  For that one I used a cameo style button I got at SAS. 

For this broach however, I used the other cameo from one of those sets of earrings I made-over (see Jewelry Makeover: Turning Earrings into Cute Necklaces).


So the one pair of earrings produced and cameo necklace and a matching broach.  However, I’m just going to give this away, it’s the perfect gift for Mother’s Day.

Close up of the pearl and lace rosette broach.

Since I had more leftover lace and all my supplies were out, I whipped up this second broach.  For decoration, I used a ribbon bow (made from leftover ribbon) and a flat back pearl.  It’s simple and it works.

Close up of the back of the broach.  It has a felt circle glued on and a pin back sewn on.

Both of these pins were finished on the back with a felt circle to cover the raw edge of the lace, just like in my applique lace rosette broach tutorial.

If you want to whip up a few of these to give to your loved ones (or to add to your wardrobe), be sure to check out my tutorials.

Here’s the updated list:

Six down, four more to go.  The next one will be up next week, and will be super cute!  Look forward to it.

Read More »

Friday, April 20, 2018

Sewing for Dolls: Socks and Lingerie? Plus Tutorial Links

My latest craft project is doll clothes, so why did it take so long to post?  You will see shortly.

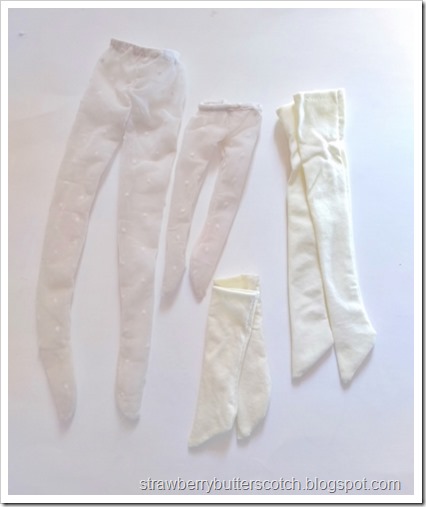
Several pairs of doll sized tights and socks made out of old tights.

First I made several pairs of tights and socks, several more pairs to be exact.  I made some before out of old tights (see From Socks to Doll Sweaters), but I’ve gotten more ball jointed dolls since then.  Meaning more itty bitty feet to cover.

Doll sized thigh high socks made from old tights.

No complaints though, doll socks and stuff are fun to make and so cute.  Look at these adorable thigh high socks I made for my newest doll (her name is Misako).

Cute crew socks for a doll made from old tights.  As worn by a ball jointed doll with black shoes.

And I made this pair of crew length socks for my only boy ball jointed doll (the last thing I made for him was these cute t-shirts).

A close up of a ball jointed doll wearing her new tights made from a pair of old tights.  She is also wearing cute shoes with ankle straps and a pink dress.

And finally I made two pairs of tights, a pair for my newer doll and a smaller pair for this one (her name is Momoko).  I used a cute lacey pair of tights that had dots all over them.  I found them at 99 Cents Only Store.

The best part is that this time I managed to make some printable patterns for all theses socks and tights.  They are sized for msd (1/4 scale) and yosd (1/6 scale) ball jointed dolls, and are included with this tutorial posted on my doll blog.

Now for the more interesting part of this project. 


Doll Lingerie

As expensive as ball jointed dolls can be, sometimes they don’t even come with underwear.  So you either have to buy them separately or make them yourself. 

Naturally I went with making them.  And if I’m going to sew doll sized undies, then I’m going to make them cute!

Two doll sized bra and underwear sets made from lace, ribbon and t-shirt fabric.

I made these two sets from t-shirt scraps, lace, ribbon and a bit of elastic.  They were actually pretty easy to put together.

To make these underwear sets, I first did a bit of “research” mostly to figure out how to make a doll sized bra.  I found several cute doll tutorials (mostly videos), including these:


A doll sized bra and underwear set made from lace and t-shirt fabric.

This one was the first set made.  I use thin lace for the band and the straps of the bra and used the same lace on the matching underpants.  It’s simple and cute.

A doll sized bra and underwear set made from lace, ribbon and t-shirt fabric.

For the second undie set, I used thin ribbon for the bra straps instead of lace.  Then I made little bows for the front of the bra and underpants.  For the other set I threaded the elastic through the waist, but with this one I stitched decorative elastic on to the fabric.

Because they were so cute and fun to make, I made a tutorial for MSD (1/4 Scale) ball jointed doll sized underwear and bras on my doll blog, feel free to check it out if you or someone you know has dolls around this size (or if you just want to laugh at my doll’s crazy antics).

Here’s the updated list:

Four down, six more to go.  I should have the next project up in about a week, but first there may be a little surprise.  Look forward to it!

Read More »

Thursday, December 21, 2017

Sewing Pouches, Lots of Them

This post may contain affiliate links, please check out my disclosures page for more info.  Thanks!

The next craft project on my Christmas list involved a lot of sewing.

Sewing lots of differnt pouches using leftover fabric.  Great for easy diy gifts.

I made pouches.  Lots of different pouches.  They make great Christmas presents, especially if you fill them with little goodies like I’m going to do. :)

One of the great things about pouches is how versatile they are.  All of these ones were made basically the same way, a few tweaks to the design makes a huge difference.

Sewing lots of differnt pouches using leftover fabric.  Great for easy diy gifts.

The two on the left here were made from the kitty cat fabric I bought recently (see A Late Black Friday Craft Haul).  Now they work as a fun purse and a small clutch. 

The pouch on the right is made from leftover fabric from a baby project three years ago (see Sewing for Baby).  That’s the nice thing about pouches, they help use up your leftovers.

Sewing lots of differnt pouches using leftover fabric.  Great for easy diy gifts.

For some of them I curved some or all of the edges.  It adds a nice touch, especially to smaller bags.

Sewing lots of differnt pouches using leftover fabric.  Great for easy diy gifts.

I could have used buttons, loops, snaps, etc. to close them, too many options.  I chose soft Velcro because it was easy and I always have it on hand.

Sewing lots of differnt pouches using leftover fabric.  Great for easy diy gifts.

Pouches are also nice because you can make them for just about anyone, including guys.  These plaid ones are nice, but not as girly looking as they could be.

Sewing lots of differnt pouches using leftover fabric.  Great for easy diy gifts.

I added small straps to the back because sometimes it’s nice to have a strap to hold on to, but something longer would make it look too much like a purse.

Sewing lots of differnt pouches using leftover fabric.  Great for easy diy gifts.

The last two I made using more leftover fabric from a skirt I made sometime ago (see Just in Time for Christmas?).  The size and long straps make them look like pretty messenger bags.

That’s all I made, this time.  They’re fun to make and handy to have, so I will probably make more pouches in the future.

If you want to make some of your own, this envelope purse tutorial is very similar to my pouches.

Here’s the updated list:

Three down, just one more to go, and just four days until Christmas.  Getting so close, wish me luck!

Read More »

Friday, December 1, 2017

Quick T-shirt Makeover: Cute Shrug, a Simple Cardigan, Plus Doll Tees

As promised, here’s my next craft projects.  Just a few things I whipped up with some t-shirts.

Easy diy T-shirt shrug and cardigan

A super easy black shrug and an even easier white t-shirt cardigan.  I was inspired by a few tutorials I found on Pinterest to make them. 

For the shrug, I used this tutorial for a t-shirt shrug.  It’s a classic, but I didn’t follow it exactly.

Easy diy T-shirt shrug and cardigan

I cut off a few inches from the bottom of the shirt.  Just enough to reduce some of the bulk from gathering the shirt at the end of the tutorial.

Easy diy T-shirt shrug and cardigan

And while re-hemming the bottom, I added some lace along the edge.  This adds a somewhat dressier touch.

Easy diy T-shirt shrug and cardigan

After that, I just followed the rest of the tutorial as is.  Sadly, my photo doesn’t do it justice.  It’s still pretty though.

Easy diy T-shirt shrug and cardigan

And versatile too.  I think it still looks cute when worn in-gathered.

Easy diy T-shirt shrug and cardigan

Now for the white “cardigan”.  I used this tutorial for a t-shirt cardigan.

Easy diy T-shirt shrug and cardigan

All you have to do is cut the t-shirt open and zig-zag stitch along the edge.  I decided to cut and stitch along the sleeves too for mine.  I kind of want to try it with a long sleeve shirt like in the tutorial.

Now with all this t-shirt cutting there comes plenty of scraps, and what do you make with t-shirt scraps?

Doll-sized t-shirts with link to tutorial.

Make doll t-shirts!

I made three little doll-sized t-shirts, two white and one black. 

Doll-sized t-shirts with link to tutorial.

They were made specially for this fine boy.  He is the only male ball jointed doll I have, so he is in desperate need of clothes.  Clothes that are not girly looking.

Doll-sized t-shirts with link to tutorial.

They fit him nicely, and thanks to the Velcro closure in back, are super easy to go on and off.  If you want to whip up a few of your own for similar sized dolls, I have posted the pattern and tutorial on my doll blog.  Enjoy!

Here’s the updated list:

Six down,  just one more to go!

Read More »

Sunday, June 4, 2017

Pink Lace for…A Doll?

At long last, the last project on my craft list.  And it’s more doll clothes, plus more of that pink lace fabric.

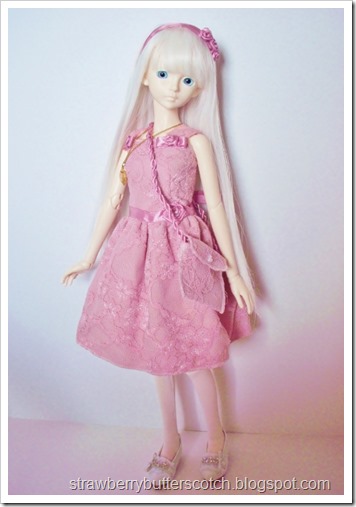
Cute pink lace dress set for a ball jointed doll.

As you can see, I used the fabric leftover from my Easter dress (see Pink Lace for Easter) to make a doll size version along with accessories.  An underskirt to give the dress a boost, a matching purse and head band, and a necklace.

Cute pink lace dress set for a ball jointed doll.

And it looks adorable on her.  I’ve had this ball jointed doll for two years, so I wanted to make her a special new outfit (check out the doll blog to see her reaction).

I used the same technique for the bodice as for my doll dress tutorial (see Doll Dresses for All, With a Tutorial), and instead of a row of ribbon roses along the neck I made three little roses.  One at each of the straps on top of a ribbon bow and a larger rose on the ribbon sash.

Cute pink lace dress set for a ball jointed doll.

On my dress I used a nice wide ribbon for the sash, but for this one the narrower ribbon I had left worked just fine.

Cute pink rose head band for a doll.

I made the matching headband using jewelry wire just like in my doll headband tutorial (see Doll Head Bands with a Tutorial).

Pink lace purse for a doll.

The same with the little purse, it’s similar as the simple purse in my doll bag tutorial (see 5 a Week: Cute Felt Bags for Dolls with a Tutorial) only with fabric instead of felt.  I glued on the some faux pearl beads to make the look of a clasp.  It really uses Velcro to close.

Cameo necklace for a doll.

The cameo necklace actually came from my mom.  It was perfect for dolls because of the small size of the cameo and the thinness of the chain, I just needed to shorten it.

Cute pink lace dress set for a ball jointed doll.

The underskirt was made as a separate piece so dress can be worn with or without it for different looks.  It can also be used as an actual skirt with another top.  Three separate looks from a couple of pieces.  Man, this is one well dressed doll.

Here’s the updated list:

Five down and out, finally!

Read More »

Popular Posts