Search This Blog

Featured Post

Simple Flower and Lace Headband Tutorial

This post may contain affiliate links, please check out my disclosures page for more info.  Thanks! As promised yesterday, here is my headb...

Showing posts with label recon. Show all posts

Sunday, October 26, 2025

Halloween Crafts: Thrifted Dress to Fluffy Fantasy Costume

This post may contain affiliate links, please check out my disclosures page for more info.  Thanks!

Halloween is less than a week away and I needed a costume. Time for a little thrift store magic. 

Halloween Crafts: Thrifted Dress to Fluffy Fantasy Costume. A costume tutorial and clothing hack.
Or should I call it formal dress hacking? It's one of my favorite techniques, especially for those "I have no ideal what I was to be for Halloween" moments.

I take an old cast off dress, and with a little imagination and a bit of cutting and sewing turn it into something special. The best dresses to use are old bridesmaid and prom dresses. The pouf-ier the better, more fabric to work with and more inspiration.

Halloween Crafts: Thrifted Dress to Fluffy Fantasy Costume.
So, I found this dress at Goodwill on sale for a whole $2. It has a lot going for it already.

Halloween Crafts: Thrifted Dress to Fluffy Fantasy Costume.
It has a sparkly bodice made using a floral lace. It's pretty and stretchy.

Halloween Crafts: Thrifted Dress to Fluffy Fantasy Costume.
I love the material for the skirt, and there's so much of it. It's ankle length on me.

Halloween Crafts: Thrifted Dress to Fluffy Fantasy Costume.
It has adjustable straps with is great, because I find myself having to shorten straps on practically everything I wear regardless of occasion.

Halloween Crafts: Thrifted Dress to Fluffy Fantasy Costume.
Now the interesting thing about this dress is the extra set of "straps" made from the same material as the skirt. It's hard to tell if they're meant to hang on or off the shoulders. When I tried it on they wouldn't stay up, and they looked super frumpy hanging down.

Halloween Crafts: Thrifted Dress to Fluffy Fantasy Costume.
Well, I know exactly what I want to do with this dress.

Halloween Crafts: Thrifted Dress to Fluffy Fantasy Costume.
First, I pinned the droopy outer strap to the adjustable one about halfway up the strap.

Halloween Crafts: Thrifted Dress to Fluffy Fantasy Costume.
I handstitched it down while folding it slightly to make little pleats and sewing down faux pearls on each pleat.

Halloween Crafts: Thrifted Dress to Fluffy Fantasy Costume.
I turned the dress inside out and folded the skirt lining, then pinned the hem to the waist seam. I proceeded to sew it in place using a blanket stitch to keep it stretchy.

Halloween Crafts: Thrifted Dress to Fluffy Fantasy Costume.
After sewing the lining, I cut the skirt to match leaving it about an inch longer.

Halloween Crafts: Thrifted Dress to Fluffy Fantasy Costume.
I thought the neckline of the dress was too low for me, so to fix this I took a small amount of the skirt material and folded it half before gathering it by hand.

Halloween Crafts: Thrifted Dress to Fluffy Fantasy Costume.
Once gathered, I stitched it in place from the backside, then cut away the excess material.

Halloween Crafts: Thrifted Dress to Fluffy Fantasy Costume.
Now it looks a little more modest and cuter. Just needs a little bow in the center.

Halloween Crafts: Thrifted Dress to Fluffy Fantasy Costume.
And I still had a lot more skirt material left, so I took a large rectangle of it and gathered it at the top edge. I needed it to just wide enough to go around my waist.

Halloween Crafts: Thrifted Dress to Fluffy Fantasy Costume.
I pinned it to some ribbon leaving enough ribbon on the ends to tie in a nice bow.

Halloween Crafts: Thrifted Dress to Fluffy Fantasy Costume.
After sewing down the ribbon, I can wrap the new "overskirt" around the dress and tie it in a pretty bow.  It's great because I can remove it and use it for other costumes or outfits as I wish.

Halloween Crafts: Thrifted Dress to Fluffy Fantasy Costume.
And here's the finished costume dress. Perfect to pair with some wings or ears for a cute fairy or elf costume.

Halloween Crafts: Thrifted Dress to Fluffy Fantasy Costume.
The little bow on the bodice was a nice touch. If the bodice hadn't fit me as well as it did, I would have added some loops to thread ribbon for a lace up effect. Maybe an idea for my next costume.

Halloween Crafts: Thrifted Dress to Fluffy Fantasy Costume.
I trimmed the edge of the overskirt in a curve as an extra touch. It's one of my favorite parts of this project, there was still plenty of scraps of material leftover after making it.

Enough to make some hair accessories.

Halloween Crafts: Thrifted Dress to Fluffy Fantasy Costume.
First, I cut the leftover material in strips about 3 inches long. I also cut 2 strips from an old pair of tights.

Halloween Crafts: Thrifted Dress to Fluffy Fantasy Costume.
I tied the knot in the tights to make a loop to form a "hair tie". I could have started with store bought hair elastics too. Anyway, I just needed to tie the strips of material to the hair ties as shown.

Halloween Crafts: Thrifted Dress to Fluffy Fantasy Costume.
The more I tie the fluffier it looks. Perfect for a pair fancy hair scrunchies to pair with my costume. The same technique could be used to make wrist cuffs or even doll sized tutus.

And with that I am ready for Halloween, well mostly ready. I just need to get the treats ready and finish another sewing project. Look forward to it.

Give it a Try:
Read More »

Thursday, September 20, 2018

Sewing for Dolls: Pink Sweater Set with Navy Skirt

This post may contain affiliate links, please check out my disclosures page for more info.  Thanks!


After way, way too much time away, I finely have gotten around to posting my next project.  More doll clothes!

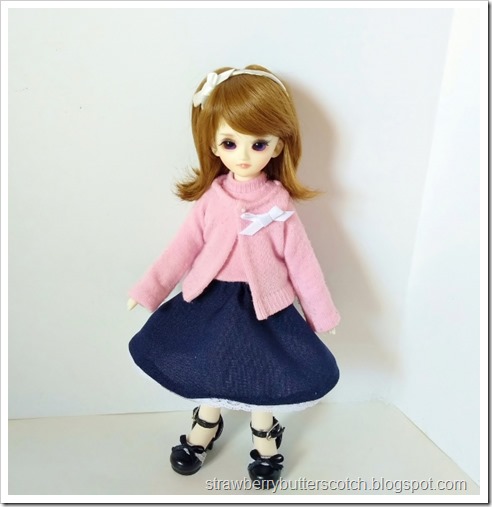
A cute doll outfit.  A pink sleeve less top with matching sweater, a navy blue skirt and a detachable bow pin.

One of my ball jointed dolls has been long overdue for a new outfit.  I had visions of pink and navy blue in my head, so I made this cute and classic set.  There’s a pink “sweater set”, a navy blue half circle skirt, and a tiny bow pin.  I wanted to add a cute beret, but my fabric choices weren’t cutting it.

The cute doll outfit worn by a ball jointed doll.

Here’s the new doll outfit worn by it’s cute owner.  (By the way, the headband she is wearing is made from this tutorial.)

Close up of the pink sock sweater.

The sweater set was made from a pair of pink knee socks (like these).  I just made another sock sweater and whipped up a knit top to go underneath.

The doll with the sweater removed to show off the sleeveless knit top.

The top is sleeveless because this is Arizona and Summer temperatures last into “Fall”. :(

The small ribbon bow.

The easiest piece to make was the bow pin.  Just make a tiny bow with ribbon (here’s a video for it), then flip it over…

The back of the ribbon bow showing off a tiny gold safety pin sewn on.

…And sew on a tiny gold safety pin.  Easy doll sized pin done!

Showing off the navy blue skirt worn by the doll.  You can see her cute shoes too.

The skirt is another doll sized half circle skirt, just made smaller for this 1/6 scale doll instead.  I used more of the poplin fabric leftover from other projects (a dress, a costume, a bag, and still counting).

If you’re interested in making this outfit for your own yosd sized ball jointed dolls or similar sized dolls, I whipped up a tutorial for the whole outfit with patterns for the skirt and top, instructions and other links.  You can find it here on my doll blog.

Here’s the updated list:

Five down, just one more to go.  So close!


Give it a try:

Read More »

Wednesday, July 4, 2018

Sleepwear Makeovers: Pants to Cute Pajama Set and a Bonus

I said a couple days later, but here’s the next craft project a couple weeks later. :(

A cute but too big pair of Mickey and Minnie Mouse pajama pants.  These will be turned into a cute set of pj shorts and top.

Anyway, I found this cute pair of pink pajama pants at a thrift store for only $1, score!

Close up of the Mickey and Minnie print on the cute pajama pants.

They have this cute Mickey and Minnie mouse print.

The problem was that not only were they too big, but I found them too warm to wear here in Arizona.  I prefer to wear shorts for sleeping.

That’s an easy thing to do, and it would leave fabric leftover, for what?  Then I thought, why not make a cute top?  Why not make a set of pajamas?

Pajama Pants to Cute Pj Set Tutorial

So let’s turn old pajama pants into a cute new pajama set. 

The pajama pants with the legs cut off, just need to adjust and hem them for shorts.

First, I cut the legs of the pants to make shorts.  I cut them about an inch longer than I wanted, so I could hem them later.

Re-sewing the inseam area on the shorts to take them in and fix the hole in that area.

Then I pinned and stitched the inseam and took it in about 1.5 inches.  This was both to make the too big shorts fit me better, and to deal with a little hole I noticed in the crotch area.  Problems solved.

The new pajama shorts, complete and ready to wear.

Then all I had to do was re-hem the shorts with a zig-zag stitch.

New pajama shorts completed!


Now for the top.  This is a drawstring tank top made a lot like the doll tank tops from my video tutorial.  Check it out if you have a little trouble with this.

The cut off legs of the pants, cut open and laid flat together with right sides together.  This is now the fabric that will be used for a cute top.

First I took the cut off legs and cut down the side to open them up.  Layer them together right sides together, and you have fabric for the top. 

I wanted the top to fit loosely, but depending on how wide your fabric is (and how wide you are), you may want to trim it a little before sewing.

I used the already hemmed part of the fabric for the top of the tank top, it will be used as a casing for the ribbon. 

The fabric with curves cut out for the arms.

I first cut the top corners off in a curve shape, (use a tank top that fits as a cutting guide if needed).

The top with the sides pinned and ready to sew.

Then I pinned and stitched the sides of the tank top.

Once fixed, the new shorts can be hemmed.

Then the bottom was ready for hemming.

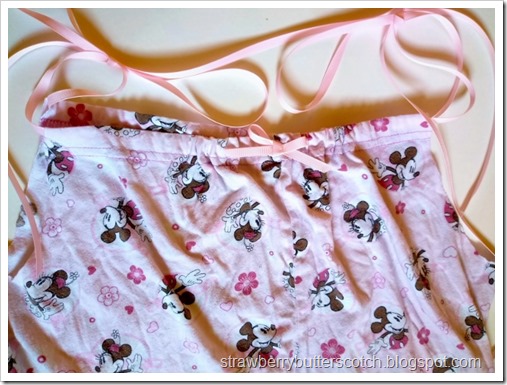
Ribbons threaded through the top of the tank top and a cute bow added to the front.

All that was left to do was thread ribbons through the “casings” and tie to form the straps.  I added a ribbon bow to the front just for fun.

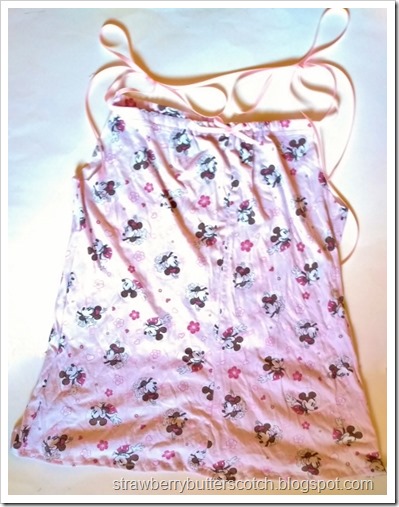
The finished tank top with ribbons and all.

And now the drawstring tank top is done…

The finished pajama set, drawstring tank top with shorts with a cute Mickey and Minnie Mouse print.

…And the pajama set is ready to wear.


Now here’s the bonus.  A cute night gown makeover. 

A t-shirt style night gown.  It will be turned into a cute pajama set.

I got this cute night gown at a thrift store ages ago.

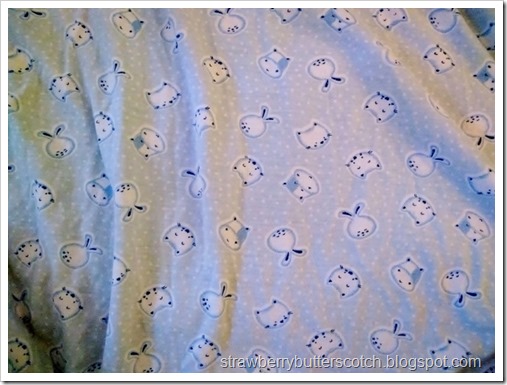
A close up of the cute print of the night gown, it's blue with little bunnies, kitties and cows.

I loved the cute pattern, it has kitties, bunnies and cows, because cows are adorable, right?

The problem is that I never wear it.  Not only is it too big, but I think it would work better as a top than a gown.  Easy to fix.

The night gown cut to t-shirt length plus about 1 inch for a hem.

I just cut it where I wanted it, plus an inch for the hem.

The shirt with pins along the side, ready to sew to take it in since it is too big.

I pinned and stitch along the sides to take it in, because things are always too big for me.

The bottom of the shirt has been re-hemmed.

Then a quick hemming job to finish.

But, we’re not done yet.  Let’s make shorts!

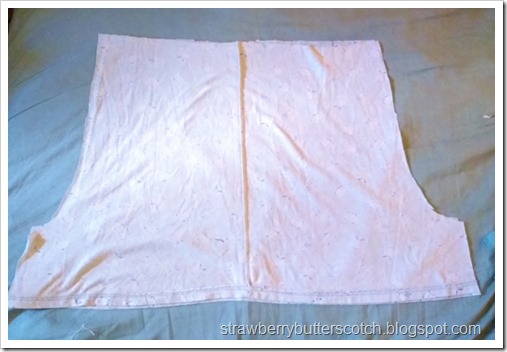
The fabric that was previously cut off the bottom of the nightgown.  It has been cut in half so there are two pieces folded in half.

I took that piece I cut off and cut down the middle to form to folded pieces.  I will use the already hemmed bottom for the hem of my shorts.

Using a pair of knit shorts a cutting guide to cut a j-shape in the folded fabric on the non-folded end.

I used a pair of shorts I already had as a guide to cut the curve.  I left a couple of inches at the top for the waist.

The two pieces of fabric, now unfolded and layered on top of each other with rights sides together.  Time to get sewing!

Unfold the pieces and layer them right sides together.

It’s hard to tell in this photo, but the curved part should be deeper on one side.  That will be the back seam, and it needs to be deeper to accommodate your back side.

The curved cut edge with pins, ready to sew for the front seam of the shorts.  Then repeat fo the back seam.

Anyway, I just pinned and stitch the back seam and then the front seam.

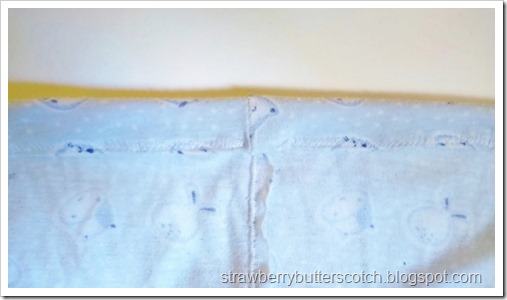
The shorts turned to show the sewn inseam (the part that goes between the legs).

Then I turned the shorts around and pinned the inseam before sewing it securely.

The top of the shorts, double folded and sewn to form a casing for the elastic.

Time for the waist.  I just double fold and sew to form a casing for the elastic.

Pink elastic threaded through the casing with a safety pin to form the elastic waistband on the shorts.

Then I thread the elastic through with a safety pin and stitched the ends together.

The finished pair of pajama shorts.

And the shorts are finished…

The finished pajama set, a cute tee with shorts with a cute blue animal print.

And the second pajama set is complete and ready to wear.

Here’s the updated list:

Nine down, just one more to go.  The next one will be up in a couple of days.  I hope.

Read More »

Popular Posts