Search This Blog

Featured Post

Simple Flower and Lace Headband Tutorial

This post may contain affiliate links, please check out my disclosures page for more info.  Thanks! As promised yesterday, here is my headb...

Showing posts with label baskets. Show all posts

Sunday, July 29, 2018

Plastic Caddy to Pretty Headband Holder


This post may contain affiliate links, please check out my disclosures page for more info.  Thanks!

For the first project on my new craft list, I decided to fix a storage problem in a pretty way.

A pile of pretty headbands, mixed up and cluttered.

I have made a ton of cute headbands overs the years to go with pretty outfits.  The problem with having all these nice hair things is storing them so they don’t get tangled up in a heap like this, or damaged.

A simple plastic storage caddy, the solution to our messy head band problem.

The solution is this, a simple plastic caddy.


I got this one for free from a friend, but I found similar ones here at DollarTree.  They are useful to store all kinds of things neatly and within reach.

Plastic Caddy to Pretty Headband Holder.

However, for hair accessory storage I wanted something prettier. 

So, that’s what I did, I made the caddy prettier, to turn it into the perfect headband holder.

Two plastic bins full of laces, ribbons, bows, flowers and other embellishments.  These will be used to make the plastic caddy all pretty.

First I whipped out my embellishments.  The container on the right is where I keep all my lace and ribbons, and the one on the left is full of smaller bits of ribbon, flowers, bows and other random small stuff.

Lately, I gotten into sorting and organizing all my craft supplies, mostly using plastic shoebox size containers and cute baskets.

Start gluing the lace around the caddy with a glue gun.

I picked out some wide lace, and started carefully gluing it around the caddy with a glue gun.

Finish gluing the lace by folding the end before gluing down.

When I got it completely around the caddy, I folded the edge of the lace before gluing it down.

Gluing ruffled lace along the top edge of the caddy with a glue gun.  Careful, it's really hot.

Then I did the same thing with some pretty ruffled eyelet lace.  I glued it along the edge of the container.  I had to be extra careful here, because it’s easier to get burn gluing there.
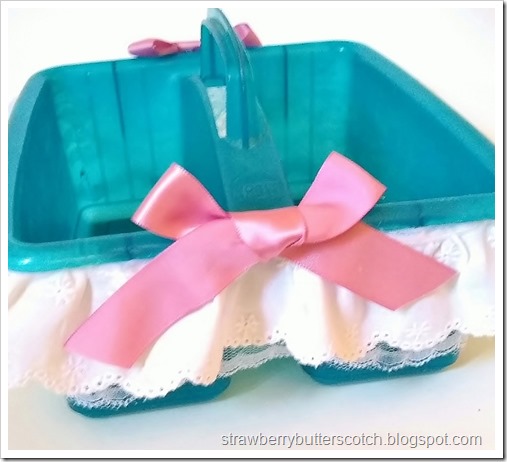
Glue cute pink ribbon bow to the sides of the caddy as a finishing touch.

To finish it off, I made two large-ish bows from some leftover ribbon and glued them to the sides of the caddy.  This ribbon was left over from this pretty pink dress I made for Easter a while ago.

The finished and nicely decorated plastic caddy, now a pretty headband holder.

And now it is done, and ready for use.
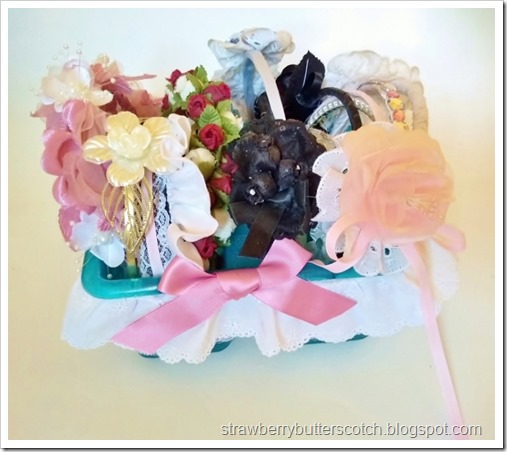
The pretty caddy full of mostly home made headbands.

See, doesn’t that look much better?  And it actually took about 15 minutes to do.  Maybe I should make more.

Here’s the updated list:

  • 3 piece outfit
  • Holder
  • First aid cases
  • Umbrella
  • Tea set
  • Tote

One down, five more to go.  The next two should be up soon, look forward to them!


Give it a try:

Read More »

Wednesday, October 30, 2013

Over the Rainbow

All right!  Finally posting something other than a LinkUp.  I have actually made several things over the past few weeks that I just haven’t gotten around to posting.  Sadly none have anything to do with my pink pants. Sad smile

Anyway, Halloween is tomorrow as we all know, so I thought I should show off what I did for a costume. 

Dorathy before

I found this Dorothy costume at a yard sale for $2.  It had several problems.  Too big, too open in back, crooked buttons, frumpy skirt and sleeves, stains, crooked ric-rac, etc., and did I mention that it was too big?  Time to work a little Halloween magic.  So here’s the before…

Dorathy after

…And after.  The skirt was an easy fix.  I just had to shorten it by about 4 inches and move the button in the back to cinch the waist.  The top was a different story.  I literarily had to take it apart, chop off a few inches everywhere, and sew it back together.  I also added a zipper to the back so my entire back wasn’t exposed.  Now it fits me almost perfectly.  All done?  Nope.  It takes more than a blue dress to make a Dorothy costume, so time for the accessories.

Basket with dog

I found this basket at another yard sale for only 25 cents.  Best deal.  I used some scraps from the costume to make bows.  I just cut strips using my pinking shears and tied them to the sides of the basket.  Easy and cute.  The little doggie was a birthday present from some reaally good friends of mine.  Yep, my birthday was yesterday.  Smile

diy ruby slippers

Moving on,  what’s a Dorothy costume without ruby slippers?  For these I started out trying to make shoe covers.  I’d seen some in stores, but didn’t like the price or the quality.  Anyway, I cut up an old Christmas stocking and used my shoes as a guide to make a pattern.  It was easy enough, but I was having trouble getting a good fit until I realized it would be easier to just sew the fabric right to the shoes.  Luckily I had an old pair of ballet flats that would have otherwise been tossed.  Several minutes of sewing (and one broken needle) later, I had my slippers.  Now I have one complete Dorothy costume that cost less than $5 to make.  Yay!

Read More »

Saturday, November 20, 2010

Decorating and Launching

I managed to finish everything on my list within the past few days.  Yay!

 photos 1202First up, this wallet.  I decided my old wallet was getting a bit cruddy, so of course I had to whip up a new one.

I used some scraps leftover from the skirt I made and decorated it with some bows and a scrap of lace.  It has a bill fold, two roomy pockets on the inside, one on the outside and…

 photos 1204

…a zippered pocket for change.

This is a necessity for me.  I love getting change, but seldom have a place for it in store bought wallets.  Guess that would explain why I bother making them instead of buying them, not just because it’s fun. 

photos 1207

Next is a notebook.  I got this notebook as a promotional freebie some time ago and I never leave the house without it.  It is the perfect size to tuck in my bag and has a pen holder that actually works.

Of course years of being tossed into my bag has left it a little roughed up.  Easy to fix that.
 

photos 1219

A touch of paint, some adhesive gems, glitter and Modge Podge all come to save the day.  This photo doesn’t do it any justice, it looks so good now in person.  Now I love taking it out to jot something down.

photos 1212

Now this basket, I rescued it from being tossed, a good basket is always handy to have around.  I thought it would be a great place to store all my laces and other trimmings, but it needed some “trimming”.

photos 1217

How’s this?  A glue gun and scraps of lace are all it took to turn it from a plain Jane basket to, well what would you call it? 

I wish I had more baskets lying around now to decorate, these would look lovely on a dresser or in the bathroom.

blue ad button

Now the last and most ambitious project, a forum site.  Click the image to check it out, hope you all like it.  It isn’t too much at the moment, these sort of things are never fully “complete”, but that’s what makes a forum so much fun.  They are always changing to fit the user’s needs, evolving into a better being or whatever.  I just hope I can keep up with the future needs, it should be a blast.

(Update: The forum is closed now, but it was fun while it lasted.)

Here’s the updated list:

  • Sunflower dress
  • Black headband
  • Update pioneer dress
  • Prettied up shoes
  • Pleated skirt
  • Wallet
  • Makeover notebook
  • Trim basket
  • Forum


  • Nine down and out.  No time to rest though, I now have a forum keep up and two holidays to plan.  My Christmas project list should be up in a few days, look forward to it.

    Read More »

    Thursday, April 29, 2010

    Another Use for Jeans

    Another Use for Jeans I was browsing around the internet the other day, and I came across this tutorial that totally blew my mind.  Check it out here at HOME MAKER, it’s for making a basket with old jeans.

    She cut off all the seams from two pairs of jeans to make an adorable basket for Easter.  When I saw it I was like “wow!”, of all the things to make with jeans, I would have never thought of baskets.

    I so want to make one eventually.  It would be so cool, baskets are great in warmer weather for picnics and the beach, etc.  Who knows, it might end up on my next list, just try to pretend to be surprised about it.
    Read More »

    Sunday, April 4, 2010

    A Bright and Early Easter

    I’ve been having an interesting Easter so far.  Since I’m in choir at church, I had to be there super early to warm up for such a special service.  I set two alarms on my phone, one to wake me up and one to let me know when to leave.  The second one woke me up, so let’s just say I was a little bit rushed this morning.  At least I was only a few a minutes late and Church went well.
    photos 585 On another note, I finished the little baskets from my list.  Just something to get into the spirit of the day.  I used this tutorial from CraftStylish,  only I made mine considerably smaller and didn’t quite follow all the directions.  They still came out okay.  What’s great is that they are made from two old cardboard boxes,  one that held zip lock baggies and one for peanut butter cracker sandwich packs.  They would be great on my desk to organize paperclips or to hold snacks (like the cracker sandwichs), or maybe crammed with little chocolates and given as Easter favors.  The possibilities are endless.
    Here’s the updated list:
    • baskets
    • doll clothes
    • foil bracelets
    • swatch book
    • embellished pins
    • Video
    • woven tote bag
    One down, six to go.  I should have the next one up tomorrow evening, look forward to it.
    Read More »

    Saturday, November 14, 2009

    Itty Bitty Baskets

      This post may contain affiliate links, see my disclosures page for more info.  Thanks!

      I saw this tutorial here for these little baskets and just had to try it.  They have a bunch of other tutorials for miniatures, they’re all so cute. Check them out here. 

      Tiny Baskets Made with Embroidery Floss

      My baskets didn’t come out quite as well, but they aren’t too bad.  The smaller one got some of Midnight’s fur stuck in it while I was twisting, so there’s some “natural” color variation.

      I really like the larger one and have special plans for it.  Look forward to it.

      Now the updated list:

      • bottle cozy
      • half apron
      • hankies
      • snowflake angels
      • bias tape accessories
      • mini baskets
      • pouches
      • bead headbands
      • Wings
      • scarf
      • id tag holder

      One down, ten to go.  I think I’ll do the bias tape accessories next.


      Give it a try:

      Read More »

      Popular Posts