Search This Blog

Featured Post

Simple Flower and Lace Headband Tutorial

This post may contain affiliate links, please check out my disclosures page for more info.  Thanks! As promised yesterday, here is my headb...

Showing posts with label crafting. Show all posts

Wednesday, July 4, 2018

Sleepwear Makeovers: Pants to Cute Pajama Set and a Bonus

I said a couple days later, but here’s the next craft project a couple weeks later. :(

A cute but too big pair of Mickey and Minnie Mouse pajama pants.  These will be turned into a cute set of pj shorts and top.

Anyway, I found this cute pair of pink pajama pants at a thrift store for only $1, score!

Close up of the Mickey and Minnie print on the cute pajama pants.

They have this cute Mickey and Minnie mouse print.

The problem was that not only were they too big, but I found them too warm to wear here in Arizona.  I prefer to wear shorts for sleeping.

That’s an easy thing to do, and it would leave fabric leftover, for what?  Then I thought, why not make a cute top?  Why not make a set of pajamas?

Pajama Pants to Cute Pj Set Tutorial

So let’s turn old pajama pants into a cute new pajama set. 

The pajama pants with the legs cut off, just need to adjust and hem them for shorts.

First, I cut the legs of the pants to make shorts.  I cut them about an inch longer than I wanted, so I could hem them later.

Re-sewing the inseam area on the shorts to take them in and fix the hole in that area.

Then I pinned and stitched the inseam and took it in about 1.5 inches.  This was both to make the too big shorts fit me better, and to deal with a little hole I noticed in the crotch area.  Problems solved.

The new pajama shorts, complete and ready to wear.

Then all I had to do was re-hem the shorts with a zig-zag stitch.

New pajama shorts completed!


Now for the top.  This is a drawstring tank top made a lot like the doll tank tops from my video tutorial.  Check it out if you have a little trouble with this.

The cut off legs of the pants, cut open and laid flat together with right sides together.  This is now the fabric that will be used for a cute top.

First I took the cut off legs and cut down the side to open them up.  Layer them together right sides together, and you have fabric for the top. 

I wanted the top to fit loosely, but depending on how wide your fabric is (and how wide you are), you may want to trim it a little before sewing.

I used the already hemmed part of the fabric for the top of the tank top, it will be used as a casing for the ribbon. 

The fabric with curves cut out for the arms.

I first cut the top corners off in a curve shape, (use a tank top that fits as a cutting guide if needed).

The top with the sides pinned and ready to sew.

Then I pinned and stitched the sides of the tank top.

Once fixed, the new shorts can be hemmed.

Then the bottom was ready for hemming.
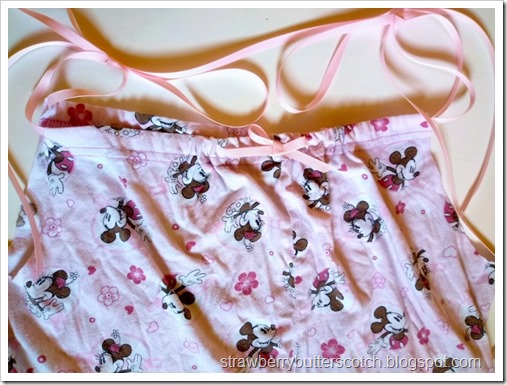
Ribbons threaded through the top of the tank top and a cute bow added to the front.

All that was left to do was thread ribbons through the “casings” and tie to form the straps.  I added a ribbon bow to the front just for fun.
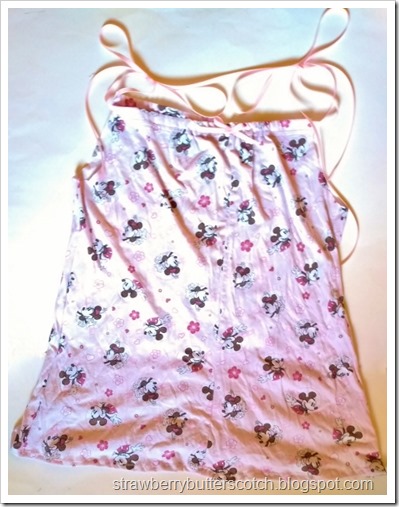
The finished tank top with ribbons and all.

And now the drawstring tank top is done…

The finished pajama set, drawstring tank top with shorts with a cute Mickey and Minnie Mouse print.

…And the pajama set is ready to wear.


Now here’s the bonus.  A cute night gown makeover. 

A t-shirt style night gown.  It will be turned into a cute pajama set.

I got this cute night gown at a thrift store ages ago.
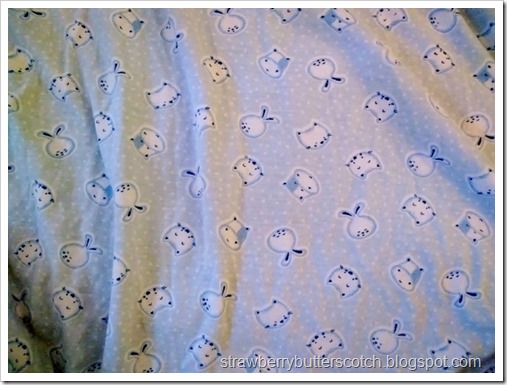
A close up of the cute print of the night gown, it's blue with little bunnies, kitties and cows.

I loved the cute pattern, it has kitties, bunnies and cows, because cows are adorable, right?

The problem is that I never wear it.  Not only is it too big, but I think it would work better as a top than a gown.  Easy to fix.

The night gown cut to t-shirt length plus about 1 inch for a hem.

I just cut it where I wanted it, plus an inch for the hem.

The shirt with pins along the side, ready to sew to take it in since it is too big.

I pinned and stitch along the sides to take it in, because things are always too big for me.

The bottom of the shirt has been re-hemmed.

Then a quick hemming job to finish.

But, we’re not done yet.  Let’s make shorts!

The fabric that was previously cut off the bottom of the nightgown.  It has been cut in half so there are two pieces folded in half.

I took that piece I cut off and cut down the middle to form to folded pieces.  I will use the already hemmed bottom for the hem of my shorts.

Using a pair of knit shorts a cutting guide to cut a j-shape in the folded fabric on the non-folded end.

I used a pair of shorts I already had as a guide to cut the curve.  I left a couple of inches at the top for the waist.
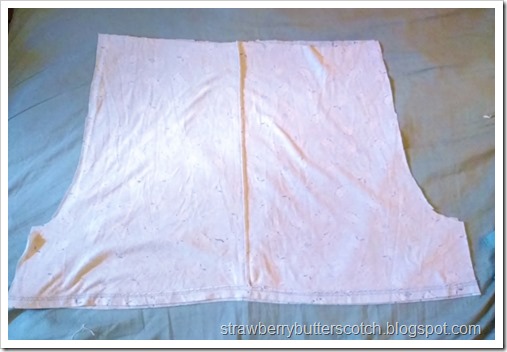
The two pieces of fabric, now unfolded and layered on top of each other with rights sides together.  Time to get sewing!

Unfold the pieces and layer them right sides together.

It’s hard to tell in this photo, but the curved part should be deeper on one side.  That will be the back seam, and it needs to be deeper to accommodate your back side.

The curved cut edge with pins, ready to sew for the front seam of the shorts.  Then repeat fo the back seam.

Anyway, I just pinned and stitch the back seam and then the front seam.

The shorts turned to show the sewn inseam (the part that goes between the legs).

Then I turned the shorts around and pinned the inseam before sewing it securely.
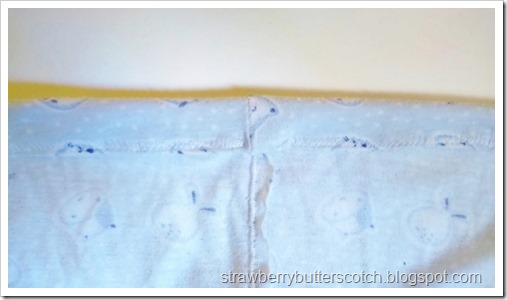
The top of the shorts, double folded and sewn to form a casing for the elastic.

Time for the waist.  I just double fold and sew to form a casing for the elastic.

Pink elastic threaded through the casing with a safety pin to form the elastic waistband on the shorts.

Then I thread the elastic through with a safety pin and stitched the ends together.

The finished pair of pajama shorts.

And the shorts are finished…

The finished pajama set, a cute tee with shorts with a cute blue animal print.

And the second pajama set is complete and ready to wear.

Here’s the updated list:

Nine down, just one more to go.  The next one will be up in a couple of days.  I hope.

Read More »

Monday, May 7, 2018

Clothing Makeover: Three More Bodyline Blouses

This post may contain affiliate links, please check out my disclosures page for more info.  Thanks!


The latest craft project is another clothing makeover, technically three makeovers.

Three different blouses from Bodyline, after a little makeover.

Three different blouses, all bought from Bodyline.  I had so much fun fixing up the last one I had to try my hand on these three. 


Two have fairly minor issues with them, but hang tight for the last one.

Blouse l364 from Bodyline, before a little alteration.  It has puffed sleeves with bows, heart shaped buttons, ruffles down the front, and a peter pan collar trimmed with faux pearls and lace.  A great blouse for lolita fashion.

This cute blouse didn’t need that much done to it.

It has some of the prettiest lace I’ve ever seen and the cutest heart shaped pearly buttons.  And I normally don’t go for ruffles down the front of a top, but the ones on this blouse are actually really cute.

Close up of the blouse sleeve with it's pretty lace.

However, the problem lies with the ruffles.  They added the same ruffles across the sleeve, there something about this placement that bothers me.  It makes is so hard to enjoy the really pretty lace, isn’t it pretty though?

The blouse sleeve after removing the ruffle with a seam ripper.

Anyway, just a bit of time with a seam ripper was all it took.  Ruffles no more!

Close up of the collar of the blouse.  You can see that the faux pearls on the collar do not quite match the pearl heart buttons down the front.

I had actually intended to remove the faux pearls on the collar because they kind of clash with the buttons.  But I kind of got use to them, they do add a nice touch. 

Bodyline blouse l364 after removing the ruffles from the sleeves.  It looks cuter this way.

So now this ruffly and pearly blouse it ready to be worn.

Bodyline blouse l015 before a little alteration.  It's a decent blouse for those into lolita fashion, with a couple of changes.

This blouse needed a little more to be done.  For starters, I love the ribbon bows down the front, but not the odd bows on the sleeves.

Close up of the blouse collar showing off the pretty lace.  It would look great if it wasn't for the extra row of the same wide ruffled lace.  It makes it look like there are two collars instead of one.

However, the biggest issue is the collar.  The wide lace is actually one of my favorite laces used by Bodyline, but I don’t like it enough to have two rows of it on such a large collar.  It makes it look like the blouse has two collars, and both ginormous.

Removed the collar and the extra lace from the collar.  There is a visable seam where the extra lace use to be, we will need to deal with this.

Removing the lace leaves behind a visible seam.  I could have just covered it up with a smaller trim, but I decided to remove the collar.

Pin and re-sew the collar back on to the blouse, but backwards on the blouse so the odd seam won't show.

Then pin it back  on backwards, and re-sew…

The re-sew collar of the blouse, the extra lace is gone and the strange seam is on the under side of the collar so you can't see it.

…to make a “new” collar.

The odd visible seam is now on the underside of the collar.  It did get a little bunched up while re-sewing, but it’s not that noticiable. 

The madeover Bodyline blouse l015.  The extra row of lace on the collar has been removed along with the bows on the sleeves.

So now the cute ribbon bow blouse is ready for use.

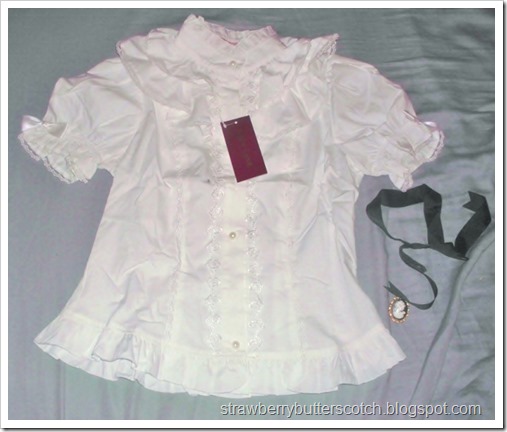
Bodyline blouse l582 before a dramatic makeover.  It came out of a lucky pack so it is missing the detachable sleeves.  The collar will be removed and a new neckline will be sewn.

This final blouse came out of a lucky pack (the one this dress came from) and needed the most work of all. 

Being from a lucky pack meant flaws, like missing pieces.  It was suppose to come with detachable sleeves so it could go from short sleeve to long sleeve for cooler weather.

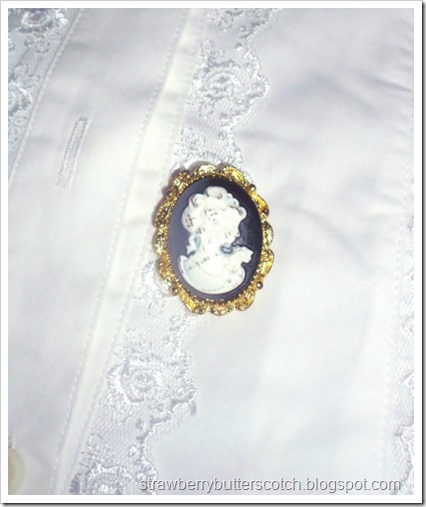
Close up of the cameo pin that came with the blouse, it is a little scratched up and could use a makeover too.  That will be for another craft project.

It did come with this cameo pin along with a ribbon necktie.  It is scratched up and in need of a makeover too, but that will be for another day.

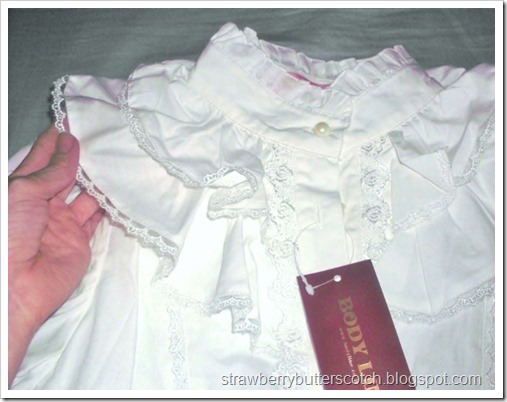
Close up of the blouse collar. It is a high straight collar with two layers of ruffles with lace.  The ruffles are overdone and will be removed with small scissors.

Anyway, the problem with this blouse is the overly ruffled collar.  It’s funny how ruffles have been getting in way, I normally love them.   These ruffles are so not flattering, so I carefully cut them off with tiny scissors.

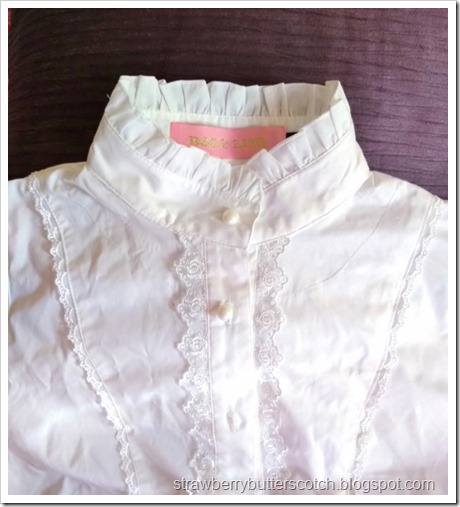
The high collar of the blouse after removing the ruffles.  It looks great like this and could easily be worn for vintage and antique clothing styles like steam punk as well as lolita fashion.

After cutting, the blouse now has an simple, yet elegant high neck collar.  This would be good look for those into vintage and antique clothing. 

However, I’m not really into high neck blouses, so back to more cutting.

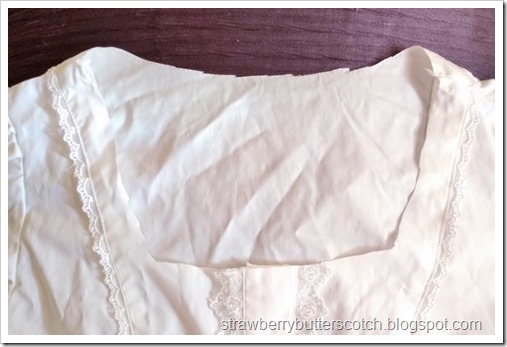
The blouse with the collar cut off.  The new neckline is cute in a pretty square shape and just needs to be trimmed and finished.

I cut off the collar and cut a new, slightly square shaped neckline.  I find this much more flattering for me.

Some lace and edging from one of the ruffles as been sewn along the new neckline.  Just need to turn it and top stitch in place.

I then cut off the edge of one of the old ruffles and stitched it along my new neckline. 

After turning and topstitching…

Close up of the new finished neckline for the blouse.  It has nice lace along the edge and a bow on the front.

…It looks like this.

I added a snap to close the top and a little bow for decoration.

Close up of one of the sleeves.  The bows were replaced with cute little ones that match the one on the front of the blouse.

I made matching bows for the sleeves to replace the odd looking ones.

Bodyline blouse l582 after a lot of sewing.  The collar has been removed completely, the neckline changed and bows removed and added.  It is now an adorable lolita style blouse.

And now my new collar-less blouse is ready to go.  These blouses were so much fun to alter, I wish I had a few more to work with.  Maybe later.

Here’s the updated list:

Five down, five more to go.  The next one will be ready in a few days, look forward to it.


Give it a try:

Read More »

Wednesday, March 28, 2018

Clothing Makeover: Altering a Pink Bodyline Dress for Easter

Normally, around Easter I work myself haggard trying to design and sew a lovely, ruffly new dress to wear on Easter Sunday.

This year, I decided instead to work myself haggard trying to alter a dress that needed work.

The before photo for the slightly ugly pink Bodyline dress

Here is the old dress that badly needed a makeover.  I got it in a lucky pack I bought from Bodyline.  The price was really cheap, but I’m not sure how “lucky” I was with this one.

The before photo for the slightly ugly pink Bodyline dress.  Close up of the collar with discoloration.

You can see here that the collar had odd stains on it, but that’s okay because I immediately thought it had to go anyway.  The lace looked kind of cheap and the collar overall was unflattering.

In addition to the collar, the elastic on the one of the sleeves was shot, the lace on the sleeves was horrible, the hearts down the front of the dress were overkill, and surprisingly I thought it could stand to have a little less lace and ruffles.

So after some time with a seam ripper and sewing machine…

The after photo of the madeover and improved pink dress, so much cuter now.

…Here’s the new dress.

Close up of the new neckline.

I chopped off that horrible collar and added a touch of lace to the new neckline.  You can see that it’s the lace from one of the hearts on the bodice.  It helps to tie in the whole dress.

Close up of the new dress bodice and neckline.

Obviously, I removed two of the hearts from the front of the bodice.  One is plenty, plus I can probably make something cute with the other two later.  I also removed two of the vertical strands of lace.

Close up of the new dress hemline with underskirt ruffle.

I removed one of the bottom ruffles, then realized the skirt was too short without it.  Oops. 

So I made a white underskirt to replace it.  It’s better this way, and I can wear the underskirt separately.

Close up of the puffed sleeves with new lace.

And finally, I replaced the elastic on the sleeves and switched the bad lace with the lace I ripped off the bodice.  The sleeves look much cuter now.

The new matching flower headband.

And just for fun, I whipped up a cute flower headband to go along with my new dress.  I think flower accessories are perfect for Easter, which is why I'm going to make a tutorial for the headband.

Here’s the updated list:

  • Dress makeover
  • Doll undies
  • Cameo and Hearts
  • Blouse makeover
  • Phone case
  • Outfit
  • Mother’s Day
  • Costume fix
  • Jammies
  • Bonnet

One down, nine more to go.  The next project should be up in a few more days, but the head band tutorial will be up tomorrow!  Look forward to it.

Read More »

Popular Posts