Search This Blog

Featured Post

Simple Flower and Lace Headband Tutorial

This post may contain affiliate links, please check out my disclosures page for more info.  Thanks! As promised yesterday, here is my headb...

Showing posts with label lace. Show all posts

Sunday, October 28, 2018

Halloween Crafts: From Plain to Pretty Lace Fantasy Costume Dress

It took way too long, but I finally finished the first project on my craft list. 

From Plain to Pretty Lace Fantasy Costume Dress

A Halloween costume.

Before it's a relatively simple pink skater style dress made for a Halloween costume 2 years ago.

Does anyone remember this dress?  I made it two years ago around Halloween along with a couple of other accessories.  The accessories turned it into a cute fairy costume.

Sometimes great costumes can come from simple things, and I will show you how again with this dress.

Using the dress, cut a 2 tank top shaped pieces from the lace to make a bodice.

I had this pink lace fabric leftover from an Easter dress (see Pink Lace for Easter).  Using the pink dress as a guide, I cut two tank top shapes out for a lacy bodice.

Then I stitched along the shoulders and “hemmed” arm area.  I just folded down the edge and zig-zag stitched it down.

A circle of lace fabric cut in half makes two ruffles for flutter sleeves.

I cut two half circles from the lace for cute flutter sleeves.

After sewing the shoulders of the bodice, sew the hemmed flutter sleeves on.

Just hem them and sew on along the arm area to finish.

Cut the lace fabric for a half circle skirt, here's a tutorial for that. Time for some math.

The skirt on the pink dress is a circle skirt, but for the lace I made a half circle instead.  Here’s a great tutorial for half circle skirts.

The sides of the bodice are sewn, the bodice has been cut down the center to open up as with the skirt, and the skirt is sewn to the bodice.  Plus, the lace over dress is layered over the old pink dress.

I decided to cut the lace bodice down the center to open it up before sewing on the skirt.

Then I hemmed all the raw edges and layered the lace “overdress” over the pink dress.  Looks pretty now.

The lace over layer is hand sewn to the dress along the front and neckline.  It can easily been removed if neccessary for next year.

I then grabbed a needle and thread and to attach the lace to the pink dress along the front and neckline.  Just enough to keep things in place.

I wanted the stitches to be easy to remove in case I want to wear these pieces separately in the future.

The pretty new costume dress complete with a couple of accessories.  A flower head band made previously and a pair of lace finger less gloves.

Just throw on a few accessories, and my costume dress is done.  I still haven’t really decided what to call it.  This dress could work for so many pretty outfits.  From princess or fairy to anime style magical girl.  It all works.

Close up of the flower head band made of faux pink and white flowers and pink ribbon.

Anyway, in addition to the left lace fabric I’m reusing the flower headband I also wore for Easter.  The color matches this dress perfectly.  Check out my flower headband tutorial to make your own.

One of the lace finger less gloves worn.  It just a tube of fabric, hemmed on the ends and fitted to a human arm.

Using more of the stretchy lace fabric, I whipping up some finger-less gloves that are easier than they look.  They are basically just tubes of fabric, hemmed and adjusted to fit my arms.

One of the lace finger less gloves worn.  It just a tube of fabric, hemmed on the ends and fitted to a human arm.

One end was pinned and stitch to go around my thumb.  An easier method it to cut the legs off a pair of lace tights and  cut off the toes for your fingers, but I didn’t have any.

So, now we have a pretty costume dress with matching accessories, and just in time for Halloween.  Yay!

Here’s the updated list:

  • Costume
  • Case
  • Doll and Kitty
  • Little Halloween
  • 3 Skirts
  • Accessories
  • Socks
  • Overalls
  • Ornaments
  • More Cases

One down, nine more to go.  The next one should be up soon.  Look forward to it!

Read More »

Sunday, August 5, 2018

First Aid Kit to Cute Nintendo 2DS Case

This post may contain affiliate links, please check out my disclosures page for more info.  Thanks!

As promised yesterday, here’s the next project on my craft list.  But first, let me share something new and wonderful.

The New Nintento 2DS XL still in the box.

My Nintendo 2DS XL.

I got it (on sale!) about two months ago, and it’s been entertaining (and distracting) me ever since.


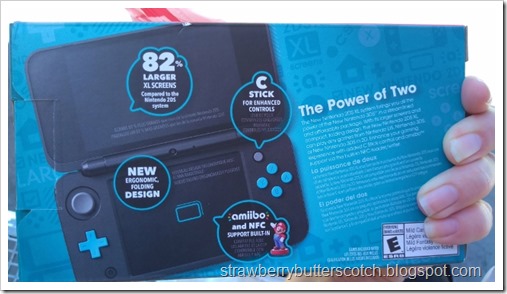
The back side of the Nintendo 2 DS XL box.

I originally was looking at the cheaper Nintendo 2DS bundles, but I went with this one because the screen was larger and it’s able to play more games.

Anyway, I thought that my nice new handheld gaming console could use a nice case to carry it along with all the games and accessories I find myself lugging around.


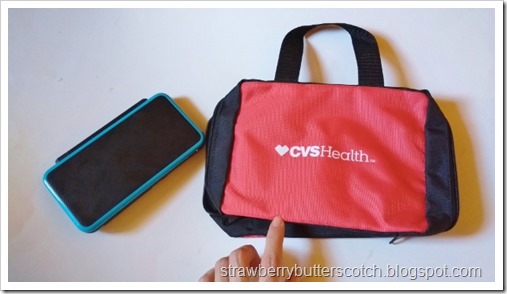
A red first aid kit case from CVS, the drug store.

Enter the first aid kit case, we sell it at work (I work in a CVS drug store).

There was a deal where if you bought three first aid items you would get a coupon for a free case.  Long story short, I now have five free cases.  Got to find a use for them all somehow.


The inside of the the first aid kit case, there are several built in pockets and a zippered one.

It has plenty of built in pockets and a zippered one too.  Perfect for storing plenty of things, besides Band-Aids.


The first aid kit case is great for the storing the nintendo ds, but it could be cuter.

The downside is it isn’t that cute looking.  The CVS logo screams medical supplies.


First Aid Kit to Nintendo 2DS Case.

It’s time to fix that, let’s take this plain looking case and make it super cute!


Update: The CVS case has been discontinued, but I found this case on Amazon that should work if you want to make your own cute case. Plus, here's one in Pink!

Cut two pieces of cute fabric large enough to cover the sides of the case, with a little extra on the sides to fold in the raw fabric edge.

First, I cut two pieces of fabric large enough to cover the sides of the case, plus a little extra to finish the raw edges.  I found it easier to cut some paper to the size I wanted first, and then use that as a “pattern”.


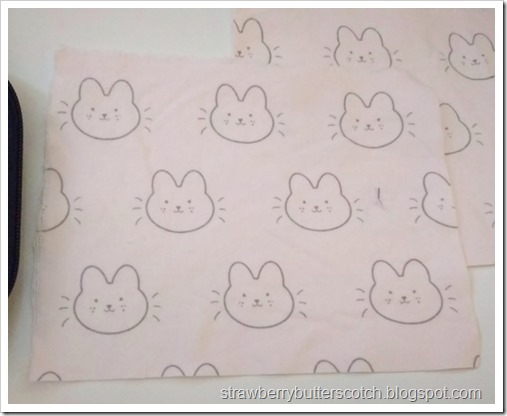
Close up of the cute fabric, it's a pink flannel with kawaii bunnies all over.

This is the fabric I used, it’s a super cute pink flannel print I found at SAS.  I bought several yards of it, so you will be seeing more projects with it.


Cut the corners of the fabric before folding back the raw edges and pinning them down.

I cut the corners of the fabric before folding and pinning back the edges.  This takes care of those raw edges.


Add pretty lace along the edges of the fabric if you want.

Then I added lace along the edges.


Pin the fabric to the sides of the case, then carefully sew along the edges, by hand or machine.  It's easier by hand though.

With the fabric all prepped and ready, I pinned it to the sides of the case and carefully sewed it on with a zig-zag stitch.

I used a zig-zag stitch because I knew the stitches would show on the inside, and thought the zig-zags would look cuter.


Finish with a cute bow.

Add a bow on the front, and the outside of the case is done.

Now for the inside I wanted a little more pocket space, surprisingly.


To make an extra pouch pocket, cut fabric the same width as the other pieces and three times as long.  Hem or finish the raws edges.

I cut another piece of fabric the same width as the other ones, but three times the length.  I then finished the raw edges by folding them once and zig-zaging around.

I did it that way instead of a regular hem to reduce the bulk, flannel is quite thick.


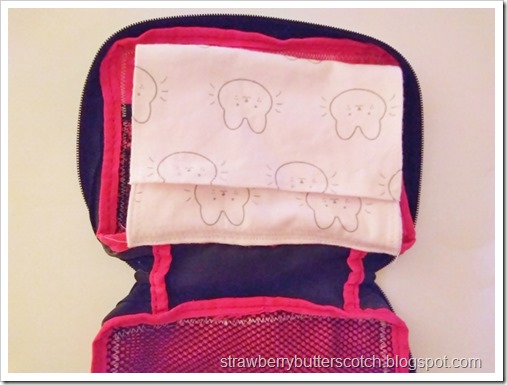
Fold the fabric at the bottom and sew on the sides to form a pocket with the rest of the fabric being the flap.

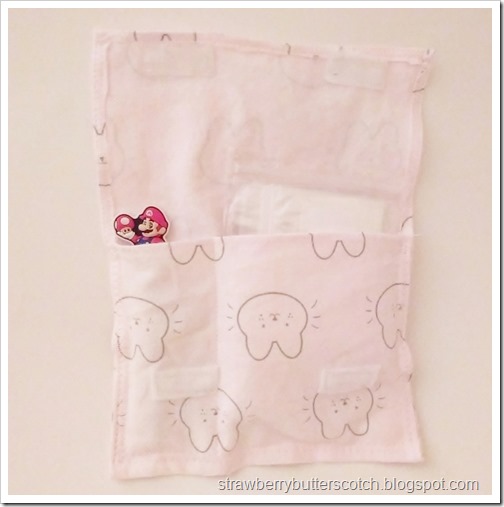
Then fold the bottom third up, sew the sides and bottom to create an instant pocket….


Sew on some Velcro to close the flap, but oops!  Should have done that before sewing down the pocket.

…Only to realize afterward that I should have sewn on the Velcro before sewing the pocket.  It would have been so much easier.  Lesson learned.


sew a line of stitching or two to divide the pocket to organize supplies.

Then I stitched a line down the pocket to make two smaller ones for organizing my junk.  The one is for extra styluses, and the other is for screen wipes and other stuff.


Sew the pouch into the case along the bottom edge.

I attached it to the bottom of the case.  It kind of reminds me of a binder pencil case now.


Now the ds case is finished and ready to fill with gaming stuff.

And with that the case is finished and ready to fill.


The filled nintendo ds case filled on one side with charging cables and such.

Here I have my chargers and power bank neatly secured in their pockets.


The nintendo ds case filled on the other side with games, plus the 2 ds xl peeking out of it's pocket.

And here, I have my 2DS XL in it’s new pocket along with my game cards in their zippered pocket.


A bunch of Nintendo DS and 3DS game carts stored in tiny ziplock bags, they are actually pill pouches.

Speaking of games, here’s how I store them to keep them free of dust and scratches.  They are kept in what appears to be tiny zip lock baggies when not in use.


A medicine pouch bought from a drug store.  They are perfect for storing ds games to keep them dust free and safe.

These are actually tiny medicine bags I also bought at work.  You can find them at most drug stores (Amazon sells some here). They are also handy for storing tiny craft supplies, like beads.


Here’s the updated list:

Three down, three more to go.


Give it a try:

Read More »

Friday, August 3, 2018

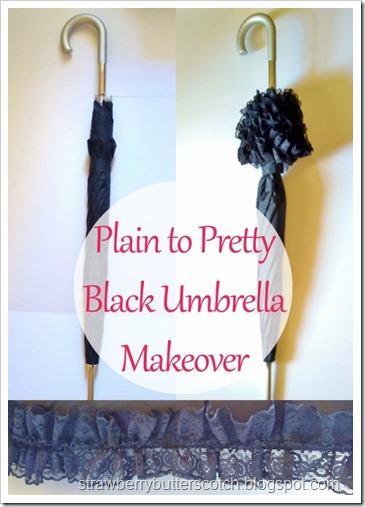
Plain to Pretty Black Umbrella Makeover

This post may contain affiliate links, please check out my disclosures page for more info.  Thanks!

The next project on my craft list is another makeover, this time for an umbrella.

I found myself having to replace my umbrella, again.  This time I decided to invest in one I was sure would last awhile before breaking on me. 


A simple black Totes stick umbrella with a curve handle, let's make it prettier.

I got this Totes stick umbrella, which was a little more than what I usually pay for umbrellas, but is totally worth it.

It opens and closes easily, dries quickly when wet, has held up to winds that have snapped previous umbrellas, and has one of the nicest and softest feeling handles I have ever touched.

I intentionally got it in black because it both makes it less likely to get really dirty and makes it better as a sun umbrella (check out this article about that).

Plain to Pretty Black Umbrella Makeover

The downside is that it isn’t as pretty as other umbrellas, but that is way too easy to fix.  We just need to add some…


Wide black lace, it will be used for our new umbrella.

…Lace!

I got this wide lace ages ago from SAS intending to use it for an umbrella.  It’s just like the lace I used for the white umbrella I decorated before (that got super dirty looking before breaking on me, sigh).


I like it specifically because it’s a pretty non-cottony lace.  I don’t recommend cotton laces because they are very absorbent.  When you use an umbrella for both sun and rain, adding something that absorbs a ton of water will make it take forever to dry.  Not to say that this lace won’t take a ton of time to dry too.


Ruffling the lace with a sewing machine.

I started by ruffling the lace using my sewing machine by using the longest stitch length and setting the tension higher.

The circumference of the umbrella is 124 in. (315 cm.) and I needed twice as much lace to make my lace ruffle plus a little extra for overlap.  The quicker option is to choose a lace that is already ruffled, but that narrows the selection quite a bit.


Pin the ruffled lace to the edge of the umbrella.

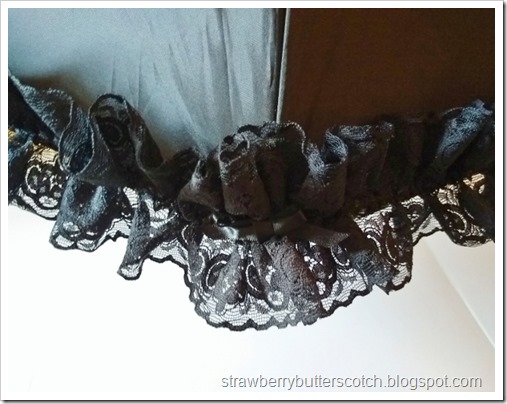
After ruffling, I pinned my lace along the edge of the umbrella.  Looking nicer already.


Carefully glue the lace down with a glue gun.

Now, I could have sewn the lace ruffle on by hand, but I was feeling lazy about it.  So, I glued it on with a glue gun.

First, I carefully glued down the sections of lace between the pins.


The lace is glued down, and all the stray bits removed.

Then I removed the pins one by one and glued down those areas.

I went around a couple more times to glue spots I missed and remove those annoying strings left by the glue gun (I watched a lot of videos while doing all of this).


Add tiny ribbon bows.

Finally, I made some little ribbon bows to add along the lace (check out my video tutorial for simple bows if you wish).


The finished and fully decorated umbrella.

And now the umbrella, or should I say, parasol is finished and ready for use.


Close up of the finished umbrella.

It is looks so pretty and the lace ruffle gives it a very poufy look, however…


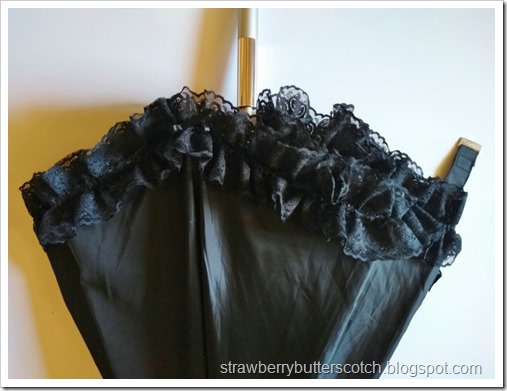
The now lacy decorated umbrella can still be closed!

…It’s not too poufy to close up!  I was afraid I would have to change the strap.


Here’s the updated list:

  • 3 piece outfit
  • Holder
  • First aid cases
  • Umbrella
  • Tea set
  • Tote

Two down, four more to go.  The next one should be up tomorrow, look forward to it!


Give it a try:

Read More »

Sunday, July 29, 2018

Plastic Caddy to Pretty Headband Holder


This post may contain affiliate links, please check out my disclosures page for more info.  Thanks!

For the first project on my new craft list, I decided to fix a storage problem in a pretty way.

A pile of pretty headbands, mixed up and cluttered.

I have made a ton of cute headbands overs the years to go with pretty outfits.  The problem with having all these nice hair things is storing them so they don’t get tangled up in a heap like this, or damaged.

A simple plastic storage caddy, the solution to our messy head band problem.

The solution is this, a simple plastic caddy.


I got this one for free from a friend, but I found similar ones here at DollarTree.  They are useful to store all kinds of things neatly and within reach.

Plastic Caddy to Pretty Headband Holder.

However, for hair accessory storage I wanted something prettier. 

So, that’s what I did, I made the caddy prettier, to turn it into the perfect headband holder.

Two plastic bins full of laces, ribbons, bows, flowers and other embellishments.  These will be used to make the plastic caddy all pretty.

First I whipped out my embellishments.  The container on the right is where I keep all my lace and ribbons, and the one on the left is full of smaller bits of ribbon, flowers, bows and other random small stuff.

Lately, I gotten into sorting and organizing all my craft supplies, mostly using plastic shoebox size containers and cute baskets.

Start gluing the lace around the caddy with a glue gun.

I picked out some wide lace, and started carefully gluing it around the caddy with a glue gun.

Finish gluing the lace by folding the end before gluing down.

When I got it completely around the caddy, I folded the edge of the lace before gluing it down.

Gluing ruffled lace along the top edge of the caddy with a glue gun.  Careful, it's really hot.

Then I did the same thing with some pretty ruffled eyelet lace.  I glued it along the edge of the container.  I had to be extra careful here, because it’s easier to get burn gluing there.

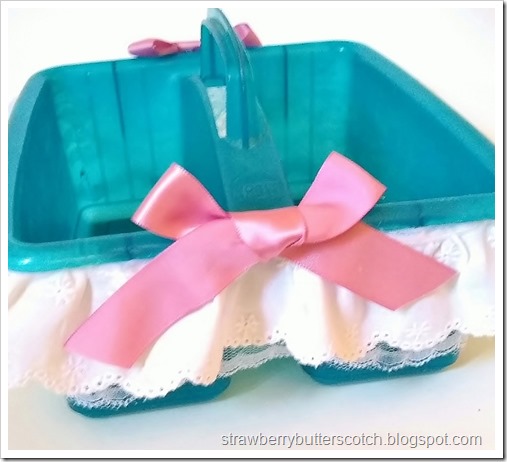
Glue cute pink ribbon bow to the sides of the caddy as a finishing touch.

To finish it off, I made two large-ish bows from some leftover ribbon and glued them to the sides of the caddy.  This ribbon was left over from this pretty pink dress I made for Easter a while ago.

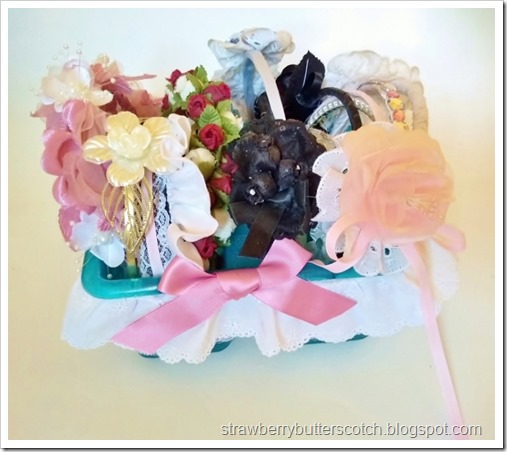
The finished and nicely decorated plastic caddy, now a pretty headband holder.

And now it is done, and ready for use.

The pretty caddy full of mostly home made headbands.

See, doesn’t that look much better?  And it actually took about 15 minutes to do.  Maybe I should make more.

Here’s the updated list:

  • 3 piece outfit
  • Holder
  • First aid cases
  • Umbrella
  • Tea set
  • Tote

One down, five more to go.  The next two should be up soon, look forward to them!


Give it a try:

Read More »

Popular Posts