Search This Blog

Featured Post

Simple Flower and Lace Headband Tutorial

This post may contain affiliate links, please check out my disclosures page for more info.  Thanks! As promised yesterday, here is my headb...

Showing posts with label Joann. Show all posts

Friday, July 13, 2018

Crafting for Dolls: Straw Hats to Half Bonnets

This post may contain affiliate links, please check out my disclosures page for more info.  Thanks!


Later than planned, but here is the last project on my craft list.  Finally.

Some small bonnet style straw hats from a craft store.

Some time ago, I found a package of small bonnet style straw hats at Bookman’s.  They were only 50 cents!

A small bonnet style straw hat from a craft store.  Let's turn it into a doll half bonnet!

I bought them thinking I could make pretty bonnets for my ball jointed dolls, until I tried them on them.  They were too small, even for my smallest dolls!

What do you do with too small doll straw hats?
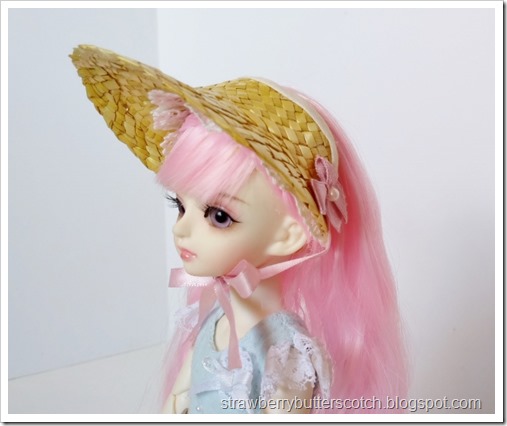

A pink haired ball jointed doll wearing a pretty half bonnet with pink bows.

You make half bonnets.

Years ago, I came across a tutorial for taking a child size straw hat and turning it into a half bonnet.  Surprisingly I still remembered it, so I thought “why not try that for a doll?”
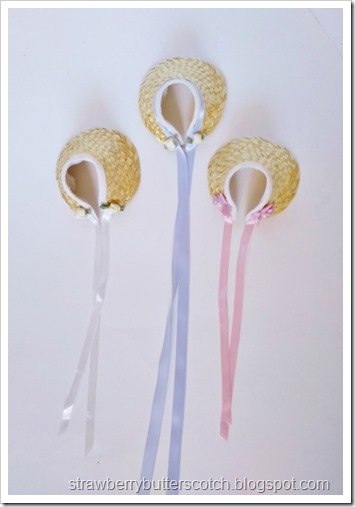
Three doll sized half bonnets made from craft store straw hat with ribbon, bows, and flowers.

So I made three ball jointed doll sized half bonnets.  They came out so cute!

The side view of a doll wearing a half bonnet.

They are trimmed on the outside with flowers and bows with ribbons for tying.

Three doll sized half bonnets, you can see the ruffled lace on the inside of the bonnet.

On the inside, I added ruffled lace to frame the doll’s face.  And it’s a great way to use up lace scraps.
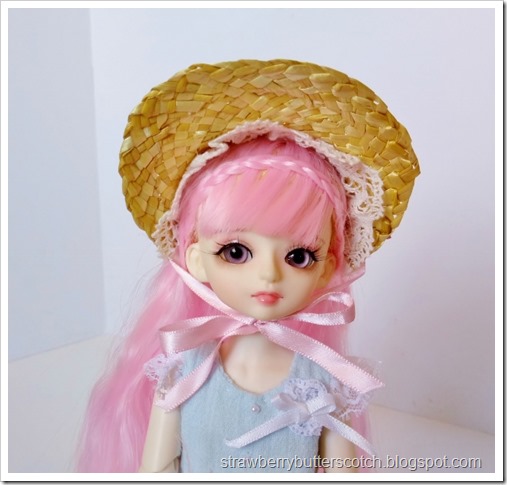
The front view of a pink haired bjd wearing a pretty bonnet.

See, doesn’t it look so pretty on Yuna?

A white haired ball jointed doll wearing a straw half bonnet with a pale purple ribbon.

Not that they don’t also look lovely on Hikaru here, I mostly intended to make the bonnets for her anyway.

Two ball jointed dolls showing off their new half bonnets.

If you are interested in making some of these half bonnets for your dolls, I whipped up a quick tutorial on my doll blog.

Here’s the updated list:

Ten down and out.  Finally finished this list! 

So now to start up on the next one.  I will have it posted by Sunday.  Look forward to it!


Give it a try:

Read More »

Saturday, April 7, 2018

Sparkly Tulle Phone Case with Tutorial

This post may contain affiliated links, please check out my disclosures page for more info.  Thanks!

Here’s another makeover project. 

This time I’m taking my plain old cell phone case and making it super pretty.  And I made a tutorial, so you can try it too!

Sparkly Fabric Covered Phone Case Tutorial

Here’s what you need:

  • An old phone case
  • A large scrap of tulle or another pretty lightweight fabric
  • Scissors
  • Tissue paper
  • Pencil
  • Various glues, see below for recommendations.
  • Something to spread glue (sponges, cotton balls, etc.)
  • Gems, beads and other embellishments

The plain phone case before we decorate it with pretty stuff.

Here is my old phone case.  I ordered it online, but it didn’t look quite as pretty as the product photo.  It’s suppose to be rose gold, however it looks darker and blander in person.  Time to change that.

Covering the phone case with tissue paper to trace the shape for a pattern.

First you cover the phone case with tissue paper and trace around it to make a pattern for your fabric.  I’m using gift tissue I got on clearance last Christmas.

Mark areas that shouldn’t be covered, like the camera hole thingy.

The paper pattern is traced and cut out.

Then carefully cut out your paper pattern and compare it to you case.  Trim off edges and such as necessary.

The pattern was pinned to the sparkly tulle and has been carefully cut out.

Pin the pattern to your fabric of choice and carefully cut out. 

I’m using this pretty sparkly tulle.  I’ve used it for this fairy costume dress and this wrap skirt (also for a costume), and now it’s being used for a phone.

One thing that will help make this part easier is ironing the fabric (yes, tulle can be iron on really low heat).  If it helps, you can also try tracing your tissue pattern on thicker paper if it’s too hard to use otherwise.

Spreading glue onto the phone case.

Next is to glue on the fabric by spreading the glue on the phone case and then apply the fabric, smoothing it down as you go. 

I recommend using Mod Podge, but you can also use Tacky Glue.  It’s best to water down the Tacky glue so it’s easier to spread.  I forgot to do that, and it shows.

Adding the fabric to the phone case, almost done!

Let the glue dry for a few minutes, and then dab more in areas that seem to need it.  This is also a good time to trim off any excess fabric that you might have missed before. 

Then set the case to the side to dry some more.

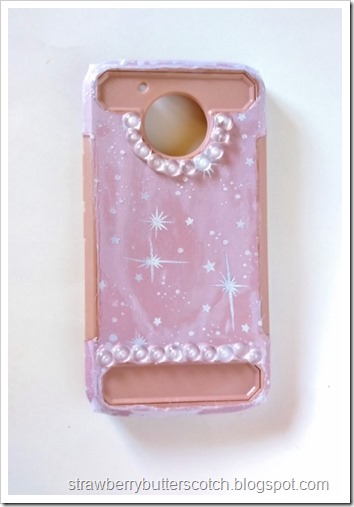
After gluing on the gems, the phone case is done and oh so pretty!

After it is dried completely, you can have fun gluing on gems, pearls, and anything else you want.  I recommend using Aleene’s Jewel-It for this part. 

Let the whole thing dry for about a day, then show off your pretty new phone case.

Here’s the updated list:

Three down, seven more to go.  The next project may take a while to put up, but hopefully not too long.


Give it a try:

Read More »

Tuesday, April 3, 2018

Jewelry Makeover: Turning Earrings into Cute Necklaces

This post may contain affiliate links, please check out my disclosures page for more info.  Thanks!

My last craft project involved altering old clothes, so this one involves changing up accessories, specifically jewelry!

A package of cameo earrings and a packaged of heart earrings, both bought on clearance and ready to be turned into necklaces.

If you remember my Comicon Haul video, you will recognize these cameo earrings from the Victorian Folly grab bag.  The heart earrings on the right I bought at the CVS I work at, they were on clearance fro $2.99.

I don’t actually like wearing dangling earrings, so what do you do with really cute but unwearable earrings?

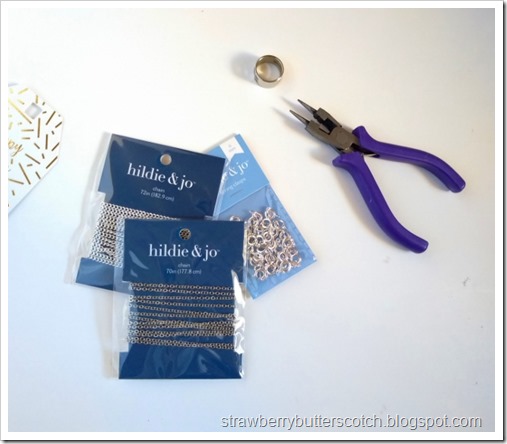
Jewelry supplies need to turn the earrings into necklaces.  Chains, clasps, basic tools, and jump rings (missing from photo).

You make necklaces!  I picked up some clasps and two different chains at Joann’s, and gathered some jump rings I already had and my jewelry tools.  They come from this basic jewelry kit.

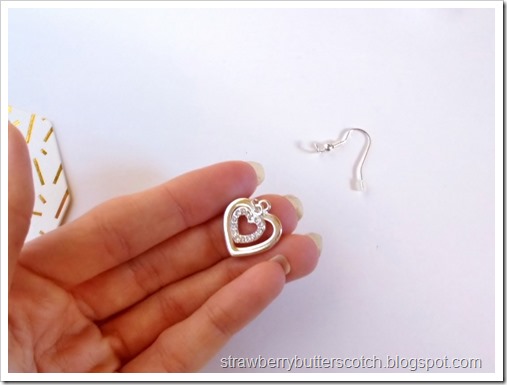
Removing the earring hook from one of the earrings.

Just had to remove the earring hook to start.

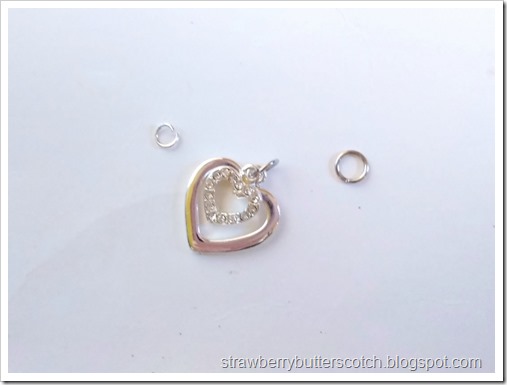
Adding a new jumpring to one of the earrings.

For the heart I had to swap out the ring for a slightly larger jump ring.

Added a new chain with clasp, and now the heart necklace is done!

Then just cut a bit chain to my desired length, and add the clasp and now my new heart necklace is ready to wear.  I think it will go well with my new dress (see Clothing Makeover: Altering a Pink Bodyline Dress for Easter).

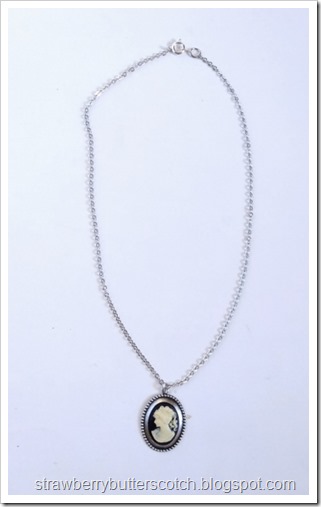
Cameo earring turned into a cameo necklace.

The cameo necklace was quicker to make, because I didn’t need to use a larger jump ring.  I already have several cameo jewelry pieces, but I can always add another necklace to my collection.

Two completed necklaces made from earrings.

I chose to make only one necklace from each pair of earrings and save the other pieces for later.  Maybe I can make other accessories with them to make a matching set.  Otherwise, I could have easily made pairs of necklaces to give away as gifts.  Kind of like those friendship necklaces and bracelets you see at Claire’s.

Here’s the updated list:

  • Dress makeover
  • Doll undies
  • Cameo and Hearts
  • Blouse makeover
  • Phone case
  • Outfit
  • Mother’s Day
  • Costume fix
  • Jammies
  • Bonnet

Two down, eight more to go.   The next project should be up by the end of the week.  Look forward to it!


Give it a try:

Read More »

Thursday, March 29, 2018

Simple Flower and Lace Headband Tutorial

This post may contain affiliate links, please check out my disclosures page for more info.  Thanks!

As promised yesterday, here is my headband tutorial.

Simple Flower and Lace Headband Tutorial

I will show you how to make this simple head band, accented with a pretty fake flower.

Materials needed to make a flower lace head band.  Wide lace, blank headband, ribbon, flower, glue gun, and scissors.

Materials needed:

  • Glue gun with glue.
  • Ribbon.
  • A large flower.
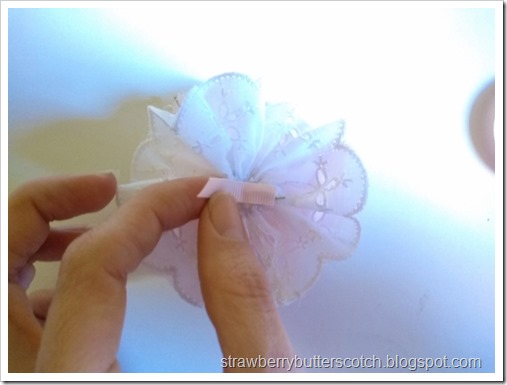
  • A lace rosette, check out my video tutorial if you don’t know how to make one.
  • Scissors.
  • A plain headband, I prefer metal ones because they can be adjusted to fit your head without breaking.
  • Any other embellishments you want.


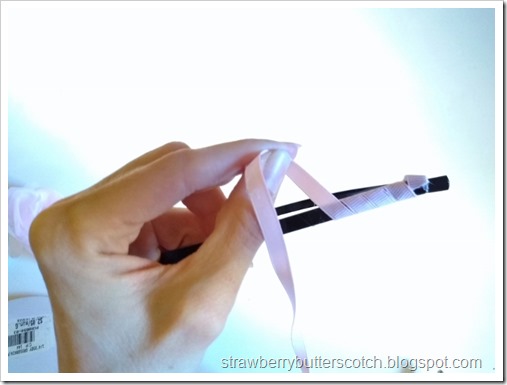
Making a flower and lace headband.  Wrap ribbon around the headband, glueing as you go.

First, glue the end of the ribbon to the end of the headband to start covering it.

Making a flower and lace headband.  Wrap ribbon around the headband, glueing as you go

Proceed to carefully wrap the ribbon around the head band, applying glue as you go.  Be careful not to burn yourself on the hot glue.

Making a flower and lace headband.  Wrap ribbon around the headband, glueing as you go.

When you get to the other end, cut the ribbon and glue down the end.

Making a flower and lace headband.  Wrap ribbon around the headband, and when finished you may wrap more ribbon on the ends for a polished look.

If you want,  you can wrap a little extra ribbon on the ends of the headband.  This will give it a more polished look, but I’m too lazy for that.

Making a flower and lace headband.  Add the flower to the lace rossette.

Now for the flowers.  If your flower has a wire stem like mine, you will want to stick it through the center of the rosette.

Making a flower and lace headband.  Add the flower to the lace rossette.

It looks kind of cute like this. :)

Making a flower and lace headband.  Add the flower to the lace rossette.

Then you twist down the wire, so it lies flat and add some glue to secure it.

If your flower doesn’t have wire, you can just glue it to the center of the rossette.

As an alternative to the large flower, you can use a cluster of three or more smaller flowers.  Use whatever you like.

Making a flower and lace headband.  Use some ribbon and glue to attach the flower piece to the headband.

Moving on, glue the end of the piece of ribbon over the center of the back of the flower and rossette piece.

Making a flower and lace headband.  Use some ribbon and glue to attach the flower piece to the headband

Wrap this ribbon around the headband…

Making a flower and lace headband.  Use some ribbon and glue to attach the flower piece to the headband

…Then glue down to attach the piece to your headband.  Make sure it is where you want it on the headband before you glue it.

Making a flower and lace headband.  Use some ribbon and glue to attach the flower piece to the headband

Now it is ready for more decorations.

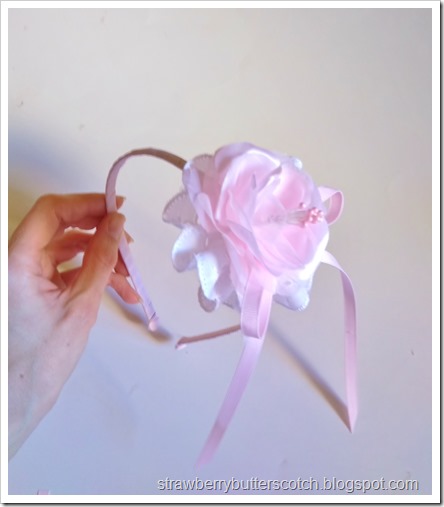
Making a flower and lace headband.  Add a ribbon bow and anyother embellishments you want, then you're done!

I added a ribbon bow with long tails (check out my simple bow video tutorial if needed), because I thought it looks pretty.  You can add jewels, strands of pearls, or anything else you want.

Enjoy the headbands and have a happy Easter.


Give it a try:

Read More »

Sunday, January 7, 2018

Sewing for Dolls: Late-ish Doll Coats for Christmas

This post may contain affiliate links, please check out my disclosures page for more info.  Thanks!

The final project on my Christmas was actually finished right in time for Christmas.  Yay!  But I’m still extremely late posting it here.  :(

Anyway, for the final project I made (let’s see if you can guess it)…

Cute felt coats for ball jointed dolls.

Doll Clothes!

Okay, who saw that one coming.  Last year I made cute little felt coats for some of my ball jointed dolls, and I decided to make some for the rest.  Four more to be exact.

Cute felt coats for ball jointed dolls.

For these two, I used a creamy beige colored felt.

Cute felt coats for ball jointed dolls.

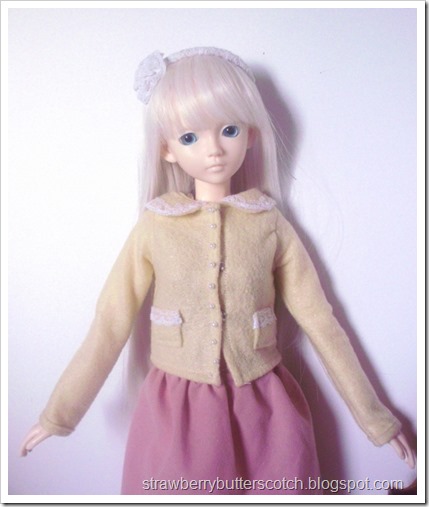
This one (for Hikaru) is trimmed with lace along the pockets and collar for cute girly touch.

Cute felt coats for ball jointed dolls.

And on the tiny coat (for Momoko) I added little felt bows to the pocket.

Cute felt coats for ball jointed dolls.

Almost all the coats have a strap on the back to cinch in the waist a little with little “buttons”.  Like last year’s coats, I used faux pearls for buttons.

Cute felt coats for ball jointed dolls.

This blue coat was made for my newest ball jointed doll.  Being so new she doesn’t have a name or hair, but she is still pretty in blue

Cute felt coats for ball jointed dolls.

Her coat is fairly simply embellished with a tiny felt flower by the collar.

Cute felt coats for ball jointed dolls.

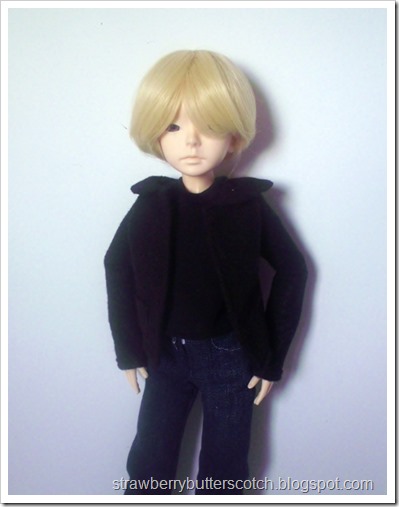
For the only boy doll (Yuki), I made a simple coat with black felt.

Cute felt coats for ball jointed dolls.

No snaps or buttons necessary since he will only wear it open anyway.  It still needed a little something.

Cute felt coats for ball jointed dolls.

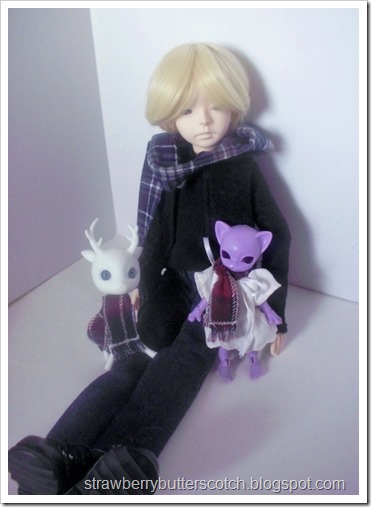
So I whipped up a quick scarf with some plaid scraps left over from the pouches I made.

Just cut the fabric in a rectangle, zig-zag stitch along the edge and about half an inch each end, fray the ends for fringe, and trim off the excess fabric.  Super easy.

Cute felt coats for ball jointed dolls.

And the result is super cute.  A tiny yet stylish scarf to complete this doll sized winter ensemble.

Cute felt coats for ball jointed dolls.

And I couldn’t stop at one scarf, so I made more tiny scarves for some animal friends.  Now everyone can be warm this winter.

Update 1/12/18: Now everyone really can be warm, I posted a sort of tutorial with patterns for these coats on my doll blog.  So if you or someone you know has 1/6 or 1/4 scale ball jointed dolls, check it out.

Here’s the updated list:

Four down and out.  Now I can finally relax and sort of enjoy the season.


Give it a try:
Read More »

Popular Posts