Search This Blog

Featured Post

Simple Flower and Lace Headband Tutorial

This post may contain affiliate links, please check out my disclosures page for more info.  Thanks! As promised yesterday, here is my headb...

Showing posts with label hair accessories. Show all posts

Sunday, July 29, 2018

Plastic Caddy to Pretty Headband Holder


This post may contain affiliate links, please check out my disclosures page for more info.  Thanks!

For the first project on my new craft list, I decided to fix a storage problem in a pretty way.

A pile of pretty headbands, mixed up and cluttered.

I have made a ton of cute headbands overs the years to go with pretty outfits.  The problem with having all these nice hair things is storing them so they don’t get tangled up in a heap like this, or damaged.

A simple plastic storage caddy, the solution to our messy head band problem.

The solution is this, a simple plastic caddy.


I got this one for free from a friend, but I found similar ones here at DollarTree.  They are useful to store all kinds of things neatly and within reach.

Plastic Caddy to Pretty Headband Holder.

However, for hair accessory storage I wanted something prettier. 

So, that’s what I did, I made the caddy prettier, to turn it into the perfect headband holder.

Two plastic bins full of laces, ribbons, bows, flowers and other embellishments.  These will be used to make the plastic caddy all pretty.

First I whipped out my embellishments.  The container on the right is where I keep all my lace and ribbons, and the one on the left is full of smaller bits of ribbon, flowers, bows and other random small stuff.

Lately, I gotten into sorting and organizing all my craft supplies, mostly using plastic shoebox size containers and cute baskets.

Start gluing the lace around the caddy with a glue gun.

I picked out some wide lace, and started carefully gluing it around the caddy with a glue gun.

Finish gluing the lace by folding the end before gluing down.

When I got it completely around the caddy, I folded the edge of the lace before gluing it down.

Gluing ruffled lace along the top edge of the caddy with a glue gun.  Careful, it's really hot.

Then I did the same thing with some pretty ruffled eyelet lace.  I glued it along the edge of the container.  I had to be extra careful here, because it’s easier to get burn gluing there.
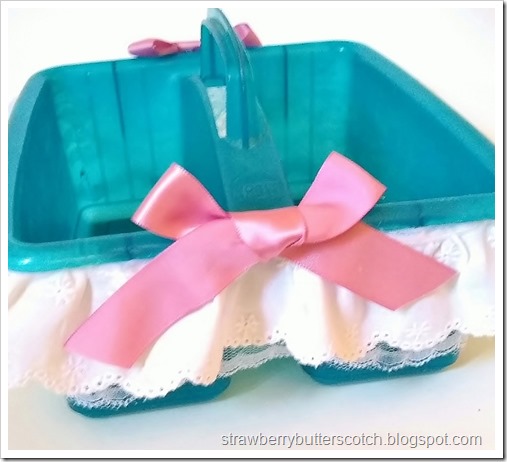
Glue cute pink ribbon bow to the sides of the caddy as a finishing touch.

To finish it off, I made two large-ish bows from some leftover ribbon and glued them to the sides of the caddy.  This ribbon was left over from this pretty pink dress I made for Easter a while ago.

The finished and nicely decorated plastic caddy, now a pretty headband holder.

And now it is done, and ready for use.
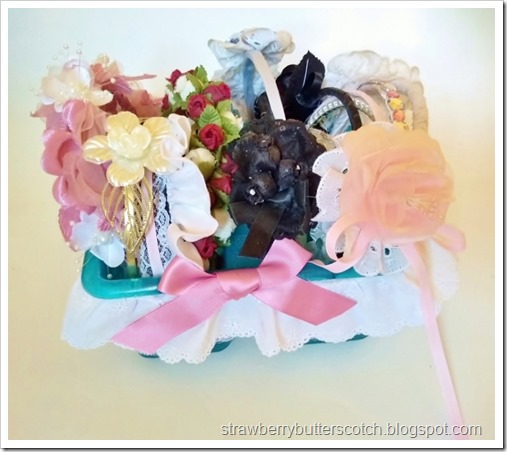
The pretty caddy full of mostly home made headbands.

See, doesn’t that look much better?  And it actually took about 15 minutes to do.  Maybe I should make more.

Here’s the updated list:

  • 3 piece outfit
  • Holder
  • First aid cases
  • Umbrella
  • Tea set
  • Tote

One down, five more to go.  The next two should be up soon, look forward to them!


Give it a try:

Read More »

Thursday, March 29, 2018

Simple Flower and Lace Headband Tutorial

This post may contain affiliate links, please check out my disclosures page for more info.  Thanks!

As promised yesterday, here is my headband tutorial.

Simple Flower and Lace Headband Tutorial

I will show you how to make this simple head band, accented with a pretty fake flower.

Materials needed to make a flower lace head band.  Wide lace, blank headband, ribbon, flower, glue gun, and scissors.

Materials needed:

  • Glue gun with glue.
  • Ribbon.
  • A large flower.
  • A lace rosette, check out my video tutorial if you don’t know how to make one.
  • Scissors.
  • A plain headband, I prefer metal ones because they can be adjusted to fit your head without breaking.
  • Any other embellishments you want.


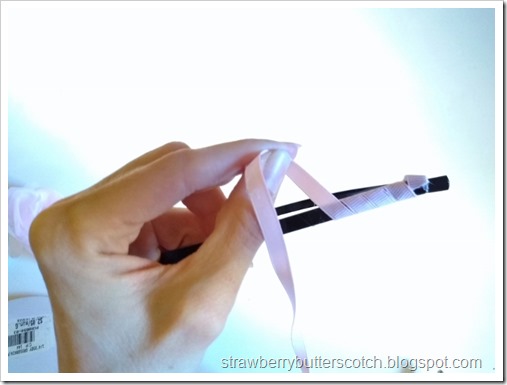
Making a flower and lace headband.  Wrap ribbon around the headband, glueing as you go.

First, glue the end of the ribbon to the end of the headband to start covering it.

Making a flower and lace headband.  Wrap ribbon around the headband, glueing as you go

Proceed to carefully wrap the ribbon around the head band, applying glue as you go.  Be careful not to burn yourself on the hot glue.

Making a flower and lace headband.  Wrap ribbon around the headband, glueing as you go.

When you get to the other end, cut the ribbon and glue down the end.

Making a flower and lace headband.  Wrap ribbon around the headband, and when finished you may wrap more ribbon on the ends for a polished look.

If you want,  you can wrap a little extra ribbon on the ends of the headband.  This will give it a more polished look, but I’m too lazy for that.

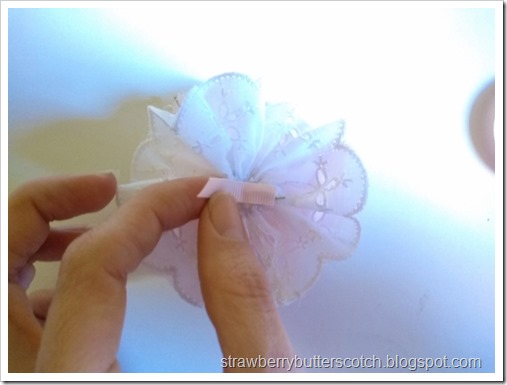
Making a flower and lace headband.  Add the flower to the lace rossette.

Now for the flowers.  If your flower has a wire stem like mine, you will want to stick it through the center of the rosette.

Making a flower and lace headband.  Add the flower to the lace rossette.

It looks kind of cute like this. :)

Making a flower and lace headband.  Add the flower to the lace rossette.

Then you twist down the wire, so it lies flat and add some glue to secure it.

If your flower doesn’t have wire, you can just glue it to the center of the rossette.

As an alternative to the large flower, you can use a cluster of three or more smaller flowers.  Use whatever you like.

Making a flower and lace headband.  Use some ribbon and glue to attach the flower piece to the headband.

Moving on, glue the end of the piece of ribbon over the center of the back of the flower and rossette piece.

Making a flower and lace headband.  Use some ribbon and glue to attach the flower piece to the headband

Wrap this ribbon around the headband…

Making a flower and lace headband.  Use some ribbon and glue to attach the flower piece to the headband

…Then glue down to attach the piece to your headband.  Make sure it is where you want it on the headband before you glue it.

Making a flower and lace headband.  Use some ribbon and glue to attach the flower piece to the headband

Now it is ready for more decorations.

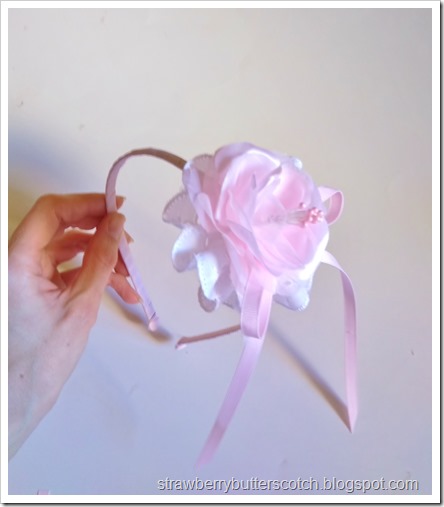
Making a flower and lace headband.  Add a ribbon bow and anyother embellishments you want, then you're done!

I added a ribbon bow with long tails (check out my simple bow video tutorial if needed), because I thought it looks pretty.  You can add jewels, strands of pearls, or anything else you want.

Enjoy the headbands and have a happy Easter.


Give it a try:

Read More »

Friday, September 29, 2017

Sewing for Baby: Another Pillowcase Dress and Headbands

I’m finally getting around to posting this!  The first project on my craft list is a baby craft.

I had another baby shower to attend, another one for a baby girl!  So I decided to make another pillowcase dress (see More Pink for Baby).

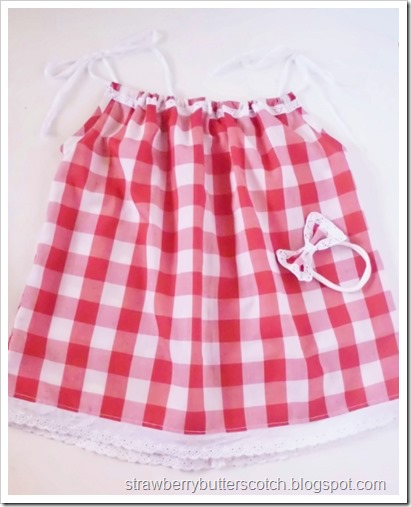
Red and white gingham print pillow case dress for baby, with matching headband.

This one I made with an adorable red and white gingham print I had in my fabric stash.

Red and white gingham print pillow case dress for baby.  Close up on the lace.

I used a soft lace instead of ribbon for the ties and added the same lace across the front.

Red and white gingham print pillow case dress for baby.  Close up on the lace.

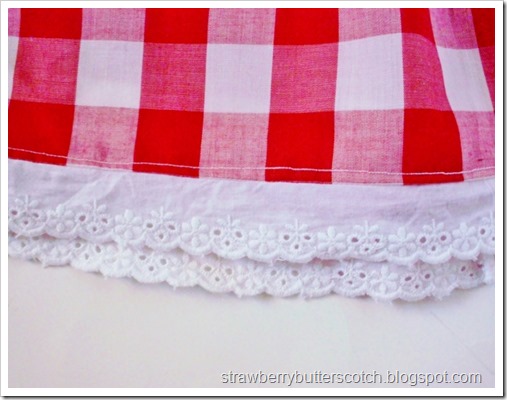
I used the same eyelet lace along the hem as with the previous dress.

Lacey gingham print bow headband for baby.

For this dress, I also made a matching bow headband.  It uses the same lace as the dress, and just like the head bands I made for the last baby shower (see More Pink for Baby), I used tights for the stretchy part.

Pretty lace and ribbon headbands for baby.

And because it’s hard to stop at just one headband, I made two more.  These are for a different baby I know.  She’s already born, but I missed her baby shower, so this is a late but cute gift for her.

Here’s the updated list:

  • Baby
  • Blue dress
  • Tiny outfits
  • T-shirts
  • Halloween
  • Pink dress
  • More T-shirts

One down, six more to go.  I will try to get the next one up a bit sooner.  Look forward to it!

Read More »

Sunday, June 4, 2017

Pink Lace for…A Doll?

At long last, the last project on my craft list.  And it’s more doll clothes, plus more of that pink lace fabric.

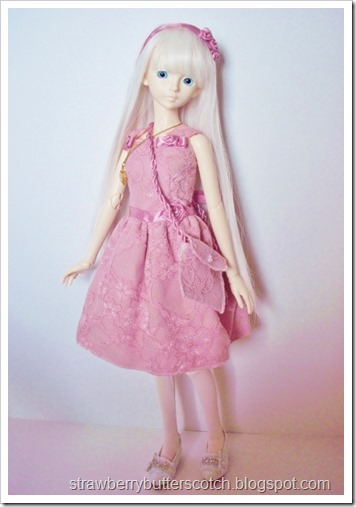
Cute pink lace dress set for a ball jointed doll.

As you can see, I used the fabric leftover from my Easter dress (see Pink Lace for Easter) to make a doll size version along with accessories.  An underskirt to give the dress a boost, a matching purse and head band, and a necklace.

Cute pink lace dress set for a ball jointed doll.

And it looks adorable on her.  I’ve had this ball jointed doll for two years, so I wanted to make her a special new outfit (check out the doll blog to see her reaction).

I used the same technique for the bodice as for my doll dress tutorial (see Doll Dresses for All, With a Tutorial), and instead of a row of ribbon roses along the neck I made three little roses.  One at each of the straps on top of a ribbon bow and a larger rose on the ribbon sash.

Cute pink lace dress set for a ball jointed doll.

On my dress I used a nice wide ribbon for the sash, but for this one the narrower ribbon I had left worked just fine.

Cute pink rose head band for a doll.

I made the matching headband using jewelry wire just like in my doll headband tutorial (see Doll Head Bands with a Tutorial).

Pink lace purse for a doll.

The same with the little purse, it’s similar as the simple purse in my doll bag tutorial (see 5 a Week: Cute Felt Bags for Dolls with a Tutorial) only with fabric instead of felt.  I glued on the some faux pearl beads to make the look of a clasp.  It really uses Velcro to close.

Cameo necklace for a doll.

The cameo necklace actually came from my mom.  It was perfect for dolls because of the small size of the cameo and the thinness of the chain, I just needed to shorten it.

Cute pink lace dress set for a ball jointed doll.

The underskirt was made as a separate piece so dress can be worn with or without it for different looks.  It can also be used as an actual skirt with another top.  Three separate looks from a couple of pieces.  Man, this is one well dressed doll.

Here’s the updated list:

Five down and out, finally!

Read More »

Thursday, April 20, 2017

Pink Lace for Easter

This post may contain affiliate links, please check out my disclosures page for more info.  Thanks!

Well, a few days after Easter and I’m finally getting around to posting this. 

It’s my Easter dress!

Pink all over lace dress for Easter.

I used that over all lace fabric I bought as SAS (see A Quick and Pink Craft Haul).  I wanted something pink and floral this year and while thinking about that I got the idea to use lace.

Ribbon roses on neckline of an Easter dress.

I made little roses from ribbon to decorate the neckline.  It took a while because not only did I have to make each one by hand, but I also had to re-learn how to do it.  It’s been a while since I last made them. 

Funny thing is that the last time I made ribbon roses was also for an Easter dress (see Time for Some Catching Up).  Actually a lot of the design for this dress was inspired by that dress.

I added little faux pearl beads to the center of each rose for an added touch.

Ribbon at the waist on a pretty pink dress.

I used a wide ribbon the same color as the roses as a sash around the waist.

Short sleeves on a pretty pink dress.

The “sleeves” are made solely from the lace, so they have a sheer appearance.  I originally wanted to make a section on the front of the bodice with just the lace, but I thought that might be a tad too revealing.  Not to mention too complicated and time consuming to complete in such a short time frame.

Ribbon and lace on a pink dress.

Instead of hemming the edge of the lace of the skirt, I added ribbon to finish it.  It helps to balance out the top.  It wasn’t exactly the easiest thing I’ve ever sewn.  Those who sew lace and netting a lot would understand.  And I think I would recommend using clips instead of sewing pins.  The pins mostly got in my way and snag the ribbon.

Now for the accessories, because why make a pretty dress without completing the outfit?

Beautiful flower head band for Easter.

I made a pretty headband using the pink and white flowers I bought from SAS.  I actually had to make it twice.  The first time it looked pretty, but I realized it didn’t look as pretty on my head which is necessary for a “head” band.  So I took it apart and put it back together again.

Simple and pretty pearl necklace.

I also made a necklace of faux glass pearls to help tie in the headband and stuff.  I bought these pearls ages ago at Joann.  Makes for a simple yet pretty necklace that I can wear with just about anything, super plus.

Pretty pink purse to match a pretty dress.

Since I bought a ton of fabric, I whipped up a matching purse too.  It’s simple little bag with a flap, similar to several I’ve done before.  The flap closes with Velcro.  I normally use snaps, but I was lazy this time.  It’s so much faster to use Velcro, at least when you use a sewing machine.  I made a larger ribbon rose to finish the bag.

Ribbon rose shoe clips to match a pink Easter dress.

Speaking of larger ribbon roses, I made a pair of them to make the final accessory, shoe clips.  Because my cute white shoes needed a little something to tie them in with the rest of the outfit.  I made them just like the shoe clips I made last year (see Lace Rosette Shoe Clips with a Twist and Tutorial).  A simple and cute way to finish off a pretty pink outfit.

Here’s the updated list:

  • Dress
  • Accessories
  • Jeans
  • Baby
  • Little dress

Two down, three more to go.  I’m running late with the next two, but I should have them up soon.  Look forward to it.

Read More »

Monday, March 20, 2017

Tiny Blue Lace Dress for A Doll, and a Tutorial?

It has been a while since I made anything for my ball jointed dolls, and one particular doll has been waiting a long time for something to wear.

Cute blue dress with lace for a ball jointed doll.

This is Yuna, a 1/6 scale ball jointed doll that I got last November.  Until now the only thing I had made for her to wear was a sweater (see From Socks to Doll Sweaters) to pair with a borrowed dress from one of the other dolls.

But now she has this adorable little blue doll dress to wear.  It is made from a scrap of blue cotton left over from a Halloween costume (see Halloween = Tulle) with a little bit of lace. 

Cute blue dress with lace for a ball jointed doll.

I decorated it with tiny pearl beads and a tiny rosette and ribbon bow.

And for those who have ball jointed dolls this size or similar sized dolls, I have a little treat.  I made a sewing tutorial for this dress on my doll blog.  It includes a free downloadable pattern.  Feel free to check it out.

Blue doll dress with a lace headband and a bag.

In addition to the dress, I whipped up a simple little felt bag and a cute lace headband.  The bag is made the same way as the felt doll purses I made last summer (see 5 a Week: Cute Felt Bags for Dolls with a Tutorial).

Pretty lace head band for a doll.

The headband is just some lace with a bit of elastic at the back.  Super easy to whip up and super pretty.  I think I want to make some more, for me and my dolls.

Cute blue dress with lace for a ball jointed doll.

Overall, it makes for one cute little dolly outfit.  And there are more to come later.

Here’s the updated list:

Four down, just one more to go.

Read More »

Popular Posts