Search This Blog

Featured Post

Simple Flower and Lace Headband Tutorial

This post may contain affiliate links, please check out my disclosures page for more info.  Thanks! As promised yesterday, here is my headb...

Showing posts with label fabric. Show all posts

Sunday, October 28, 2018

Halloween Crafts: From Plain to Pretty Lace Fantasy Costume Dress

It took way too long, but I finally finished the first project on my craft list. 

From Plain to Pretty Lace Fantasy Costume Dress

A Halloween costume.

Before it's a relatively simple pink skater style dress made for a Halloween costume 2 years ago.

Does anyone remember this dress?  I made it two years ago around Halloween along with a couple of other accessories.  The accessories turned it into a cute fairy costume.

Sometimes great costumes can come from simple things, and I will show you how again with this dress.

Using the dress, cut a 2 tank top shaped pieces from the lace to make a bodice.

I had this pink lace fabric leftover from an Easter dress (see Pink Lace for Easter).  Using the pink dress as a guide, I cut two tank top shapes out for a lacy bodice.

Then I stitched along the shoulders and “hemmed” arm area.  I just folded down the edge and zig-zag stitched it down.

A circle of lace fabric cut in half makes two ruffles for flutter sleeves.

I cut two half circles from the lace for cute flutter sleeves.

After sewing the shoulders of the bodice, sew the hemmed flutter sleeves on.

Just hem them and sew on along the arm area to finish.

Cut the lace fabric for a half circle skirt, here's a tutorial for that. Time for some math.

The skirt on the pink dress is a circle skirt, but for the lace I made a half circle instead.  Here’s a great tutorial for half circle skirts.

The sides of the bodice are sewn, the bodice has been cut down the center to open up as with the skirt, and the skirt is sewn to the bodice.  Plus, the lace over dress is layered over the old pink dress.

I decided to cut the lace bodice down the center to open it up before sewing on the skirt.

Then I hemmed all the raw edges and layered the lace “overdress” over the pink dress.  Looks pretty now.

The lace over layer is hand sewn to the dress along the front and neckline.  It can easily been removed if neccessary for next year.

I then grabbed a needle and thread and to attach the lace to the pink dress along the front and neckline.  Just enough to keep things in place.

I wanted the stitches to be easy to remove in case I want to wear these pieces separately in the future.

The pretty new costume dress complete with a couple of accessories.  A flower head band made previously and a pair of lace finger less gloves.

Just throw on a few accessories, and my costume dress is done.  I still haven’t really decided what to call it.  This dress could work for so many pretty outfits.  From princess or fairy to anime style magical girl.  It all works.

Close up of the flower head band made of faux pink and white flowers and pink ribbon.

Anyway, in addition to the left lace fabric I’m reusing the flower headband I also wore for Easter.  The color matches this dress perfectly.  Check out my flower headband tutorial to make your own.

One of the lace finger less gloves worn.  It just a tube of fabric, hemmed on the ends and fitted to a human arm.

Using more of the stretchy lace fabric, I whipping up some finger-less gloves that are easier than they look.  They are basically just tubes of fabric, hemmed and adjusted to fit my arms.

One of the lace finger less gloves worn.  It just a tube of fabric, hemmed on the ends and fitted to a human arm.

One end was pinned and stitch to go around my thumb.  An easier method it to cut the legs off a pair of lace tights and  cut off the toes for your fingers, but I didn’t have any.

So, now we have a pretty costume dress with matching accessories, and just in time for Halloween.  Yay!

Here’s the updated list:

  • Costume
  • Case
  • Doll and Kitty
  • Little Halloween
  • 3 Skirts
  • Accessories
  • Socks
  • Overalls
  • Ornaments
  • More Cases

One down, nine more to go.  The next one should be up soon.  Look forward to it!

Read More »

Sunday, August 19, 2018

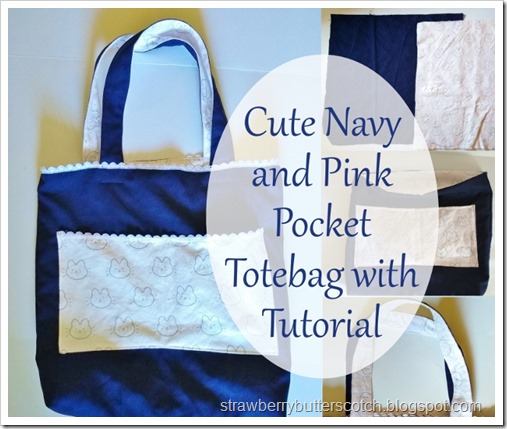
Cute Navy and Pink Pocket Tote Bag with Tutorial

This post may contain affiliate links, please check out my disclosures page for more info.  Thanks!

The next project on my craft list is a practical one, but still cute and with a tutorial too!

Cute Navy and Pink Pocket Totebag with Tutorial

I needed a new tote bag to lug around my stuff on weekends.  One that was sturdy, wouldn’t stain easily, and of course would look cute. 

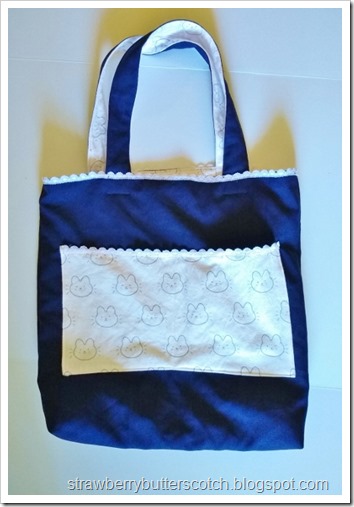
So, I picked out two different fabrics and came up with this blue and pink bag.  It’s trimmed with lace and has a cute printed pocket on the outside and one on the inside as well.

To make one for yourself you will need:

  • 2 contrasting fabrics, about 1 yard of each.
  • Matching thread
  • Basic sewing supplies
  • Basic sewing knowledge
  • (Optional) Interfacing, see below.
  • (Optional) Sewing machine, hand sewing is possible.
  • Lace or other trim, about 2 yards.
  • (Optional) DVDs, Netflix, etc. because movies and sewing projects go well together.

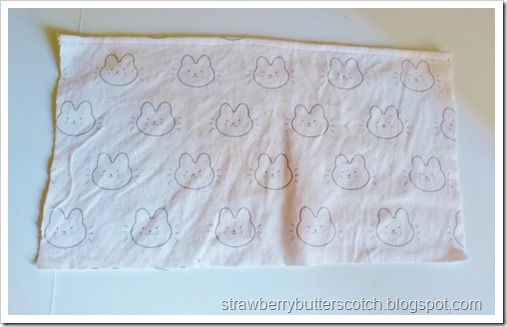
Cut two squares of fabric for the inner and outer side of the bag.  Mine are navy blue and a pink print with cute bunnies.

These are the fabrics I used.  One is some navy blue poly poplin I had leftover from a dress and a costume, this is for the outside of the back.  It’s a nice color that won’t show dirt easily.

For the inside (or lining) of the bag I used more of the that cute pink flannel I used for my 2DS Case.  Told you it would pop up again.

I didn’t bother with interfacing because both of my fabrics are pretty thick, but I recommend it for thinner or easily wrinkled material.  You will want to use it on the pockets, straps, and the outer fabric.

Anyway, cut 2 squares of fabric about 20 x 20 in. (51 x 51 cm.) from each of your fabrics.  This makes a bag that’s large enough to carry my laptop, you may wish to make yours a little smaller.

Cut two rectangles for pockets from the cute inner fabric.

Next, cut two rectangles 9 x 15 in. (23 x 38 cm.) from your inner fabric.  These will be pockets, one for the inside and one on the outside.

Hem the top edge of the pockets.

Proceed to hem the top edge of each pocket.  If you are going to add lace to the pocket, this is the time to do it.

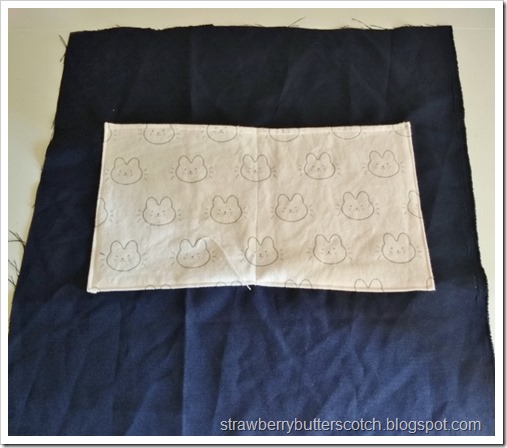
Pinning and sewing on the pockets.

Fold back the other edges of the pocket and pin to one of the squares of inner fabric before sewing down the pocket.  Repeat with the outer fabric.

The pink pocket sewn onto the navy blue fabric.

After sewing on the pocket, you can sew a line down the center to divide it into two pockets.  This is purely optional, but fun.

Pin the sew around the bag.

Now it’s time to start assembling the bag.  Pin the two squares together with right sides facing, then sew the sides and bottom.  Repeat for the inner fabric as well.

Sewing the corners to form a flat bottom bag.

Here I have my “lining” with the bottom corner turned and pinned flat.  I just sew along the pins, repeat on the other corner and…

The bottom is now flat!

…boom!   Flat bottomed bag!

Just need to repeat for the outer fabric part.  Of course, this is optional, but it’s a nice little detail.  If you need more help, here’s a great video tutorial for doing this.

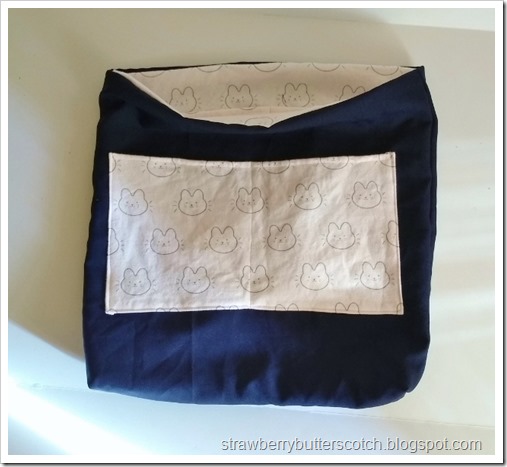
Sewing the lining into the bag.

Almost done now.  Stick your lining into the outer part with rights sides together and pin them along the top edge.  Sew around the top, but leave a hand size bit open.

The tote bag is almost done!

When you finish sewing, turn it all “right side” out,  then carefully tuck your inner part into your brand new bag!

Topstitching the top of the bag.

Well, it’s almost a bag.  Pin along the top edge again and top stitch to close the unsewn part and to make the bag neat. 

And now the body of the bag is complete.  Let’s get those straps done.

Cut long strips for the straps.

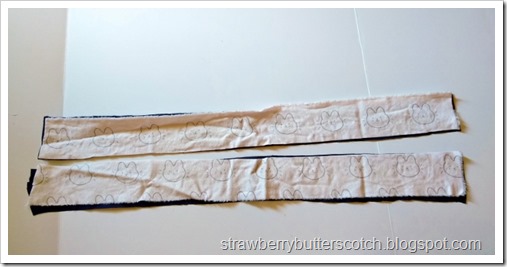
Cut two long rectangles 3 x 26 in. (7.5 x 66 cm.) for each strap.  I chose to use pink on one side and blue on the other of each strap, but do what you like.

Pin and sew the straps.

With right sides together, pin and sew along the long side of each strap, leave the ends open. Then carefully turn them right sides out.  This might take sometime, but that’s why we watch movies while sewing.

Sewing around the straps.

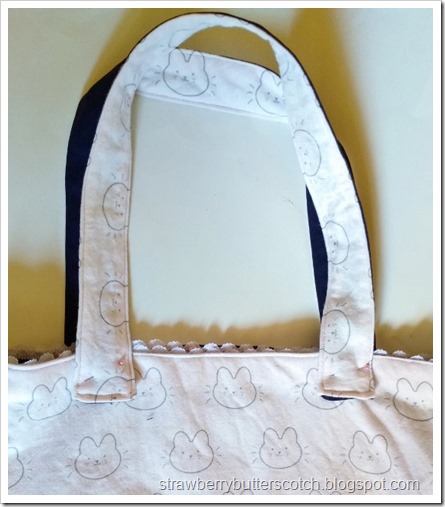
After turning, tuck the ends in and pin along all around the straps before sewing along the edges.

Attach the straps to the bag.

Pin the straps on the bag where you want them.  Try the bag on before sewing the straps in place.

Add some lace to complete the cute tote bag.

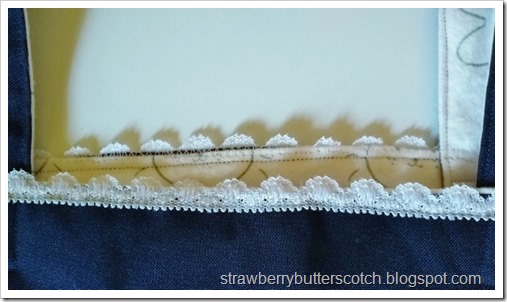
Now you can add some lace or trim along the top edge of the bag.

Confession: I added the lace too soon and it got in my way.  I also forgot to add the pocket lace before sewing the pocket on the bag, so I had to do it by hand afterwards.  :(

The finished navy blue bag with cute pink pockets, lining, and lace trim.

Anyway, now the bag is done and ready to haul all your junk, but in a cute way!

Here’s the updated list:

Four down, just two more to go.  The next one will be up fairly soon, try to guess what it will be.


Give it a try:

Read More »

Sunday, August 5, 2018

First Aid Kit to Cute Nintendo 2DS Case

This post may contain affiliate links, please check out my disclosures page for more info.  Thanks!

As promised yesterday, here’s the next project on my craft list.  But first, let me share something new and wonderful.

The New Nintento 2DS XL still in the box.

My Nintendo 2DS XL.

I got it (on sale!) about two months ago, and it’s been entertaining (and distracting) me ever since.


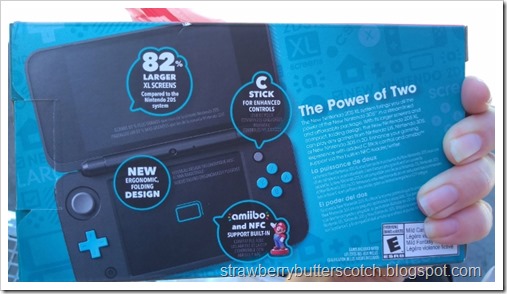
The back side of the Nintendo 2 DS XL box.

I originally was looking at the cheaper Nintendo 2DS bundles, but I went with this one because the screen was larger and it’s able to play more games.

Anyway, I thought that my nice new handheld gaming console could use a nice case to carry it along with all the games and accessories I find myself lugging around.


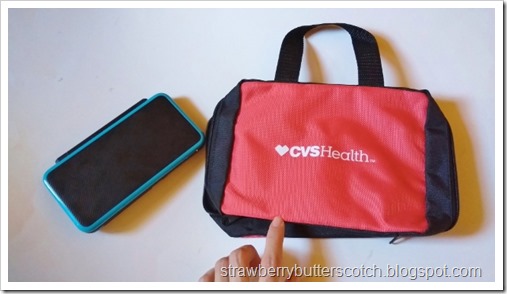
A red first aid kit case from CVS, the drug store.

Enter the first aid kit case, we sell it at work (I work in a CVS drug store).

There was a deal where if you bought three first aid items you would get a coupon for a free case.  Long story short, I now have five free cases.  Got to find a use for them all somehow.


The inside of the the first aid kit case, there are several built in pockets and a zippered one.

It has plenty of built in pockets and a zippered one too.  Perfect for storing plenty of things, besides Band-Aids.


The first aid kit case is great for the storing the nintendo ds, but it could be cuter.

The downside is it isn’t that cute looking.  The CVS logo screams medical supplies.


First Aid Kit to Nintendo 2DS Case.

It’s time to fix that, let’s take this plain looking case and make it super cute!


Update: The CVS case has been discontinued, but I found this case on Amazon that should work if you want to make your own cute case. Plus, here's one in Pink!

Cut two pieces of cute fabric large enough to cover the sides of the case, with a little extra on the sides to fold in the raw fabric edge.

First, I cut two pieces of fabric large enough to cover the sides of the case, plus a little extra to finish the raw edges.  I found it easier to cut some paper to the size I wanted first, and then use that as a “pattern”.


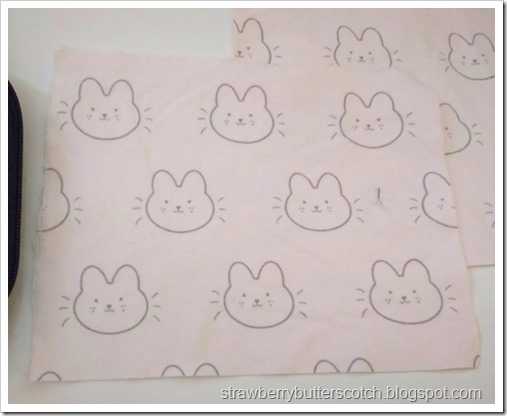
Close up of the cute fabric, it's a pink flannel with kawaii bunnies all over.

This is the fabric I used, it’s a super cute pink flannel print I found at SAS.  I bought several yards of it, so you will be seeing more projects with it.


Cut the corners of the fabric before folding back the raw edges and pinning them down.

I cut the corners of the fabric before folding and pinning back the edges.  This takes care of those raw edges.


Add pretty lace along the edges of the fabric if you want.

Then I added lace along the edges.


Pin the fabric to the sides of the case, then carefully sew along the edges, by hand or machine.  It's easier by hand though.

With the fabric all prepped and ready, I pinned it to the sides of the case and carefully sewed it on with a zig-zag stitch.

I used a zig-zag stitch because I knew the stitches would show on the inside, and thought the zig-zags would look cuter.


Finish with a cute bow.

Add a bow on the front, and the outside of the case is done.

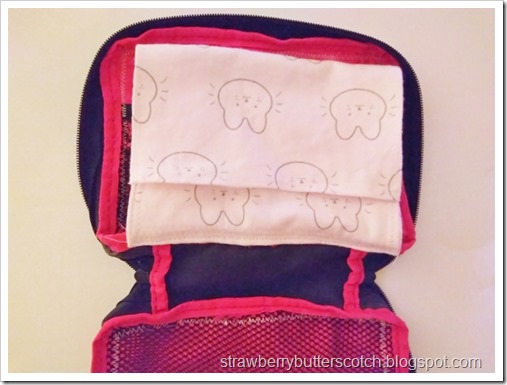
Now for the inside I wanted a little more pocket space, surprisingly.


To make an extra pouch pocket, cut fabric the same width as the other pieces and three times as long.  Hem or finish the raws edges.

I cut another piece of fabric the same width as the other ones, but three times the length.  I then finished the raw edges by folding them once and zig-zaging around.

I did it that way instead of a regular hem to reduce the bulk, flannel is quite thick.


Fold the fabric at the bottom and sew on the sides to form a pocket with the rest of the fabric being the flap.

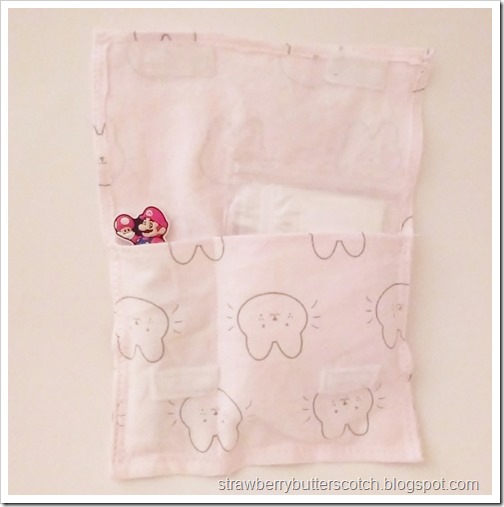
Then fold the bottom third up, sew the sides and bottom to create an instant pocket….


Sew on some Velcro to close the flap, but oops!  Should have done that before sewing down the pocket.

…Only to realize afterward that I should have sewn on the Velcro before sewing the pocket.  It would have been so much easier.  Lesson learned.


sew a line of stitching or two to divide the pocket to organize supplies.

Then I stitched a line down the pocket to make two smaller ones for organizing my junk.  The one is for extra styluses, and the other is for screen wipes and other stuff.


Sew the pouch into the case along the bottom edge.

I attached it to the bottom of the case.  It kind of reminds me of a binder pencil case now.


Now the ds case is finished and ready to fill with gaming stuff.

And with that the case is finished and ready to fill.


The filled nintendo ds case filled on one side with charging cables and such.

Here I have my chargers and power bank neatly secured in their pockets.


The nintendo ds case filled on the other side with games, plus the 2 ds xl peeking out of it's pocket.

And here, I have my 2DS XL in it’s new pocket along with my game cards in their zippered pocket.


A bunch of Nintendo DS and 3DS game carts stored in tiny ziplock bags, they are actually pill pouches.

Speaking of games, here’s how I store them to keep them free of dust and scratches.  They are kept in what appears to be tiny zip lock baggies when not in use.


A medicine pouch bought from a drug store.  They are perfect for storing ds games to keep them dust free and safe.

These are actually tiny medicine bags I also bought at work.  You can find them at most drug stores (Amazon sells some here). They are also handy for storing tiny craft supplies, like beads.


Here’s the updated list:

Three down, three more to go.


Give it a try:

Read More »

Popular Posts