Search This Blog

Featured Post

Simple Flower and Lace Headband Tutorial

This post may contain affiliate links, please check out my disclosures page for more info.  Thanks! As promised yesterday, here is my headb...

Showing posts with label case. Show all posts

Sunday, August 5, 2018

First Aid Kit to Cute Nintendo 2DS Case

This post may contain affiliate links, please check out my disclosures page for more info.  Thanks!

As promised yesterday, here’s the next project on my craft list.  But first, let me share something new and wonderful.

The New Nintento 2DS XL still in the box.

My Nintendo 2DS XL.

I got it (on sale!) about two months ago, and it’s been entertaining (and distracting) me ever since.
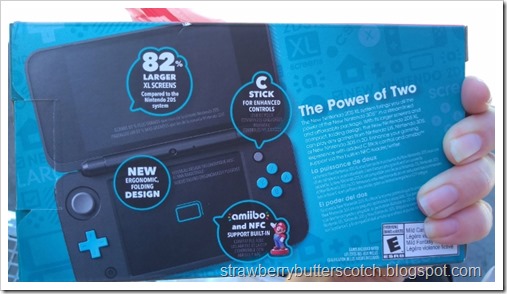

The back side of the Nintendo 2 DS XL box.

I originally was looking at the cheaper Nintendo 2DS bundles, but I went with this one because the screen was larger and it’s able to play more games.

Anyway, I thought that my nice new handheld gaming console could use a nice case to carry it along with all the games and accessories I find myself lugging around.


A red first aid kit case from CVS, the drug store.

Enter the first aid kit case, we sell it at work (I work in a CVS drug store).

There was a deal where if you bought three first aid items you would get a coupon for a free case.  Long story short, I now have five free cases.  Got to find a use for them all somehow.


The inside of the the first aid kit case, there are several built in pockets and a zippered one.

It has plenty of built in pockets and a zippered one too.  Perfect for storing plenty of things, besides Band-Aids.
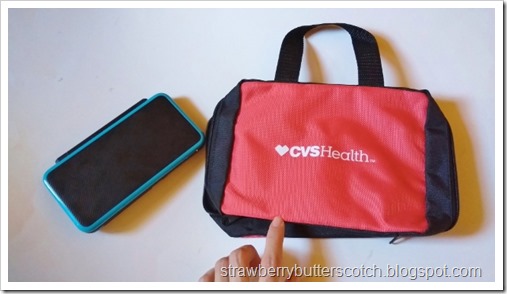

The first aid kit case is great for the storing the nintendo ds, but it could be cuter.

The downside is it isn’t that cute looking.  The CVS logo screams medical supplies.


First Aid Kit to Nintendo 2DS Case.

It’s time to fix that, let’s take this plain looking case and make it super cute!


Update: The CVS case has been discontinued, but I found this case on Amazon that should work if you want to make your own cute case. Plus, here's one in Pink!

Cut two pieces of cute fabric large enough to cover the sides of the case, with a little extra on the sides to fold in the raw fabric edge.

First, I cut two pieces of fabric large enough to cover the sides of the case, plus a little extra to finish the raw edges.  I found it easier to cut some paper to the size I wanted first, and then use that as a “pattern”.
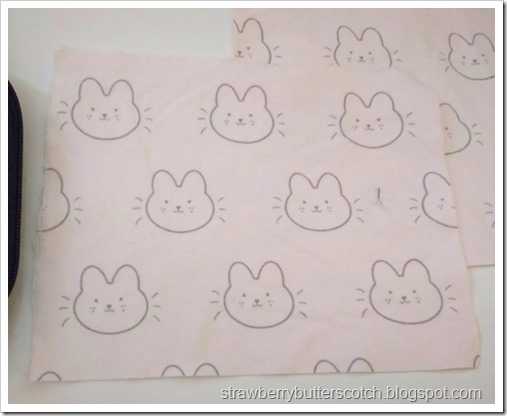

Close up of the cute fabric, it's a pink flannel with kawaii bunnies all over.

This is the fabric I used, it’s a super cute pink flannel print I found at SAS.  I bought several yards of it, so you will be seeing more projects with it.


Cut the corners of the fabric before folding back the raw edges and pinning them down.

I cut the corners of the fabric before folding and pinning back the edges.  This takes care of those raw edges.


Add pretty lace along the edges of the fabric if you want.

Then I added lace along the edges.


Pin the fabric to the sides of the case, then carefully sew along the edges, by hand or machine.  It's easier by hand though.

With the fabric all prepped and ready, I pinned it to the sides of the case and carefully sewed it on with a zig-zag stitch.

I used a zig-zag stitch because I knew the stitches would show on the inside, and thought the zig-zags would look cuter.


Finish with a cute bow.

Add a bow on the front, and the outside of the case is done.

Now for the inside I wanted a little more pocket space, surprisingly.


To make an extra pouch pocket, cut fabric the same width as the other pieces and three times as long.  Hem or finish the raws edges.

I cut another piece of fabric the same width as the other ones, but three times the length.  I then finished the raw edges by folding them once and zig-zaging around.

I did it that way instead of a regular hem to reduce the bulk, flannel is quite thick.


Fold the fabric at the bottom and sew on the sides to form a pocket with the rest of the fabric being the flap.

Then fold the bottom third up, sew the sides and bottom to create an instant pocket….


Sew on some Velcro to close the flap, but oops!  Should have done that before sewing down the pocket.

…Only to realize afterward that I should have sewn on the Velcro before sewing the pocket.  It would have been so much easier.  Lesson learned.
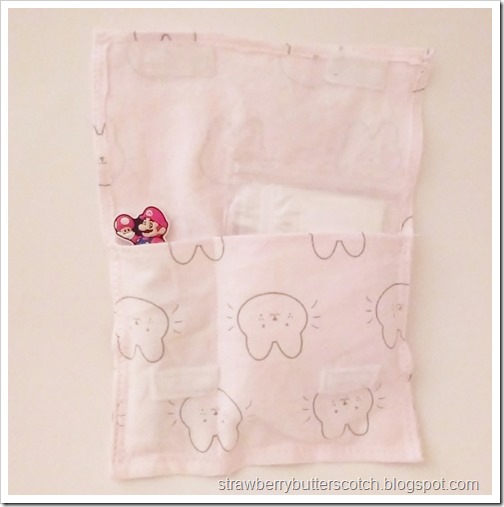

sew a line of stitching or two to divide the pocket to organize supplies.

Then I stitched a line down the pocket to make two smaller ones for organizing my junk.  The one is for extra styluses, and the other is for screen wipes and other stuff.
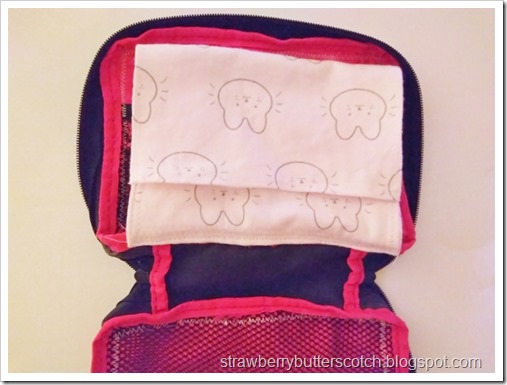

Sew the pouch into the case along the bottom edge.

I attached it to the bottom of the case.  It kind of reminds me of a binder pencil case now.


Now the ds case is finished and ready to fill with gaming stuff.

And with that the case is finished and ready to fill.


The filled nintendo ds case filled on one side with charging cables and such.

Here I have my chargers and power bank neatly secured in their pockets.


The nintendo ds case filled on the other side with games, plus the 2 ds xl peeking out of it's pocket.

And here, I have my 2DS XL in it’s new pocket along with my game cards in their zippered pocket.


A bunch of Nintendo DS and 3DS game carts stored in tiny ziplock bags, they are actually pill pouches.

Speaking of games, here’s how I store them to keep them free of dust and scratches.  They are kept in what appears to be tiny zip lock baggies when not in use.


A medicine pouch bought from a drug store.  They are perfect for storing ds games to keep them dust free and safe.

These are actually tiny medicine bags I also bought at work.  You can find them at most drug stores (Amazon sells some here). They are also handy for storing tiny craft supplies, like beads.


Here’s the updated list:

Three down, three more to go.


Give it a try:

Read More »

Saturday, April 7, 2018

Sparkly Tulle Phone Case with Tutorial

This post may contain affiliated links, please check out my disclosures page for more info.  Thanks!

Here’s another makeover project. 

This time I’m taking my plain old cell phone case and making it super pretty.  And I made a tutorial, so you can try it too!

Sparkly Fabric Covered Phone Case Tutorial

Here’s what you need:

  • An old phone case
  • A large scrap of tulle or another pretty lightweight fabric
  • Scissors
  • Tissue paper
  • Pencil
  • Various glues, see below for recommendations.
  • Something to spread glue (sponges, cotton balls, etc.)
  • Gems, beads and other embellishments

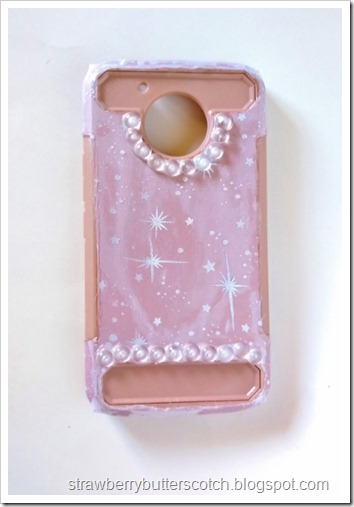
The plain phone case before we decorate it with pretty stuff.

Here is my old phone case.  I ordered it online, but it didn’t look quite as pretty as the product photo.  It’s suppose to be rose gold, however it looks darker and blander in person.  Time to change that.

Covering the phone case with tissue paper to trace the shape for a pattern.

First you cover the phone case with tissue paper and trace around it to make a pattern for your fabric.  I’m using gift tissue I got on clearance last Christmas.

Mark areas that shouldn’t be covered, like the camera hole thingy.

The paper pattern is traced and cut out.

Then carefully cut out your paper pattern and compare it to you case.  Trim off edges and such as necessary.

The pattern was pinned to the sparkly tulle and has been carefully cut out.

Pin the pattern to your fabric of choice and carefully cut out. 

I’m using this pretty sparkly tulle.  I’ve used it for this fairy costume dress and this wrap skirt (also for a costume), and now it’s being used for a phone.

One thing that will help make this part easier is ironing the fabric (yes, tulle can be iron on really low heat).  If it helps, you can also try tracing your tissue pattern on thicker paper if it’s too hard to use otherwise.

Spreading glue onto the phone case.

Next is to glue on the fabric by spreading the glue on the phone case and then apply the fabric, smoothing it down as you go. 

I recommend using Mod Podge, but you can also use Tacky Glue.  It’s best to water down the Tacky glue so it’s easier to spread.  I forgot to do that, and it shows.

Adding the fabric to the phone case, almost done!

Let the glue dry for a few minutes, and then dab more in areas that seem to need it.  This is also a good time to trim off any excess fabric that you might have missed before. 

Then set the case to the side to dry some more.

After gluing on the gems, the phone case is done and oh so pretty!

After it is dried completely, you can have fun gluing on gems, pearls, and anything else you want.  I recommend using Aleene’s Jewel-It for this part. 

Let the whole thing dry for about a day, then show off your pretty new phone case.

Here’s the updated list:

Three down, seven more to go.  The next project may take a while to put up, but hopefully not too long.


Give it a try:

Read More »

Sunday, March 6, 2016

Purple and Lace

The bad news, this post is unbelievably late, like several weeks late.  The good news, I finished all the projects on my list.

First up..

Purple Laptop Case with Lace

…a laptop case.

This project is actually a bit of a substitution on my list.  I intended to make something to “cover” something else, but this became more of a priority.

I found myself needing to replace my laptop computer (one of the reasons this post is late) for a larger but thankfully better one.  Since it was larger it was too big for my old case so I needed something new to cover it with.

I made it nearly the same way as one I made previously for an old netbook I had (see It's Covered), just no bias tape and I use fleece and poplin fabrics instead of denim.  It’s actually the same purple poplin fabric as I made for my tote bag (see Catching Up: Bags and More Bags).

Lacey Purple Laptop Sleeve

Fits my new laptop perfectly and matches my bag, what’s not to love?

Next project…

Lacey Purple Doll Bag

…yet another bag, that matches too.

Yes, I am really loving the purple fabric.  At first glance this looks like a small lacey purple duffle bag.  But it’s designed to carry something besides gym clothes, dolls.  It’s a carry bag for my ball jointed doll so I can take her places without fear of damage.  The design is roughly based on this doll bag tutorial.

Purple Bag with Inside Pockets

The inside is lined with fleece just like the laptop case, and there’s plenty of pockets to stash extra clothes and supplies.

Outside Pocket on Bag

There’s a pocket on the outside for convenience.

Carry Bag for Ball Jointed Doll

As you can see, there’s plenty of room for her, and possibly for a friend if I get another ball jointed doll in the future.  Or if I just want to lug other dolls or plushies with me somewhere, I’m set.

Bag for Ball Jointed Doll

And this isn’t the only thing I made for my doll, or the last of the purple fabric either.

Purple Jacket and Skirt Set for Ball Jointed Doll

I also made clothes.  A cute lace trimmed skirt with a matching light jacket, they’re perfect for spring.

Ball Jointed Doll In Purple

I originally planned to make the jacket a little different around the collar, but I goofed up with it so had to improvise.  I actually like it better like this so all is well. 

I also goofed with making the pattern for the front of the jacket.  My doll is a tiny bit more developed in the bust than she looks and I neglected this fact, so that’s why there is only one snap at the top to close it.  Anyway, it looks adorable and that’s all that matters.

Here’s the updated list:

Five down and out.  Coming up, Easter sewing!
Read More »

Sunday, August 23, 2015

5 a Week: Needle Books

It’s Sunday, so it’s time for week 8 of…
 
5 a Week: Needle Books
…The Five a Week Pledge.
 
If you haven’t been around here, it’s where you pledge to do five things each week of your choice (see the first week for more info).  I pledged to make five small crafts each week.  Feel free to grab a button and join me.  If you already have, post a comment or a link to share what you accomplished.
 
This week’s craft:

5 Needle Books Made with Fleece

Needle books.

Or needle cases if you prefer to call them that.  I say needle books because they look like cute little fabric books until you flip them open.

5 Needle Cases Made with Fleece

See what I mean?

The main reason I made them was to use up some leftover fleece.  Despite recent attempts at decluttering, I still had a few fleece squares hanging out in my stash waiting to be used.  Plus I realized I didn’t actually have anything cute to put my sewing needles in.  Just the packaging they came in, which is super boring.

5 a Week: Needle Books

This needle book is my favorite.  I love the cute daisy print fleece.

5 a Week: Needle Books

These books are super easy to make.  All I had to do was cut a couple of rectangle shaped pieces from the fleece for the “pages”, cut a wider piece to wrap around as the “cover”, then sew a straight line along the side as the “binding”.

5 a Week: Needle Books

I chose to just let the fabric do the talking, but if I wanted to I could have actually made them more elaborate.  Maybe add appliques or trims to the covers before sewing, or decorative stitching along the edges.  I kept on coming up with tons of ideas for making these books while sewing them, maybe even for making similar fabric books.  For now I’m happy with these, but I did come up with one good idea.  What’s a cute needle book without a cute matching pincushion?  So that will probably be next week’s craft.  Look forward to it!

Read More »

Friday, December 7, 2012

Finally Finished on the Fleece

As the title says, I finally finished my November project list.  In December.  A week late.  Sad smile
Well, a few things kind of popped up.  Very important life altering things, but I can’t talk about it. 
DSCI2699 (800x499)
Anyway, the idea of making little fleece bows popped in my head while doing some cutting.  What better thing to do with small scraps of fleece?  All you really need are three rectangle pieces and something to stick the finished bow to like a clip or something.  I wanted to stick these bows to hair elastics, but for some reason I couldn’t find any.  I’m sure I had a ton somewhere.  I just used strips of elastic, they are actually more secure this way.
DSCI2715 (800x511)
The next one is an idea I have been toying with for like a year.  Little cat-shaped purses.  I made them in two colors/patterns and two of each.  In the picture it shows the front and back view of each.  On the front of each one is a little bitty heart made from a scrap of the back pattern.  Think of it as the kitty’s nose.  I would have put eyes too, but I thought it might look to cluttered.  How is it, are they fine the way they are or do they look weird without eyes?
DSCI2708 (800x492)
Next is sunglasses cases.  I found a piece of fleece with this interesting red pattern and thought it would be perfect for a case of some kind.  Just a simple pouch shape, slanted at the opening with a fabric cord loop attached, not too hard to make.  I decided to make a second matching one with white fleece.  It would have been black, but I seem to be lacking in that color.  Oh well, it still looks good.
DSCI2704 (800x650)
And the last project is these cuffs.  They are pretty easy to make.  I just cut the fleece in the strips and braided them.  Then I sewed the ends together, of course that was the hard part.  Sewing the ends without making them look messy or ugly.  I think I did a good job on that part, but just in case I added little bows to hide any goofs.
Here’s the updated list:
  • Hair accessories
  • Tiny teddies
  • Tiny birds
  • Bags
  • Tiny sweaters
  • Tiny hats
  • Yoyo’s
  • Cases
  • Key chains
  • Cuffs
Ten down and out.  It’s funny.  Usually in December I start working on my big old Christmas list of gifts and decorations and stuff.  This year, thanks to all the stuff I made for this list and the Christmas stuff I made last summer, I have no need to make anything for December.  My crafting is done for the year.  Nothing left but to enjoy the month and maybe get a leg up for next year. 
Read More »

Popular Posts