Search This Blog

Featured Post

Simple Flower and Lace Headband Tutorial

This post may contain affiliate links, please check out my disclosures page for more info.  Thanks! As promised yesterday, here is my headb...

Showing posts with label kawaii. Show all posts

Sunday, August 19, 2018

Cute Navy and Pink Pocket Tote Bag with Tutorial

This post may contain affiliate links, please check out my disclosures page for more info.  Thanks!

The next project on my craft list is a practical one, but still cute and with a tutorial too!
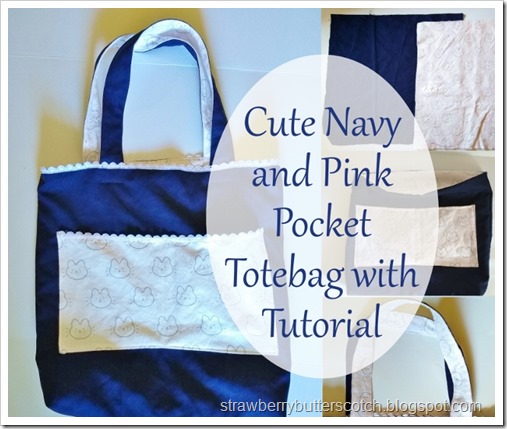
Cute Navy and Pink Pocket Totebag with Tutorial

I needed a new tote bag to lug around my stuff on weekends.  One that was sturdy, wouldn’t stain easily, and of course would look cute. 

So, I picked out two different fabrics and came up with this blue and pink bag.  It’s trimmed with lace and has a cute printed pocket on the outside and one on the inside as well.

To make one for yourself you will need:

  • 2 contrasting fabrics, about 1 yard of each.
  • Matching thread
  • Basic sewing supplies
  • Basic sewing knowledge
  • (Optional) Interfacing, see below.
  • (Optional) Sewing machine, hand sewing is possible.
  • Lace or other trim, about 2 yards.
  • (Optional) DVDs, Netflix, etc. because movies and sewing projects go well together.

Cut two squares of fabric for the inner and outer side of the bag.  Mine are navy blue and a pink print with cute bunnies.

These are the fabrics I used.  One is some navy blue poly poplin I had leftover from a dress and a costume, this is for the outside of the back.  It’s a nice color that won’t show dirt easily.

For the inside (or lining) of the bag I used more of the that cute pink flannel I used for my 2DS Case.  Told you it would pop up again.

I didn’t bother with interfacing because both of my fabrics are pretty thick, but I recommend it for thinner or easily wrinkled material.  You will want to use it on the pockets, straps, and the outer fabric.

Anyway, cut 2 squares of fabric about 20 x 20 in. (51 x 51 cm.) from each of your fabrics.  This makes a bag that’s large enough to carry my laptop, you may wish to make yours a little smaller.

Cut two rectangles for pockets from the cute inner fabric.

Next, cut two rectangles 9 x 15 in. (23 x 38 cm.) from your inner fabric.  These will be pockets, one for the inside and one on the outside.
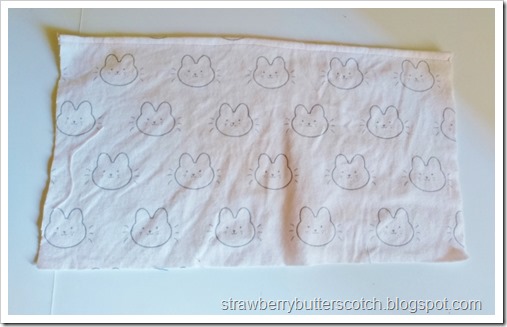
Hem the top edge of the pockets.

Proceed to hem the top edge of each pocket.  If you are going to add lace to the pocket, this is the time to do it.

Pinning and sewing on the pockets.

Fold back the other edges of the pocket and pin to one of the squares of inner fabric before sewing down the pocket.  Repeat with the outer fabric.
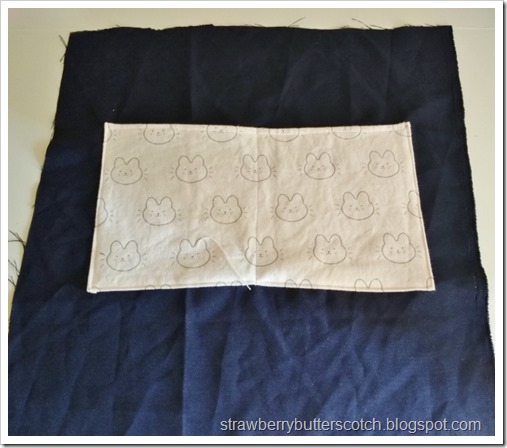
The pink pocket sewn onto the navy blue fabric.

After sewing on the pocket, you can sew a line down the center to divide it into two pockets.  This is purely optional, but fun.

Pin the sew around the bag.

Now it’s time to start assembling the bag.  Pin the two squares together with right sides facing, then sew the sides and bottom.  Repeat for the inner fabric as well.

Sewing the corners to form a flat bottom bag.

Here I have my “lining” with the bottom corner turned and pinned flat.  I just sew along the pins, repeat on the other corner and…

The bottom is now flat!

…boom!   Flat bottomed bag!

Just need to repeat for the outer fabric part.  Of course, this is optional, but it’s a nice little detail.  If you need more help, here’s a great video tutorial for doing this.

Sewing the lining into the bag.

Almost done now.  Stick your lining into the outer part with rights sides together and pin them along the top edge.  Sew around the top, but leave a hand size bit open.
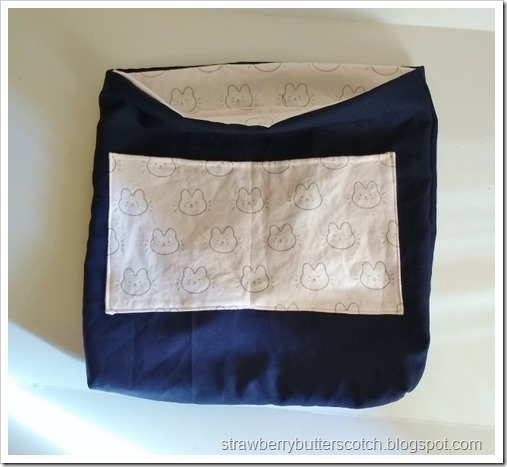
The tote bag is almost done!

When you finish sewing, turn it all “right side” out,  then carefully tuck your inner part into your brand new bag!

Topstitching the top of the bag.

Well, it’s almost a bag.  Pin along the top edge again and top stitch to close the unsewn part and to make the bag neat. 

And now the body of the bag is complete.  Let’s get those straps done.
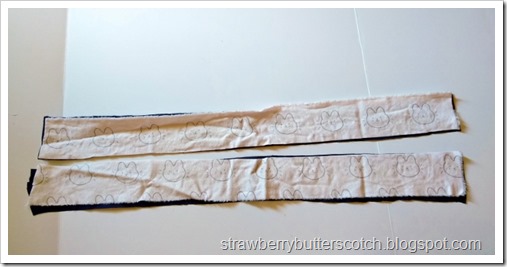
Cut long strips for the straps.

Cut two long rectangles 3 x 26 in. (7.5 x 66 cm.) for each strap.  I chose to use pink on one side and blue on the other of each strap, but do what you like.

Pin and sew the straps.

With right sides together, pin and sew along the long side of each strap, leave the ends open. Then carefully turn them right sides out.  This might take sometime, but that’s why we watch movies while sewing.

Sewing around the straps.

After turning, tuck the ends in and pin along all around the straps before sewing along the edges.
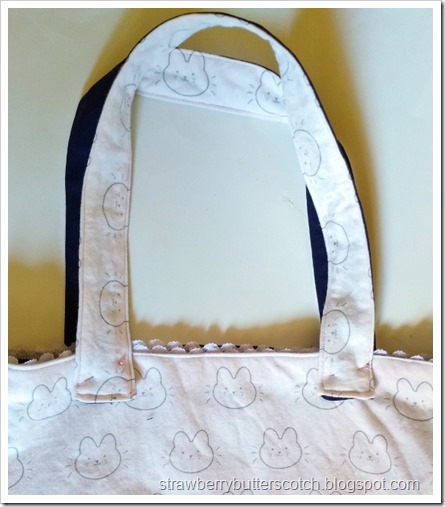
Attach the straps to the bag.

Pin the straps on the bag where you want them.  Try the bag on before sewing the straps in place.
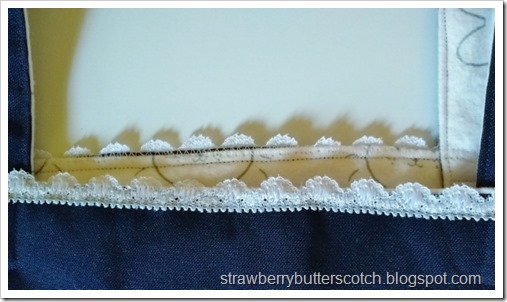
Add some lace to complete the cute tote bag.

Now you can add some lace or trim along the top edge of the bag.

Confession: I added the lace too soon and it got in my way.  I also forgot to add the pocket lace before sewing the pocket on the bag, so I had to do it by hand afterwards.  :(
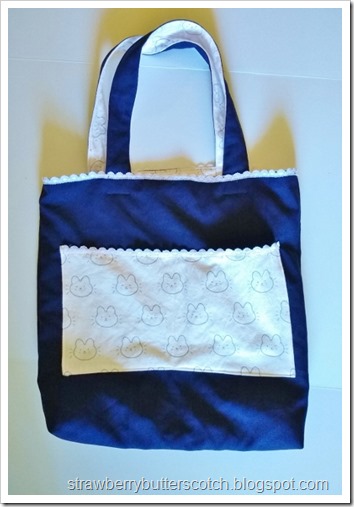
The finished navy blue bag with cute pink pockets, lining, and lace trim.

Anyway, now the bag is done and ready to haul all your junk, but in a cute way!

Here’s the updated list:

Four down, just two more to go.  The next one will be up fairly soon, try to guess what it will be.


Give it a try:

Read More »

Sunday, August 5, 2018

First Aid Kit to Cute Nintendo 2DS Case

This post may contain affiliate links, please check out my disclosures page for more info.  Thanks!

As promised yesterday, here’s the next project on my craft list.  But first, let me share something new and wonderful.

The New Nintento 2DS XL still in the box.

My Nintendo 2DS XL.

I got it (on sale!) about two months ago, and it’s been entertaining (and distracting) me ever since.


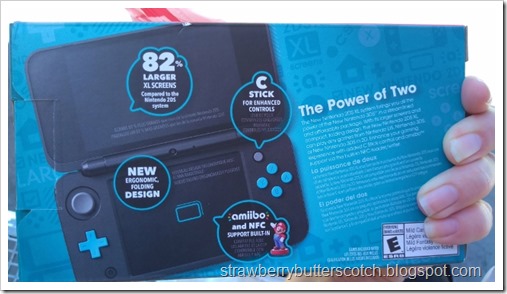
The back side of the Nintendo 2 DS XL box.

I originally was looking at the cheaper Nintendo 2DS bundles, but I went with this one because the screen was larger and it’s able to play more games.

Anyway, I thought that my nice new handheld gaming console could use a nice case to carry it along with all the games and accessories I find myself lugging around.


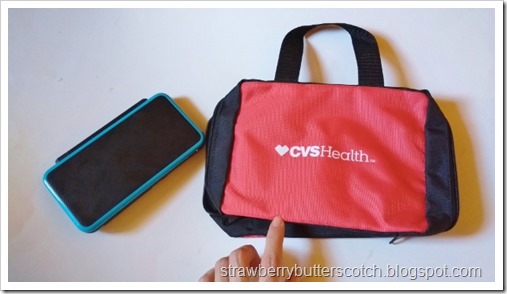
A red first aid kit case from CVS, the drug store.

Enter the first aid kit case, we sell it at work (I work in a CVS drug store).

There was a deal where if you bought three first aid items you would get a coupon for a free case.  Long story short, I now have five free cases.  Got to find a use for them all somehow.


The inside of the the first aid kit case, there are several built in pockets and a zippered one.

It has plenty of built in pockets and a zippered one too.  Perfect for storing plenty of things, besides Band-Aids.


The first aid kit case is great for the storing the nintendo ds, but it could be cuter.

The downside is it isn’t that cute looking.  The CVS logo screams medical supplies.


First Aid Kit to Nintendo 2DS Case.

It’s time to fix that, let’s take this plain looking case and make it super cute!


Update: The CVS case has been discontinued, but I found this case on Amazon that should work if you want to make your own cute case. Plus, here's one in Pink!

Cut two pieces of cute fabric large enough to cover the sides of the case, with a little extra on the sides to fold in the raw fabric edge.

First, I cut two pieces of fabric large enough to cover the sides of the case, plus a little extra to finish the raw edges.  I found it easier to cut some paper to the size I wanted first, and then use that as a “pattern”.


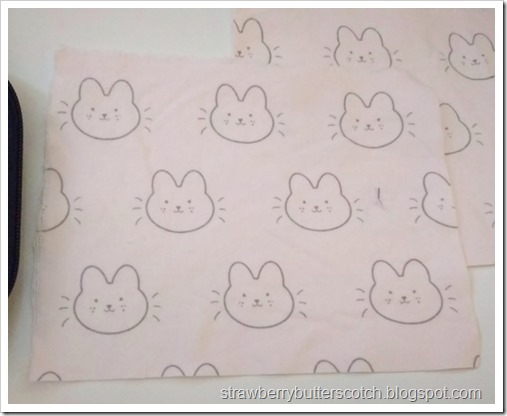
Close up of the cute fabric, it's a pink flannel with kawaii bunnies all over.

This is the fabric I used, it’s a super cute pink flannel print I found at SAS.  I bought several yards of it, so you will be seeing more projects with it.


Cut the corners of the fabric before folding back the raw edges and pinning them down.

I cut the corners of the fabric before folding and pinning back the edges.  This takes care of those raw edges.


Add pretty lace along the edges of the fabric if you want.

Then I added lace along the edges.


Pin the fabric to the sides of the case, then carefully sew along the edges, by hand or machine.  It's easier by hand though.

With the fabric all prepped and ready, I pinned it to the sides of the case and carefully sewed it on with a zig-zag stitch.

I used a zig-zag stitch because I knew the stitches would show on the inside, and thought the zig-zags would look cuter.


Finish with a cute bow.

Add a bow on the front, and the outside of the case is done.

Now for the inside I wanted a little more pocket space, surprisingly.


To make an extra pouch pocket, cut fabric the same width as the other pieces and three times as long.  Hem or finish the raws edges.

I cut another piece of fabric the same width as the other ones, but three times the length.  I then finished the raw edges by folding them once and zig-zaging around.

I did it that way instead of a regular hem to reduce the bulk, flannel is quite thick.


Fold the fabric at the bottom and sew on the sides to form a pocket with the rest of the fabric being the flap.

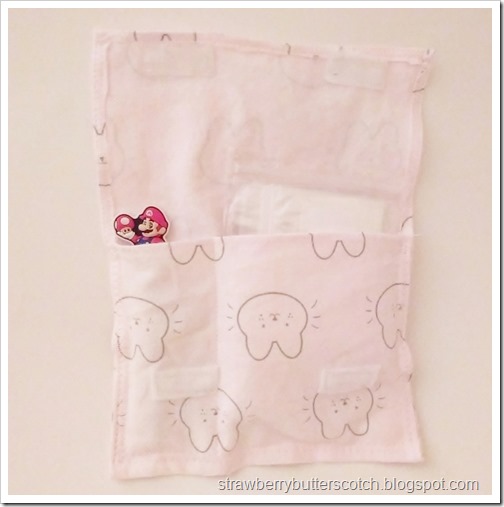
Then fold the bottom third up, sew the sides and bottom to create an instant pocket….


Sew on some Velcro to close the flap, but oops!  Should have done that before sewing down the pocket.

…Only to realize afterward that I should have sewn on the Velcro before sewing the pocket.  It would have been so much easier.  Lesson learned.


sew a line of stitching or two to divide the pocket to organize supplies.

Then I stitched a line down the pocket to make two smaller ones for organizing my junk.  The one is for extra styluses, and the other is for screen wipes and other stuff.


Sew the pouch into the case along the bottom edge.

I attached it to the bottom of the case.  It kind of reminds me of a binder pencil case now.


Now the ds case is finished and ready to fill with gaming stuff.

And with that the case is finished and ready to fill.


The filled nintendo ds case filled on one side with charging cables and such.

Here I have my chargers and power bank neatly secured in their pockets.


The nintendo ds case filled on the other side with games, plus the 2 ds xl peeking out of it's pocket.

And here, I have my 2DS XL in it’s new pocket along with my game cards in their zippered pocket.


A bunch of Nintendo DS and 3DS game carts stored in tiny ziplock bags, they are actually pill pouches.

Speaking of games, here’s how I store them to keep them free of dust and scratches.  They are kept in what appears to be tiny zip lock baggies when not in use.


A medicine pouch bought from a drug store.  They are perfect for storing ds games to keep them dust free and safe.

These are actually tiny medicine bags I also bought at work.  You can find them at most drug stores (Amazon sells some here). They are also handy for storing tiny craft supplies, like beads.


Here’s the updated list:

Three down, three more to go.


Give it a try:

Read More »

Friday, March 23, 2018

Q Box Unboxing: Late Clearance Box Opening

This post may contain affiliate links, please check out my disclosures page for more info.  Thanks!

Here’s something super late.  Last November I stumbled upon Q Box.  It’s a subscription box, sort of like Kawaii Box, which features cute goodies mostly from Japan based on a monthly theme.  Some past themes include Pokémon, Sailor Moon, Alice in Wonderland, etc.

Q Box Clearance Box Unboxing

Anyway, I discovered they were having a special box, their clearance box.  Packed full with more items than normal at a cheaper price.  Plus, they were having a special sale, buy 2 get 1 free.  Hard to resist that.

Cute packaging for Q Box, the cute subscription box

So not long later, this adorably cute package showed up in the mail for me.

Three cute Q Box boxes, waiting to be opened.

And inside were three “boxes”, I think the last one was packed in the cute heart bag to save space.

Close up of a cute Christmas sticker on a subscription box.

It was close to Christmas at the time, so they put cute little holiday stamps on the boxes.  Most fitting since I actually used many of the goodies inside for Christmas.  I stuffed those pouches I made (see Sewing Pouches, Lots of Them) and gave them as gifts.

Close up of the Q Box logo sticker on the box.

Anyway, the boxes and all other packaging also had Q Box’s special little logo sticker, in case anyone forgot where this stuff all came from. :)

The inside of one of the Q Box clearance boxes, they can fit of lot of cute stuff in each one.

And a lot of stuff there was, each box was crammed full of fun surprises.  I had originally intended to open one box at a time, you know, take my time with it.  But I ended up ripping through all three at once.  I did take the time to make a video, which was then pushed to side due to holiday preparation.

But finally, here is my Q Box unboxing video.


Enjoy!
Read More »

Tuesday, July 11, 2017

Sailor Moon Gashapon Toy Unboxing

It’s up a little later than I had planned, but it’s finally ready.

Sailor Moon Gashapon Unboxing.  Cute capsule toys from Japan.

My Sailor Moon gashapon unboxing!

For those who don’t know, a gashapon or Gachapon is a capsule toy from Japan.  Like the tiny toys you see selling for 25 or 50 cents in those little machines at grocery stores. 

Kind of like that, only much better.  They are usually better quality and with a wider variety to choose from.  For more information about them, check this video from Only in Japan.

Sailor Moon Gashapon Unboxing.  Cute capsule toys from Japan.

Anyway, as you saw in my Comicon haul video (see Phoenix Comicon Shopping Haul and Grab Bag Opening), I received several gashapons from my grab bags, all Sailor Moon ones. 

Since opening them was so special to me, I chose to make it a separate video.  And now you can finally see for yourself.  Be prepared for a couple of surprises.

Enjoy the video!

Read More »

Tuesday, July 5, 2016

My Trip to Phoenix Comicon 2016

I know I mentioned that I was going to Phoenix Comicon this year (see Sailor Moon? No, Just a Uniform), but I never did say anything about how it went.

It’s hard to put such things in words, so I actually made a short video of it.  Here is just a small taste of what it was like.

Now that you finished that, I thought I should give a few more details, at least about what I brought home.

My Trip to Phoenix Comicon 2016

You saw the grab bag I got at J-list in the video…

My Trip to Phoenix Comicon 2016: J-list Grab Bag

…and the random stuff that came out of it.  Now what will I do with it all?

My Trip to Phoenix Comicon 2016: Train Food Tray

The train shaped food tray will probably be fun for lunch and stuff.

My Trip to Phoenix Comicon 2016: Cute Anime Mug

I’ve gotten a lot of use out of the travel mug.  I fill it up with green tea for early mornings.  Nothing like tea in a cute mug to brighten the day.

My Trip to Phoenix Comicon 2016: It's a Leek Pen?

I haven’t yet used the leek pen, but it will come in handy.

My Trip to Phoenix Comicon 2016

I’m afraid the DVD titles aren’t very appealing to me.  I may give them away or take them to Bookman’s.

My Trip to Phoenix Comicon 2016:  A Gundam Clock

I’m sure this clock thing will be useful as soon as I figure out how to use it.  I think it’s really cute, but I kind of have the urge to whip out my glue gun and add bows or something to it.

My Trip to Phoenix Comicon 2016: Bento T-shirt!

The bento t-shirt is adorable, one can never have too many t-shirts.  And if I don’t wear it as is, I could turn it into something cute.

My Trip to Phoenix Comicon 2016: Bento T-shirt Tag

Here’s a better look at the tag.

My Trip to Phoenix Comicon 2016: Kawaii Sanrio Pork Chop?

And this is the strangest thing right?  I was surprised it was a Sanrio character.  That’s right, the company that brought us Hello Kitty also created Kirimi-Chan.  A character with a giant salmon filet for a head.

And this is a giant inflatable pork chop for you to wear on your head, because one of Kirimi-Chan's friends is a pork chop.  I’m not sure what to do with it, but I kind of want to keep it just because it’s hilarious.

My Trip to Phoenix Comicon 2016: Cute Stationery :)

Now the cute stationery set.  I wish I had thought to ask the vendor for a business card or something.  All the stuff they had were so cute including this set.  I’m still at that stage where it’s so cute that I can’t use this stuff for fear of ruining it.

When that’s over, I will probably use the cute bear pencil like crazy for drawing and designing.  The pen would be great for jotting down notes, especially in the notebook.  It’s perfect for shopping lists and such.  The eraser is perfect because one can never have enough, and I can use the pouch to sort out these and all my other pencils and stuff.

Overall, it was super fun and hopefully next year will be fun too. 

Read More »

Popular Posts