Search This Blog

Featured Post

Simple Flower and Lace Headband Tutorial

This post may contain affiliate links, please check out my disclosures page for more info.  Thanks! As promised yesterday, here is my headb...

Showing posts with label miniatures. Show all posts

Saturday, September 15, 2012

Finally Complete

So despite looking everywhere around my house, I still have not found my lost camera.Sad smile  However, after weeks of being unable to post the last two projects on my list due to this problem I realized something.  My netbook has a built in web camera.  It has been there this entire time and I just forgot.Embarrassed smile  So they may look a little fuzzy, but here are the last two projects, finally.
Picture0205
First, the scarf.  I have tons of different kinds of lace thanks to a certain friend of mine and my lace hoarding habit.  I especially have ton of this particular lace.  One day while thinking about what I could do to use a bunch of it up I just happen to glance at my Knifty Knitter.  I hadn’t used it in a while I thought a lace scarf would be really pretty.  And I was right.  It wasn’t exactly the easiest knit project for me, I had to start over twice.  But considering I am still such a beginner and I haven’t touched the loom for such a long time, that is to be expected.
Picture0209
Next, the doll house.  I took the old doll house kit I bought (see Good Day for a (Yard) Sale) and turned it into this cute blue cottage.  Not bad for my first one.  There were a few problem of course.  When the instructions say to read them all before starting, they really mean all.  I didn’t and missed a very important step, one that effects the alignment of all the parts.  Meaning if you look really closely at my house, there are just a few pieces that are a little skewed looking.  Another problem I had was the door.  It would not fit.  I’m not sure if it was due to anything on my part or possibly to the age of the wood.  This was an old kit, the company isn’t around anymore.  Anyway, with a little help from some sandpaper (more like a lot of help), I got it to work.
Here’s the updated list:
  • Pens
  • Binder
  • Lunch bag
  • Backpack
  • Button
  • Scarf
  • Doll house 
Seven down and out.  I won’t be posting the next list until October.  I technically only have a couple of things I need to make for this month.  It would seem kind of strange to make list for them.
Read More »

Tuesday, September 28, 2010

List and Library: Completed

I said I would take my time on my list, and spending two days to finish everything on it is sort of taking my time. 
  photos 1061
First up, here are the head bands before I redid them.  The one on the right looks exactly like one I already had, boring.  The other one isn’t very flattering on me.  Midnight seemed interested in them though.
photos 1107
Here’s the after, much better.  For the one on the left, I made a tube of fabric scraps and attached lace to it.  I slid the head band through it and glued the ends of the fabric to the head band.  Then I wrapped the ends of the fabric with lace and glued it down.  It makes for a pretty ruffled effect.  For the other head band, I weaved fabric strips through the teeth very tightly while gluing it down as I went across them.  The finished them up with a couple of bows on the sides.
photos 1101
The rest of the list was more miniatures for the the doll house library.  Here’s a nice soft chair made from a toilet paper tube, fabric scraps and batting.  The end table is made nearly the same way as the one for the bedroom (see Night Necessities) except it has a small shelf instead of a drawer.  I thought it would be a great place to stash a couple of books.
photos 1102
This is one I am particularly proud of, a small globe.  The base and stand are made of cardboard while the globe itself is made from a ball of paper mache.  They are held together with straight pins to allow the globe to freely move.  I just wished the continents were a little more realistic, nobody’s perfect.
photos 1103
You need plenty of good lighting for good reading, meaning a couple of decent lamps are a necessity.  The bases are made from some old hair accessories that broke years ago.  The shades are scraps of fabric glued to cardboard circles.
photos 1104The last one is this simple rug.  A while back I heard about an old technique that involved pulling threading out of woven fabric and stitching for a decorative effect.  I decided to try my hand at a simple version of it.  I’m afraid the effect doesn’t show up very well in the photo, maybe I didn’t do it right.  Oh well, it still makes a nifty rug.
photos 1110 Now here’s the complete library in all its glory.  Oh to be doll size.
Here’s the updated list:
  • Bag
  • Cuffs
  • Bookshelves
  • Books
  • Magazines
  • Poncho
  • Table
  • Desk chair
  • Chair
  • End table
  • Lamps
  • Capelet
  • Headbands
  • Globe
  • Rug
  • Curtains
All complete and not a moment too soon.  The next list will probably have things for Fall and Winter, that is what has been stuck in my head for the longest time now.
Read More »

Friday, September 24, 2010

Study Hard and Don’t Fall Over

photos 1082
A library needs a quiet place to sit and study, so of course the doll house library needed one too.  A simple “wooden” table and a sturdy chair does the trick.  They seem fine, but I think I got the proportions slightly skewed.  The chair looks too short even though its a perfect fit.  I kind of like it like that though, it is amusing to look at to say the least.  Makes me want to paint the walls a really bright color and write messages on them or something like that.  Or would that be too much?
Here’s the updated list:
  • Bag
  • Cuffs
  • Bookshelves
  • Books
  • Magazines
  • Poncho
  • Table
  • Desk chair
  • Chair
  • End table
  • Lamps
  • Capelet
  • Headbands
  • Globe
  • Rug
  • Curtains
Nine down, seven to go.  Next up is more tiny furnishings.
Read More »

Monday, September 20, 2010

Bring on the Books

It took a few days to do it, but I finally got the books for the doll house library done.  I had a little trouble finding the supplies I needed.

photos 1070As you can see, I made a ton of books and some magazines too.  I made the books with strips of folded paper glued together.  I cut out pictures of book covers from ads for book clubs, it makes them look so real.   I did the same thing for the magazines and used magazine pages for the inside to give that glossy look and feel.  I also stapled them instead of using glue,  it helps them to lie flat.  So now the basic items are done, I just need to work on the handy extra stuff.

Here’s the updated list:

  • Bag
  • Cuffs
  • Bookshelves
  • Books
  • Magazines
  • Poncho
  • Table
  • Desk chair
  • Chair
  • End table
  • Lamps
  • Capelet
  • Headbands
  • Globe
  • Rug
  • Curtains

Seven down, nine to go.  More minis are up next.

Read More »

Sunday, August 15, 2010

Mountain Climbing or Knitting?


Well I finished the video, ran a little late with it too.  That’s because of some technical problems.  


First my webcam was on the fritz, it’s only a year old and it’s having so much trouble.  Then I had problems with my editing software, some little problem that should have been simple to solve if only the help file was a little more detailed in it’s explanation.

The Adventures of Kailey and Boris Episode 6 Hobbies

Anyway, it’s done.  In this episode, the focus is mostly on Kailey finding a suitable hobby.  Of course the ever loyal, and apparently talented Boris steps in to help in his own way.  This video happens to feature some great clipart from Graphics Fairy, lovely photos from various artists at FreeDigitalPhotos.net, and some not so lovely photos from me.

Here it is for your enjoyment:


Here’s the updated list:
  • doll headbands
  • halters
  • camera
  • stamps
  • painting supplies
  • knitting supplies
  • video
  • face magnets
Seven down, just one more to go.  The last one should be up later today.
Read More »

Tuesday, August 10, 2010

Mini Arts and Crafts

I finished a couple more from the list, and like the camera, they are also miniature props for the video I will be making.
photos 1000
First we have some painting supplies: a little easel, two canvases, a small paint brush, and an artist’s palette loaded with paint.  The easel is based on a design I made when I was little.  I was really into My Little Pony and troll dolls and I used to make all kinds of things for them, like houses and stuff.  Once I made little easels for the ponies to show off their artistic abilities, strange I know.  Anyway, this a more sophisticated model, meaning it doesn’t fall over as much.  The palette was interesting to make due to the paint, they are drops of crayon waxed heated from a burning candle and dripped onto the cardboard palette.  Gives a more realistic look to it.  The canvasses are simply cardboard frames covered with white paper, they already have pictures “painted” on them, wait for the video to see them.
photos 1005
I also whipped up some basic materials for knitting.  A ball of yarn made from embroidery floss, and a set of bamboo knitting needles made from a skewer cut down to sized and split.  I wonder if they would really work for knitting, I wouldn’t know since I never learned how to knit.
Here’s the updated list:
  • doll headbands
  • halters
  • camera
  • stamps
  • painting supplies
  • knitting supplies
  • video
  • face magnets
Six down, just two more to go.  The video should be up in a few days, and I should finish the list off this weekend.  Assuming I don’t come up with another surprise project like last weekend.
Read More »

Monday, August 2, 2010

Smile!

For those who have been here for awhile, it isn’t too much of a surprise that the video on my project list is going to be another Kailey and Boris video.  If you’re totally clueless, you can check out the last video here.  I need some mini props before I can start on the new one. 
photos 980One of the things I need is a tiny digital camera.  I made this one using my usual material of choice, cardboard.  I used sequins for all the little bits and I decided to paint it pink like my camera, the one I never use because it stinks.  It doesn’t look too bad, but I think I used too much Mod Podge, it looks like it’s melting.
Here’s the updated list:
  • doll headbands
  • halters
  • camera
  • stamps
  • painting supplies
  • knitting supplies
  • video
  • face magnets
Three down, five to go.  The next one should be up by Wednesday, and I may have an announcement tomorrow.  Depends on a few things.
Read More »

Sunday, August 1, 2010

Loading Up

Yesterday was a 1/2 off sale at Goodwill so I picked up some supplies.
photos 966
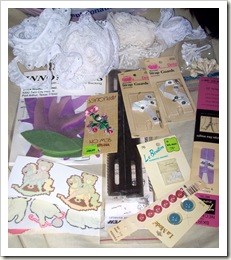
I got a baggie full of all this stuff.  A zipper, a set of wooden purse handles, several buttons including doll size ones, strap guards(?), flower appliqués, fabric roses, some unidentifiable stuff, and four different kinds of lace.  It was the lace I really wanted, the other stuff are bonuses, assuming I can find something to do with it all.
photos 968
I also got a bunch of fabric.  I have something special planned to do with it, and not something on my project list either.  Still, I can’t even start on it without doing a little more research.  I guess it is a little strange to be starting a big thing when I only just started something else.
photos 972Speaking of that something else, here’s a little something from the list.  On my last list I made some doll aprons from a tutorial I found online (see Fun-sized Aprons).  While making them I thought it would be neat to use the same idea to make a doll halter top too.  I used the same pattern, but shortened it and made it wider.  It makes for an easy little summer top for this Barbie doll.  Of course it would fit her a little better if the elastic straps were a tad shorter, something I need to work on.
Here’s the updated list:
  • doll headbands
  • halters
  • camera
  • stamps
  • painting supplies
  • knitting supplies
  • video
  • face magnets
Two down, six to go.  The next one should be up by tomorrow, hopefully a littler earlier too.
Read More »

Thursday, July 29, 2010

Bring on the Glitz

I found this quick tutorial for making headbands for a Barbie doll and thought it was just perfect.  The tutorial uses soda or water bottle cap rings, but I was fresh out.  I did have some for gallon size jugs though, they were larger and I thought maybe they would work on a slightly large head.
photos 963So I made them for my Bratz dolls.  Their heads are noticeable larger than most fashion dolls.  This one was made using a purple ring from a 2% milk carton.  It’s smothered with glitter, and I decided to use my glue gun to attach all that glitter which was odd at first but seems to be working well.
photos 961This one was made with the ring from a gallon size water bottle.  I think the blue color looks great with the glitter.  While I was putting it on this doll, I noticed something that made me think that they are over doing it with the makeup on these dolls.  At a certain angle she kind of looks like a drag queen, but that’s just me. 
Here’s the updated list:
  • doll headbands
  • halters
  • camera
  • stamps
  • painting supplies
  • knitting supplies
  • video
  • face magnets
One down, seven to go.  More doll stuff to come.
Read More »

Thursday, July 22, 2010

Kitchen: Check

The list is completed and so it the kitchen for the doll house.
photos 956
As I mentioned before, it is an unbelievably tiny little kitchen, but it has all the necessities.  I made the curtains the same way as the other rooms because I like the way they look from the outside of the house.  Instead of “papering” the walls like I did with the bathroom and bedroom, I painted them to match the ceiling.  The floor is a little different, I cut squares from cardboard for tiles and glued them down.  I painted them and sealed them too.  The color matches the cabinets and doesn’t show dirt, a great quality for a kitchen :)
photos 958In the middle of setting this up, I noticed something.  I forgot to add the stove to my project list, so it wasn’t made until the last minute.  It was fairly easy to whip up.  It kind of reminds me of a washing machine though.  That would be kind of cute, maybe I should make a mini Laundromat after I finish the house.  Would that be too weird? 
Here’s the updated list:
  • Rosettes
  • Doll aprons
  • Zipper charms
  • Refrigerator
  • Heart purse
  • Doll
  • Kitchen sink
  • Cupboards
  • Clothes
  • Vase
  • Dishes
  • Curtains
Twelve down and out.  Another completed list.  Yay!
Read More »

Wednesday, July 21, 2010

Main Dish

The cardboard doll house kitchen needed some dishware, but how do you make cardboard dishes?
photos 939
You don’t, these are made from paper.  I used a used envelope to make these plates and mugs.  The plates were made by cutting two circles from paper and gluing them together.  I folded up the edges little by little and coated them with Mod Podge.  Then came the paint and more Mod Podge.  For the mugs, I rolled strips of paper in little tubes for the cup shape.  I glued them leaving a little bit of the end of the strips loose, that part was cut in the shape of the handle.  I glued them to another piece of paper that I cut into a round shape for the base.  Multiple layers of paint and Mod Podge later, and they are surprisingly durable mugs with matching plates.  I chose to paint them pink on a whim.  They kind of remind me of some plastic toy dishes I used to have when I was little.  I don’t know what happened to those.  Oh well.
photos 953 
While I was at it with the dishes, I whipped up a little vase for the doll house too.  I twisted paper to make the top of the vase and used two different beads for the bottom part.  I painted it pink to match the dishes and coated it with Mod Podge.  It will really brighten up the little kitchen, if it doesn’t totally clash with the other pieces.  I can always repaint them if that happens.
Here’s the updated list:
  • Rosettes
  • Doll aprons
  • Zipper charms
  • Refrigerator
  • Heart purse
  • Doll
  • Kitchen sink
  • Cupboards
  • Clothes
  • Vase
  • Dishes
  • Curtains
Eleven down, just one to go.  The end will come tomorrow.
Read More »

Thursday, July 15, 2010

Kitchen Storage

photos 927
Even a doll house kitchen needs places to store away stuff.  So I made some cabinets in the same chocolate colors as the sink to match.  You may be thinking “that’s all the cabinets and counter space?”  Well the kitchen in my cardboard doll house is unbelievable small, even for a doll house.  So it will be a very humble kitchen, but at least there will be plenty of room for food still.  You did see the refrigerator right? (See A Frig to Raid)
Here’s the updated list:
  • Rosettes
  • Doll aprons
  • Zipper charms
  • Refrigerator
  • Heart purse
  • Doll
  • Kitchen sink
  • Cupboards
  • Clothes
  • Vase
  • Dishes
  • Curtains
Eight down, four to go.  Next is a break from the kitchen interiors.
Read More »

Tuesday, July 13, 2010

Everything and The Kitchen Sink

photos 923
I got the sink for the cardboard kitchen all together.  It kind of resembles the the bathroom sink for an apartment I used to live in though.  Whatever, it’s for the kitchen.  Of course, it’s made from cardboard too, just like the rest of the house.  I mixed brown and white paint to form the various colors used, they remind me of chocolate which I think is perfect for a kitchen.  I used plastic beads for the knobs that look like the ones at my house, the facet is made from aluminum foil.  I decided not to make the cabinet doors open up, who in their right mind would actually want to go under the sink?  Nothing good goes on down there.  I’m already working on making the rest of the kitchen, also in chocolate colors.  Yum.
Here’s the updated list:
  • Rosettes
  • Doll aprons
  • Zipper charms
  • Refrigerator
  • Heart purse
  • Doll
  • Kitchen sink
  • Cupboards
  • Clothes
  • Vase
  • Dishes
  • Curtains
Seven down, five to go.  Pretty far along on the list.
Read More »

Sunday, July 11, 2010

Dolls for Dudes

My nephew has a thing for dolls, mainly my dolls like my Ken doll.  However, he only recently turned 3 and I don’t think he is quite old enough for Barbie and Ken, so I decided to make him a more appropriate doll that has that same appeal to him.
photos 884
Here is our little guy,  when my nephew saw him he loved him.  The hair is embroidered and is the same color as my nephew.  In fact the doll does bear a great resemblance to him except for the tan, that’s thanks to tan-ish shirt I used to make the doll.  Wearing a simple tank top and elastic waist jeans made from fabric scraps, it’s a casual outfit that is easy for a 3 year old to put on and take up again.
  photos 887
I am particularly proud of the shoes, a simple pair of slide-on sandals that are easy to put on and stay on surprisingly well.  To make them, I cut strips of fabric and glued the ends on the bottom of a round piece of cardboard.  Then glued another piece of cardboard underneath to cover, and then I glued a similar shaped piece of fabric as a lining to make it look better.
photos 889 The must have for this doll that’s missing from most fashion dolls, a pair of boxer shorts.  My nephew has a thing about “big boy” underpants, I figure his new friend should wear them too.  I made them the same way as the the jeans except a bit shorter and with cotton scraps instead of denim.  It really completes what I hope will become a life-time friend for him.
Here’s the updated list:
  • Rosettes
  • Doll aprons
  • Zipper charms
  • Refrigerator
  • Heart purse
  • Doll
  • Kitchen sink
  • Cupboards
  • Clothes
  • Vase
  • Dishes
  • Curtains
Six down, six to go.  More doll house stuff is up next, so stay tuned.
Read More »

Friday, July 9, 2010

A Frig to Raid

Dollhouse or real, the heart of the home is in the kitchen.  And the pit of the kitchen is the refrigerator.
photos 905So, of course I started the cardboard doll house kitchen with the refrigerator, also from cardboard.  I could have just glued on the doors and left them at that, but I decided to make them so they can open.  I love miniature food and really what to fill this sucker up.
photos 904
On the inside, I carefully placed little shelves, mostly on the doors though it was a little tricky.  I had to carefully line them up so the door wouldn’t get stuck.  It was easier with the freezer since it only has the one shelf on the door.  It’s now all set for stocking of tiny little foods and beverages, as soon as I get some made.
Here’s the updated list:
  • Rosettes
  • Doll aprons
  • Zipper charms
  • Refrigerator
  • Heart purse
  • Doll
  • Kitchen sink
  • Cupboards
  • Clothes
  • Vase
  • Dishes
  • Curtains
Four down, eight to go.  The next two projects are so cute, you just have to check them out.
Read More »

Tuesday, June 8, 2010

In the Name of the Moon

I got this up way later than I had intended to due to technical difficulties, and human error.  I’m house sitting this week, away from home.  I realized I didn’t pack my camera, so I had to use the webcam on my netbook which is a little shall we say, temperamental.  Plus photo quality is lousy, so I apologize for the blurriness of the picture.
photos 780Anyway, here’s the surprise.  The doll costume I made is Sailor Moon.  I had been think of making a Sailor Moon costume for some time now.  I am a bit of a fan, plus the design of the outfit is pretty easy to make and still really cute.  I just can’t wait to show this to my niece, she will flip.  She actually wants me to make her a Sailor Moon costume too, maybe another day.  For the costume, I used scraps of material from some dresses I cut up for some costumes for myself, including the one I made for Halloween(see Two New Outfits, One Special Day).  I added premade bows from the enormous stash of them I have that I’m still trying to find uses for,  someday they all will be gone.  The tiara and hair jewels are made from ornament hook wire and a couple of buttons decorated with sparkly paint.  Looks pretty good, except that I get the feeling that I’m missing something.  By the way, she’s wearing a pair of plastic doll boots that didn’t quite make it into the photo, Sailor Moon has got to have her footwear right?
Here’s the updated list:
  • Tube top
  • Doll costume
  • Card holder
  • Green dress
  • Top recon
  • Polo dress
Two down, four to go.  By the way, my final exam went fairly okay today.  And tomorrow is the first day of my externship, wish me luck. :)
Read More »

Sunday, May 30, 2010

Bedroom: Check

I finished the curtains, and the whole doll house bedroom to boot.  Take a look, they came out great.
photos 756
You can see that I made the curtains the same way as the the ones in the bathroom (see Bathroom: Check).  I think the view from the outside of the house looks better when all the curtains match.  I will show you what I mean when I finish the other rooms, or at least a couple more.
photos 749
I used this bluish gray scrapbook paper for the walls, I thought it would look good with the blanket and rug.  I cut a small, long strip and flipped it over for the border at the ceiling, it’s actually there to hide some mistakes I made with the paper.  You can see I decided to used the small free standing art pieces instead of some of the larger pieces I made, it keeps the look simple yet pleasant.
photos 751
On this side you can see I hung another piece on the wall next to the wardrobe.  I thought it was too bare without something, plus the running children are adorable.  I should also mention that the floor is painted instead of covered like the bathroom was, I used brown painted mixed with white to hopefully give it the look of hard wood flooring.  I love wooden floors, I just wish we had some here.
photos 758
Here’s the complete room in all it’s splendor,  it does look lovely and very tidy.  Just wait until it gets used, it probably won’t stay so clean. :)
Here’s the updated list:
  • hangers
  • bed
  • mirror
  • dresser
  • skirt
  • pocket
  • lamp
  • night stand
  • wardrobe
  • rug
  • framed art
  • curtains
Twelve down and we’re finished.  I will probably have the next list up by Thursday, although it maybe a little shorter or at least simpler.  I start my externship in less than 2 weeks, plus I might be a little scare sooner than that for another reason.  I’ll keep you posted.
Read More »

Friday, May 28, 2010

The Walls are Covered

Most rooms aren’t complete without a something for the walls, that includes doll house rooms.
photos 747
These are simply pictures cut out from various magazines and glued onto cardboard from a notepad, then Mod Podge was applied to seal them.  The two smaller ones were made to stand on their own, perfect for side tables and dressers.  I love the cut little Cat Women poster, I wonder if it will match the decor?  Actually I haven’t yet decided which ones will be used for the little bedroom, I could always save some for the other rooms or for current ones.  I think the heart clock would look cute in the bathroom.  I will have to decide on that later.  For now, I can enjoy how cute they all are.
Here’s the updated list:
  • hangers
  • bed
  • mirror
  • dresser
  • skirt
  • pocket
  • lamp
  • night stand
  • wardrobe
  • rug
  • framed art
  • curtains
Eleven down, just one more to go.  Going right on schedule.
Read More »

Thursday, May 27, 2010

Snug as a Bug

photos 746For a rug for the bedroom, I wanted something homey and cozy.  In other words, a rag rug.  I used scraps from the shirt I made the skirt with for this rug (See Shirt to ....).   It was surprisingly quick to make.  I have heard that miniatures can take just as long or even longer to make as compared to life sized items.  So when it took me just barely 30 minutes to finish, I was a little shocked.  I just ripped the fabric into long strips, braided them into two stranded braids, coiled and pinned them, then zig-zag stitch to finish.  Maybe I should have made more, I know several little girls who would love a few for their doll houses, and possibly a few older girls.
Here’s the updated list:
  • hangers
  • bed
  • mirror
  • dresser
  • skirt
  • pocket
  • lamp
  • night stand
  • wardrobe
  • rug
  • framed art
  • curtains
Ten down, two to go.  I am sure I will have the last two done before the end of the weekend.  That’s assuming something doesn’t go wrong with my glue gun.  Knock on wood.
Read More »

Wednesday, May 26, 2010

The Lion, the Witch and the…..

photos 737I finished the wardrobe today, although I think it might be a little large for the room.  Not in scale, just in size, the room is a little small for a bedroom.  I will just have to make up for it by cramming it full of cute doll clothes and stuff.  Made from cardboard and paint and glue just like the rest of the furniture, the difference is that unlike the drawers for all the other pieces I made, the doors on this are real.   Because although tiny little drawers are nearly impossible to make, tiny little doors are a major cinch to do.  I peeled back a layer of cardboard on the doors to give them a decorative touch too.  I wonder how that would look in a life size piece?
photos 733
Here you can see the roomy interior.  Yep, I can definitely fill this up with tons of little clothes.  Can’t wait for that.  I used a bamboo skewer for the clothing rod.  I just jabbed it through and applied a dab of glue to keep it in place.  Of course the skewer had to be cut down to size to fit, and now I have to figure out want to do with the rest of it.  Don’t want to waste it, I know I can use a bit for the curtains on my list, but what else?  Hmmm.
Here’s the updated list:
  • hangers
  • bed
  • mirror
  • dresser
  • skirt
  • pocket
  • lamp
  • night stand
  • wardrobe
  • rug
  • framed art
  • curtains
Nine down, three to go.  I will probably have the next up really early tomorrow, look forward to it.  Oh, and I mentioned yesterday that I had a test today.  I got a B on it. :)
Read More »

Popular Posts