Search This Blog

Featured Post

Simple Flower and Lace Headband Tutorial

This post may contain affiliate links, please check out my disclosures page for more info.  Thanks! As promised yesterday, here is my headb...

Showing posts with label cosplay. Show all posts

Sunday, October 26, 2025

Halloween Crafts: Thrifted Dress to Fluffy Fantasy Costume

This post may contain affiliate links, please check out my disclosures page for more info.  Thanks!

Halloween is less than a week away and I needed a costume. Time for a little thrift store magic. 

Halloween Crafts: Thrifted Dress to Fluffy Fantasy Costume. A costume tutorial and clothing hack.
Or should I call it formal dress hacking? It's one of my favorite techniques, especially for those "I have no ideal what I was to be for Halloween" moments.

I take an old cast off dress, and with a little imagination and a bit of cutting and sewing turn it into something special. The best dresses to use are old bridesmaid and prom dresses. The pouf-ier the better, more fabric to work with and more inspiration.

Halloween Crafts: Thrifted Dress to Fluffy Fantasy Costume.
So, I found this dress at Goodwill on sale for a whole $2. It has a lot going for it already.

Halloween Crafts: Thrifted Dress to Fluffy Fantasy Costume.
It has a sparkly bodice made using a floral lace. It's pretty and stretchy.

Halloween Crafts: Thrifted Dress to Fluffy Fantasy Costume.
I love the material for the skirt, and there's so much of it. It's ankle length on me.

Halloween Crafts: Thrifted Dress to Fluffy Fantasy Costume.
It has adjustable straps with is great, because I find myself having to shorten straps on practically everything I wear regardless of occasion.

Halloween Crafts: Thrifted Dress to Fluffy Fantasy Costume.
Now the interesting thing about this dress is the extra set of "straps" made from the same material as the skirt. It's hard to tell if they're meant to hang on or off the shoulders. When I tried it on they wouldn't stay up, and they looked super frumpy hanging down.

Halloween Crafts: Thrifted Dress to Fluffy Fantasy Costume.
Well, I know exactly what I want to do with this dress.

Halloween Crafts: Thrifted Dress to Fluffy Fantasy Costume.
First, I pinned the droopy outer strap to the adjustable one about halfway up the strap.

Halloween Crafts: Thrifted Dress to Fluffy Fantasy Costume.
I handstitched it down while folding it slightly to make little pleats and sewing down faux pearls on each pleat.

Halloween Crafts: Thrifted Dress to Fluffy Fantasy Costume.
I turned the dress inside out and folded the skirt lining, then pinned the hem to the waist seam. I proceeded to sew it in place using a blanket stitch to keep it stretchy.

Halloween Crafts: Thrifted Dress to Fluffy Fantasy Costume.
After sewing the lining, I cut the skirt to match leaving it about an inch longer.

Halloween Crafts: Thrifted Dress to Fluffy Fantasy Costume.
I thought the neckline of the dress was too low for me, so to fix this I took a small amount of the skirt material and folded it half before gathering it by hand.

Halloween Crafts: Thrifted Dress to Fluffy Fantasy Costume.
Once gathered, I stitched it in place from the backside, then cut away the excess material.

Halloween Crafts: Thrifted Dress to Fluffy Fantasy Costume.
Now it looks a little more modest and cuter. Just needs a little bow in the center.

Halloween Crafts: Thrifted Dress to Fluffy Fantasy Costume.
And I still had a lot more skirt material left, so I took a large rectangle of it and gathered it at the top edge. I needed it to just wide enough to go around my waist.

Halloween Crafts: Thrifted Dress to Fluffy Fantasy Costume.
I pinned it to some ribbon leaving enough ribbon on the ends to tie in a nice bow.

Halloween Crafts: Thrifted Dress to Fluffy Fantasy Costume.
After sewing down the ribbon, I can wrap the new "overskirt" around the dress and tie it in a pretty bow.  It's great because I can remove it and use it for other costumes or outfits as I wish.

Halloween Crafts: Thrifted Dress to Fluffy Fantasy Costume.
And here's the finished costume dress. Perfect to pair with some wings or ears for a cute fairy or elf costume.

Halloween Crafts: Thrifted Dress to Fluffy Fantasy Costume.
The little bow on the bodice was a nice touch. If the bodice hadn't fit me as well as it did, I would have added some loops to thread ribbon for a lace up effect. Maybe an idea for my next costume.

Halloween Crafts: Thrifted Dress to Fluffy Fantasy Costume.
I trimmed the edge of the overskirt in a curve as an extra touch. It's one of my favorite parts of this project, there was still plenty of scraps of material leftover after making it.

Enough to make some hair accessories.

Halloween Crafts: Thrifted Dress to Fluffy Fantasy Costume.
First, I cut the leftover material in strips about 3 inches long. I also cut 2 strips from an old pair of tights.

Halloween Crafts: Thrifted Dress to Fluffy Fantasy Costume.
I tied the knot in the tights to make a loop to form a "hair tie". I could have started with store bought hair elastics too. Anyway, I just needed to tie the strips of material to the hair ties as shown.

Halloween Crafts: Thrifted Dress to Fluffy Fantasy Costume.
The more I tie the fluffier it looks. Perfect for a pair fancy hair scrunchies to pair with my costume. The same technique could be used to make wrist cuffs or even doll sized tutus.

And with that I am ready for Halloween, well mostly ready. I just need to get the treats ready and finish another sewing project. Look forward to it.

Give it a Try:
Read More »

Sunday, October 28, 2018

Halloween Crafts: From Plain to Pretty Lace Fantasy Costume Dress

It took way too long, but I finally finished the first project on my craft list. 

From Plain to Pretty Lace Fantasy Costume Dress

A Halloween costume.

Before it's a relatively simple pink skater style dress made for a Halloween costume 2 years ago.

Does anyone remember this dress?  I made it two years ago around Halloween along with a couple of other accessories.  The accessories turned it into a cute fairy costume.

Sometimes great costumes can come from simple things, and I will show you how again with this dress.

Using the dress, cut a 2 tank top shaped pieces from the lace to make a bodice.

I had this pink lace fabric leftover from an Easter dress (see Pink Lace for Easter).  Using the pink dress as a guide, I cut two tank top shapes out for a lacy bodice.

Then I stitched along the shoulders and “hemmed” arm area.  I just folded down the edge and zig-zag stitched it down.

A circle of lace fabric cut in half makes two ruffles for flutter sleeves.

I cut two half circles from the lace for cute flutter sleeves.

After sewing the shoulders of the bodice, sew the hemmed flutter sleeves on.

Just hem them and sew on along the arm area to finish.

Cut the lace fabric for a half circle skirt, here's a tutorial for that. Time for some math.

The skirt on the pink dress is a circle skirt, but for the lace I made a half circle instead.  Here’s a great tutorial for half circle skirts.

The sides of the bodice are sewn, the bodice has been cut down the center to open up as with the skirt, and the skirt is sewn to the bodice.  Plus, the lace over dress is layered over the old pink dress.

I decided to cut the lace bodice down the center to open it up before sewing on the skirt.

Then I hemmed all the raw edges and layered the lace “overdress” over the pink dress.  Looks pretty now.

The lace over layer is hand sewn to the dress along the front and neckline.  It can easily been removed if neccessary for next year.

I then grabbed a needle and thread and to attach the lace to the pink dress along the front and neckline.  Just enough to keep things in place.

I wanted the stitches to be easy to remove in case I want to wear these pieces separately in the future.

The pretty new costume dress complete with a couple of accessories.  A flower head band made previously and a pair of lace finger less gloves.

Just throw on a few accessories, and my costume dress is done.  I still haven’t really decided what to call it.  This dress could work for so many pretty outfits.  From princess or fairy to anime style magical girl.  It all works.

Close up of the flower head band made of faux pink and white flowers and pink ribbon.

Anyway, in addition to the left lace fabric I’m reusing the flower headband I also wore for Easter.  The color matches this dress perfectly.  Check out my flower headband tutorial to make your own.

One of the lace finger less gloves worn.  It just a tube of fabric, hemmed on the ends and fitted to a human arm.

Using more of the stretchy lace fabric, I whipping up some finger-less gloves that are easier than they look.  They are basically just tubes of fabric, hemmed and adjusted to fit my arms.

One of the lace finger less gloves worn.  It just a tube of fabric, hemmed on the ends and fitted to a human arm.

One end was pinned and stitch to go around my thumb.  An easier method it to cut the legs off a pair of lace tights and  cut off the toes for your fingers, but I didn’t have any.

So, now we have a pretty costume dress with matching accessories, and just in time for Halloween.  Yay!

Here’s the updated list:

  • Costume
  • Case
  • Doll and Kitty
  • Little Halloween
  • 3 Skirts
  • Accessories
  • Socks
  • Overalls
  • Ornaments
  • More Cases

One down, nine more to go.  The next one should be up soon.  Look forward to it!

Read More »

Saturday, May 19, 2018

A Maid Costume? or An Anime Cosplay Fix

This post may contain affiliate links, please check out my disclosures page for more info.  Thanks!

This next craft project is part of the preparations for a special event,  Phoenix Comic Fest (formerly known as Phoenix Comicon).

It’s next week and it’s fun to wear something special for conventions, cosplay or otherwise.

The old costume before the makeover.  It was bought from Bodyline in a lucky pack.  It is supposed to be a maid cafe outfit from the anime series Love Live.

That brings us to the costume.  This costume came from another lucky pack.  It’s sold here at Bodyline and it is supposed to be a maid café uniform from the anime series, Love Live

It is kind of both a lucky and in-lucky piece, here’s why.

A close up of the collar (which is too small to fit over the head even when unbottoned) and the golden necktie.  The gold is too much for my tastes.

Underneath the gold necktie (which is a little too gaudy for my tastes) is only two buttons.  You should be able to unbutton the collar and pull it over your head, but even when unbuttoned it is too small to fit over most heads.  That includes mine.

A close up of the matching maid headband that includes a rather large black and gold bow angled on the headband.  It will have to go.

And beyond that issue, there is the matching headband with the large gold bow, also not quite my taste.

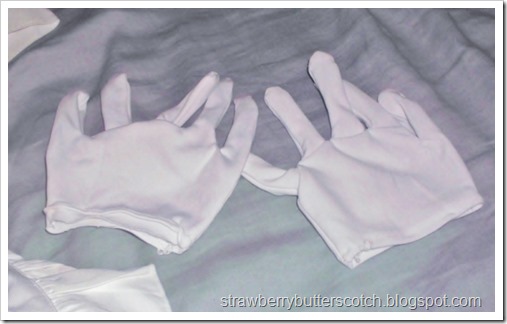
The odd pair of gloves that came with the costume.  They are intentionally made to fit only about half way donw your hand.  It looks okay on the animated show, but not in real life.

And this odd pair of gloves.  They are intentionally designed to fit only part of the way on your hands.  It probably looks cute on an animated character, but not so much in real life.

Anyway, you’ve seen the before…

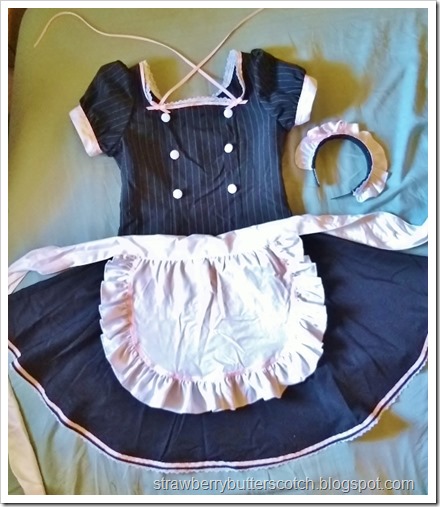
The made costume after the makeover.  The collar is gone with a pretty new lace and pink ribbon trimmed neckline.  The headband is now trimmed with ribbon and lace with a matching ribbon bow.  There is lace and pink ribbon along the skirt and more ribbon on the apron.  And no more odd gloves!

…And here’s the after.

It looks so much better, mainly because now I can actually put it on.

Here’s how I did it.

A close up of the collar before the makeover to demonstrate what was done to improve the maid costume.

First, obviously that collar had to go, because the convention is a family event.  Top-less maids are not appropriate.

The collar was cut off along with the sleeves, and an inch of fabric was cut of the shoulders to adjust the fit.

After cutting of the entire collar part, I also temporarily removed the sleeves.  I found that the top was a little big on me at the shoulders, so I needed to take off about an inch.

A close up of the new neckline of the costume.  After resewing the shoulders and sleeves, the new neckine one sewn with added lace.  Pink ribbon was added along the edge along with two tiny pink bows at the corners of the rather square shaped neckline.  Two straps of ribbon were also added.  These are to be criss-crossed and tied around the neck when worn for a pretty touch.

After re-sewing the shoulders and sleeves, I added lace to the new square-ish neckline.  Then I added pink grosgrain ribbon along the edge with little matching bows. 

I added ribbon neck straps too, these look so cute when tied around the neck.

A close up of the sleeve.  Pink ribbon was added along the cuff of the puffed sleeve.  It looks so cute.

I also added some ribbon on the cuffs of the sleeves.  Everything matches!  :)

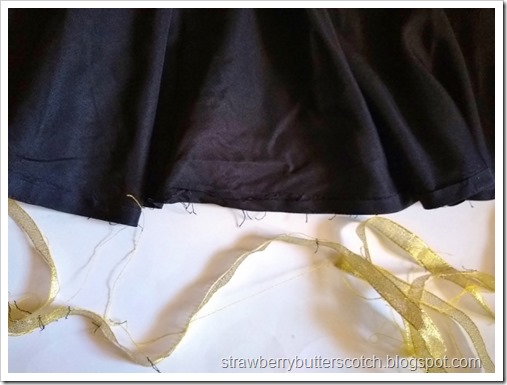
A close up of the skirt hem during the makeover process.  It had gold ribbon along the edge, but this was removed to reveal a raw edge.

Now for the skirt.  Obviously, with all the pink used on the top the gold trim on the skirt had to go, so I carefully removed it with a seam ripper.

This revealed the odd way they hemmed to skirt.  They folded the fabric on the right side and used the ribbon to cover the raw edge.  I’m not sure what to think about this.

After the makeover, the skirt is finished with the same lace and ribbon as the new neckline.

Anyway,  I just went with the flow and covered that raw edge with my pink ribbon and added lace along the edge of the skirt.  Now the skirt matches too!

The maid style headband with the old large bow.  The bow was carefully removed with a seam ripper, but it looks too plain without it.

Now on to the headband.  Obviously the first thing to do was remove the bow using my seam ripper again.  But that left it a little too plain.

The maid headband after a makeover.  Two rows of lace were added with a line of pink ribon running down between them.  The headband is finished with pink ribbon bow which is cute but a little more subtle than the old bow.

I just added two rows of lace across the headband with a row of pink ribbon in between.  All that was left was to add a pink bow.  Much better.

A close up of the apron.  Pink ribbon was added along the apron ruffle to tie it in with the rest of the newly made-over costume.

And the final change was to add some pink ribbon to the apron to help tie it in with the rest of the outfit.  I thought about adding some small bows too, but for now I’m okay with this.

Here’s the updated list:

Seven down, three more to go.  The next one may go up later than expected thanks to the convention and certain other blogging issues.  But it will be really cute, so look forward to that!

Read More »

Tuesday, June 13, 2017

Phoenix Comicon 2017, Yay!

Well, it’s been well over two weeks since I went to Phoenix Comicon. 

Video from Phoenix Comicon 2017I was busy with other stuff (work, that darn craft list, etc.),so I couldn’t quite find the time to post this.


But finally, I finished making this Comicon video.  It’s short and sweet.

Enjoy!

And I will be posting more related videos soon.  Look forward to it!

Read More »

Popular Posts