Search This Blog

Featured Post

Simple Flower and Lace Headband Tutorial

This post may contain affiliate links, please check out my disclosures page for more info.  Thanks! As promised yesterday, here is my headb...

Showing posts with label toy. Show all posts

Sunday, September 30, 2018

Quick and Easy Dollar Store Tea Set Makeover

This post may contain affiliate links, please check out my disclosures page for more info.  Thanks!

Finally, the last project on my list.  A pretty tea set.

Quick and Easy Dollar Store Tea Set Makeover

I wanted another cute little porcelain tea set for my dolls and stuff.  You used to be able to find them at most dollar stores.  Sadly that’s not the case anymore. 

So, I did the next best thing.

A pink and yellow plastic toy tea set bought from Dollar Tree, a dollar store chain.

I got a plastic set instead (see the doll blog for their reaction).  You can find this tea set at Dollar Tree as well as most dollar stores.

It’s the right size and is sort of cute, but the colors are kind of tacky.  The easiest way to fix the color issue was to paint it.

So let’s paint some plastic!

Getting ready to paint the tea set using acrylic paints, glossy Mod Podge, cheap brushes, a paper plate and one other tool.

I gathered up some supplies I had on hand and got to work.  I used acrylic paints, paint brushes, a paper plate for the paint, and glossy Mod Podge. 

The Mod Podge protects the work and makes the pieces shiny and pretty.

The strangest tool needed, emory boards for nails.  Can also use fine sandpaper.  Just lightly sand the surface of the plastic pieces before painting them.

I also used these, nail emery boards.  You could also use fine sand paper, but I used these because it’s what I had around.

So first, I lightly sanded the surface of all my pieces.  This helps the paint stick on better, or so I’ve been told.

Paint the pieces with 1-2 coats of white paint as a base.  Let dry  between coats.

Then I applied 2 coats of white paint to all the pieces, allowing them to dry between coats.  I painted one side of each piece at a time.

I was going to paint the pieces a different color after the white paint dried, but I decided they looked pretty that way and went with it.

Adding pink paint to bring out the details in the cute dishes and cups.  There are little hearts and flowers!

I then added some pale pink paint to bring out some of the details.

Finish with one 1-2 coats of glossy Mod Podge to protect and make it shine.

And finally, I applied two coats of the glossy Mod Podge (allowing to dry between coats) to seal and finish them.

The tea set looks so much nicer now.  The gloss makes the pieces look very porcelain-like, but since they are plastic I don’t have to worry about dropping them.

A close up of one of the tea cups, looks a little like porcelain now with the gloss.

I could have painted little designs on the cups like flowers and such if I wanted to, but maybe I will save that for another set.

A close up of the tea pot, it looks great too.

I really like how cute the tea pot came out.  There were little roses around the heart that I didn’t even notice until I started painting it.

A close up of one of the dishes, you can really see the cute heart pattern.

The plates look really pretty too, the hearts are so sweet.

A close up of one of the spoons.  It is painted white with pink on the inside.

I added a touch of pink to the spoons to tie them into the set, also because painting them white made them look too much like “disposable” plastic spoons.  Maybe next time I’ll try using a silver or gold paint.

The finished teaset in all its glory.

Over all, I think the tea set looks great and it would be fun to paint more of them in the future.

Here’s the updated list:

Six down and out.


Give it a try:

Read More »

Friday, December 15, 2017

Christmas Crafts: Diy Elf on a Shelf with Outfit Tutorial

This post may contain affiliate links, please check out my disclosures page for more info.  Thanks!

For my first project for Christmas, here’s…

A diy elf on the shelf all dressed in felt sitting on top of a copy of the Elf on the Shelf book.

…The Elf on the Shelf.

A diy elf on the shelf all dressed in felt.

I started to think it would be fun to have one of these little elves around the house.  Then I started to think it would be more fun to make one instead of buying one.

And I’m not the first to think that.  I found this tutorial for a DIY elf, and decided to make a similar one.  Just without the clay and the vintage doll face which was too tricky to find, but super adorable.

A plain posable doll from the craft store, perfect for a homemade elf on the shelf.

Anyway remember that odd doll I bought at Joann (see A Late Black Friday Craft Haul).  I got it specifically to used for this project because it’s the same one used in that tutorial.  It poses nicely, so it’s perfect for elfishly good fun.

The doll's feet cut off and pinned to make new elf feet.

And just like in that tutorial, I prepared the doll by cutting off the feet and stitching the bottom of the legs shut.

However, from there I just did my own thing.  Basically all I did for my elf is make it a cute little elf outfit and decorate the face.  It was so much fun, I wanted to share it with you.


Elf on the Shelf Tutorial


Materials:

Diy elf on the shelf clothes pattern and tutorial.

Here’s the pattern for the clothes. 

If you chose not to cut the doll’s feet, you will either need to make the pants about 1.5 inches longer or cut off the tips of the pants before sewing.  Then you will have normal pants and just need to make your elf some shoes.

The clothing pieces are made in simple shapes, so this would be perfect for a beginning sewing project for a child, with adult supervision of course.

Diy elf on the shelf clothes tutorial with pattern.  Make your own easy elf on the shelf.

First cut two shirt pieces and pin.  Sew along the sleeves and down the sides. 

You can sew by hand using a running stitch, but I recommend using a backstitch (if you don’t know how to do a backstitch, check out my video tutorial for doll drawstring tank tops).

Diy elf on the shelf clothes tutorial with pattern.  Make your own easy elf on the shelf.

When done sewing, carefully clip the seam allowance at the armpits so it will look better when turned right side out. 

Try not to accidently cut the thread or you will have to re-sew it (I did it three times while sewing this outfit!).

Diy elf on the shelf clothes tutorial with pattern.  Make your own easy elf on the shelf.

Turn the shirt right side out and try it on the doll for fit.  You will need to cut down the back to make an opening.

Diy elf on the shelf clothes tutorial with pattern.  Make your own easy elf on the shelf.

Looks great right?

Diy elf on the shelf clothes tutorial with pattern.  Make your own easy elf on the shelf.

Now pin on the collar and sew in place.  If you’re feeling lazy, you could glue it on instead.

Diy elf on the shelf clothes tutorial with pattern.  Make your own easy elf on the shelf.

Now cut two pieces for the pants and pin and sew.  Just like with the shirt, you clip at the crotch and around the feet.

Diy elf on the shelf clothes tutorial with pattern.  Make your own easy elf on the shelf.

After turning right side our try it on the doll.  It will be a snug fit, so getting them on may be a bit tricky.

If you are making this with a kid, you will probably need to help them.

Diy elf on the shelf clothes tutorial with pattern.  Make your own easy elf on the shelf.

Cut one piece for the hat and hat trim and sew (or glue) the trim along the curved edge of the hat.

Diy elf on the shelf clothes tutorial with pattern.  Make your own easy elf on the shelf.

Then fold the hat in half and sew along the straight edge to form a cone.  Clip the point at the top before turning right side out.

Diy elf on the shelf clothes tutorial with pattern.  Make your own easy elf on the shelf.

And here is your little elf hat.

Diy elf on the shelf clothes tutorial with pattern.  Make your own easy elf on the shelf.

Cut two pieces for each glove (4 pieces total).  Sew around and clip before turning right side out.  Easiest gloves in the world.

Diy elf on the shelf clothes tutorial with pattern.  Make your own easy elf on the shelf.

Time to dress your little elf.

Diy elf on the shelf clothes tutorial with pattern.  Make your own easy elf on the shelf.

You can simply sew or glue the back of the shirt closed.  However, if you want to make the clothes removable just sew on snaps or Velcro.

Diy elf on the shelf clothes tutorial with pattern.  Make your own easy elf on the shelf.

Before attaching the hat (if you want to), it’s time to add a face to this little guy.  Just draw a little face in pencil, then draw over with fabric markers.

Diy elf on the shelf clothes tutorial with pattern.  Make your own easy elf on the shelf.

Here’s how mine turned out.  I used the beaded eyes as the pupils and drew the rest of the eye parts along with nose, mouth, chin and eyebrows.

I added a touch of pink for the cheeks and in the corners of the nose and mouth.  A little bit of blue and purple to the eyes, and he has a face.

Truth be told, I kind of think it looks cuter with the blank doll face, but an elf needs a smile. 

Diy elf on the shelf clothes tutorial with pattern.  Make your own easy elf on the shelf.

For hair, I made several strokes using both yellow and brown to make it pop more.  He has highlights! 

The nice thing about the hair is if you mess up you can hide it under the hat.

An diy elf on the shelf, now fully dressed.

And there you have your completed elf doll.  All he (or she) needs is the book.

A used copy of the The Elf on the Shelf book, purchased from a public library.

I found this copy at the bookstore at my local library, or rather it found me.  I just walked in the door and there it was, for only $3 too.  It was fate.

For those who aren’t as lucky though, you can find the book on amazon among other places.

The finished elf on the shelf in all his diy glory!

Book or not, you can still have tons of fun with these elves.  Try not to get too carried away. :)

Here’s the updated list:

  • Snowmen
  • Elf
  • pouches
  • Coats

One down, three more to go, and 10 days until Christmas.  Oh, dear.


Give it a try:

Read More »

Tuesday, July 11, 2017

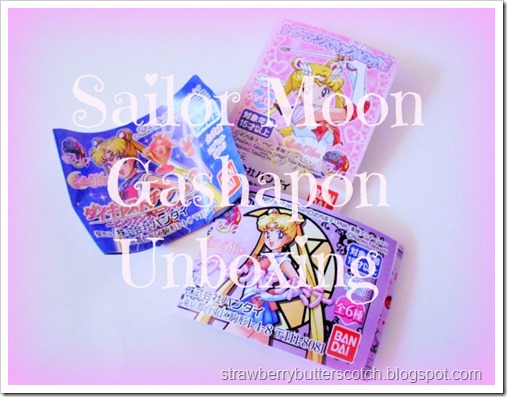
Sailor Moon Gashapon Toy Unboxing

It’s up a little later than I had planned, but it’s finally ready.

Sailor Moon Gashapon Unboxing.  Cute capsule toys from Japan.

My Sailor Moon gashapon unboxing!

For those who don’t know, a gashapon or Gachapon is a capsule toy from Japan.  Like the tiny toys you see selling for 25 or 50 cents in those little machines at grocery stores. 

Kind of like that, only much better.  They are usually better quality and with a wider variety to choose from.  For more information about them, check this video from Only in Japan.

Sailor Moon Gashapon Unboxing.  Cute capsule toys from Japan.

Anyway, as you saw in my Comicon haul video (see Phoenix Comicon Shopping Haul and Grab Bag Opening), I received several gashapons from my grab bags, all Sailor Moon ones. 

Since opening them was so special to me, I chose to make it a separate video.  And now you can finally see for yourself.  Be prepared for a couple of surprises.

Enjoy the video!

Read More »

Sunday, June 25, 2017

Phoenix Comicon Shopping Haul and Grab Bag Opening

Continuing on from my Phoenix Comicon 2017 video, here is part 2.  The shopping haul!

Phoenix Comicon shopping haul video, lots of fun grab bags and cute stuff!

All the cute and/or unusual stuff I bought at the vendors hall.  Mostly grab bags, I can’t resist them.  One part surprise, one part bargain and full of fun.


Enjoy the video.

Here’s links for some of the items:

I will be posting the next video soon for the Sailor Moon gashapons.  Look forward to it!

Read More »

Wednesday, June 7, 2017

Wordless Wednesday: “Do You Want to Build a Snowman?”

This post may contain affiliate links, please check out my disclosures page for more info.  Thanks!

Taken at a local Target store.

All was not right in the Frozen toy aisle at Target.


All was not right in the Frozen toy aisle at Target.  I guess she didn't want to build a snowman.

Featuring this Frozen music box.


Read More »

Saturday, December 31, 2016

Crafting for Christmas: More Clothes and a House

This post is probably a bit late, but so were the crafts.  The last of my Christmas crafts were finished the night before Christmas Eve, just in time.

First up…

Cute fabric house made with felt and trimmed with lace.

The Fabric House

I made a similar fabric house for Christmas several years ago, in fact I made several of them to give to some lucky kids (see Christmas Operation: Complete and Then Some).  I made them all based on this tutorial.  For this new one I wanted to go a different route.

Cute fabric house made with felt and trimmed with lace

I made it all using felt because it’s nice and thick and comes in great colors, plus I had a ton of it lying around.

The new owner of the house needed an easy way to close it, so this house was made with Velcro instead of elastic loops like the others.  Plus, it was made slightly wider to accommodate his favorite stuff toys.

Inside of a cute fabric house.

Notice the lace added to the roof and along the door and window.  I thought it would add a nice touch, plus the new owner actually likes lace and other interesting textures.

The next and final craft project involves the lovely poinsettia fabric I used for my dress (see Crafting for Christmas: Ornaments, Dresses, and a Printable?).

Simple casual poinsettia skirt.

The Poinsettia Skirt

A simple rectangle skirt with a comfortable elastic waistband.  It’s easy to make and wear, but still has impact thanks to the pretty poinsettia print.  It was made as a gift for a good friend, she absolutely loved it.

In case anyone wants to make one themselves, it’s just made of two pieces. 

The main part is a rectangle.  Length is about twice your hip measurement or a few inches less for a less full skirt.  The width is how long you want the skirt plus a couple of inches.The second piece is the waistband that is as long as your hip measurement plus about four inches and about 2-4 inches wide to fit your elastic through.

Here’s a tutorial I found for a rectangle skirt that should help.  Note that the length measurement in the tutorial is different because it’s a much fuller skirt.

Now that we’re finished with Christmas and the year, it’s time for a little break to catch our breath. 

See you all next year!

Read More »

Friday, November 14, 2014

Sewing for Baby

As I mentioned before, I have friends who are expecting their first child this month, so I made a boat load of things for their baby shower which I haven’t shown yet. :)

But first here’s something else I haven’t shown here much. My notebook sketches.

baby crafts sketch

Before I do a lot of my sewing, I like to sketch out ideas in notebooks.  This one page is dedicated to all the baby things I wanted to make.  Some of the things I didn’t actually make, this time anyway.  Let’s save something for later.

diaper bag sketch

First up is the diaper bag.  I designed it based on a tote bag I saw someone using at work.  Large and roomy with lots of pockets on the inside and a useful little one on the outside. The twist?

elephant turtle fabric close up

This is the fabric I picked out for it.  I found it at Wal-Mart, have I mentioned before how glad I am that they brought fabric back to their stores?  I just couldn’t resist the little turtles and elephants, plus it works for boy and girl babies.

diaper bag

Here’s the finished bag.  The straps go most of the way down the sides of the bag for security, plus it makes the pocket look good.

diaper bag interior

Here’s the inside.  There are six pockets all ready to shove stuff in and carry.  That’s exactly what I did.  I crammed it with all the other stuff I made plus some essentials I bought on sale.

baby blanket sketch

Now the blankets.  Here’s the baby blanket…

receiving blanket sketch

…and receiving blankets.  The receiving blankets were just a single square cut from a knit fabric and hemmed. The baby blanket involved a layer of sweat shirt fabric sewn with the softer side facing outward.  I used this tutorial as a guide.

dalmation fabric close up

Here’s the fabric I used.  I got it at SAS. Dalmatians and fire trucks, perfect for a new little boy. :)

baby blanket plus

Here are the finished blankets.  In addition to blankets, I made some birth cloths and wash cloths.  The wash cloths are made like the receiving blankets but smaller and using plain white knit fabric.  The burp cloths are made like the blanket only smaller and rectangle shaped.

baby teddy sketch

Now the best part, the teddy bear.  Because every kid needs a stuffed best friend.

baby teddy

Here’s the finished bear.  All ready for hugs

baby teddy pattern

I made the patterns from scratch using newspaper.  It was easier than expected, I must be getting better at making patterns.

teddy fabric close up

Here’s the fabric I used.  It’s fake fur from SAS.  It’s a perfect off-white and super soft.  I have plenty of leftovers so be prepared for more teddies in the future.

baby teddy pieces cut

Some in progress photos just for fun.

baby teddy progress 11

baby teddy progress 1

Sewn and turned partially right side out.  The legs were a pain to sew.

baby jacket sketch

And now the jacket.  Sad thing about it, I seem to have lost the finished photo.  I have search all over my computer and it seems to have totally disappeared.  It looked totally adorable and almost exactly like my sketch except I put a turtle applique and an elephant applique on the front.  Obviously I cut the appliques from the bag fabric.

jacket patterns

Here’s the patterns I made, they are based on a dress pattern but were perfect for a jacket. 

sweat fabric close up

And of course this the fabric I used, I used it for the blanket as well.  I got it a Goodwill.  It’s always nice to find good fabric at thrift stores.  I have plenty of it leftover so I will probably make another one soon.  Look forward to it.

Read More »

Popular Posts